> ## Documentation Index
> Fetch the complete documentation index at: https://www.propeldata.com/llms.txt
> Use this file to discover all available pages before exploring further.
# Federation to ClickHouse setup guide
> Connect your ClickHouse to Propel for Federation.
This guide explains how to connect your own ClickHouse to Propel. It works with self-hosted, managed, or ClickHouse Cloud servers.
It covers how to:
1. [Create a user for Propel in your ClickHouse server](#step-1-create-a-user-for-propel-in-your-clickhouse-server).
2. [Make sure your ClickHouse is accessible from Propel IPs](##step-2-make-sure-your-clickhouse-is-accessible-from-propel-ips).
3. [Create a ClickHouse Data Pool in Propel](#step-3-create-a-clickhouse-data-pool-in-propel).
4. [Preview and query your data](#step-4-preview-and-query-your-data).
***
## Requirements
* You have a [Propel account](https://console.propeldata.com/get-started).
* You have a ClickHouse Cloud, self-managed, or managed ClickHouse server.
* A user with `SELECT` permission on the tables you need to connect.
***
## Step 1: Create a user for Propel in your ClickHouse server
In this section, you'll set up a user for Propel. Propel will use this user to connect to your ClickHouse instance and query the tables.
To create a role for Propel in ClickHouse, execute the SQL statement below.
```sql theme={"system"}
CREATE ROLE propel_role;
```
Propel needs to be able to do a `SELECT` on the tables. You need to grant the "propel\_role" role `SELECT` privileges. You can limit this grant to only the tables you are going to connect to Propel by specifying each table name instead of the **"\*"**.
```sql theme={"system"}
GRANT SELECT ON .* TO propel_role;
```
Replace `` with your database name.
Create the user "propel\_user" and assign it the role "propel\_role". You can do this with the following SQL statements:
```sql theme={"system"}
CREATE USER propel_user IDENTIFIED WITH sha256_password BY '';
GRANT propel_role TO propel_user;
```
Make sure to replace `` with a secure password.
To ensure your user has the necessary permissions to see and query the tables you need, connect to your ClickHouse using the "propel\_user" you just created and run the following statements:
```sql theme={"system"}
USE DATABASE ;
SHOW TABLES;
```
Make sure to replace `` with a secure password. You should see the tables you need to connect to Propel.
Make sure you can query the tables using a `SELECT` SQL statement.
```sql theme={"system"}
SELECT * from LIMIT 10
```
If you see the records, you are good to go!
## Step 2. Make sure your ClickHouse is accessible from Propel IPs
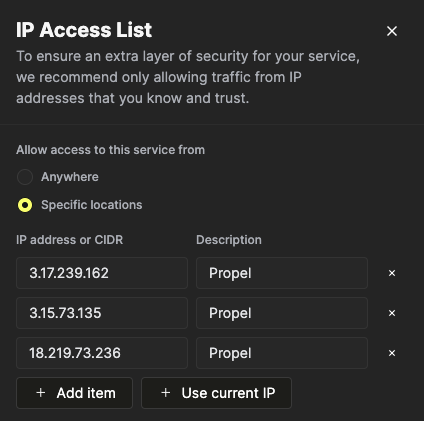
To ensure that Propel can connect to your ClickHouse server, you need to authorize access from the following IP addresses:
```
18.219.73.236
3.15.73.135
3.17.239.162
```
### 2.1 Allowing Propel's IP in ClickHouse Cloud
If you are using ClickHouse Cloud, go to **"Settings"** then **"IP access list"** and click **"Add IPs"**.
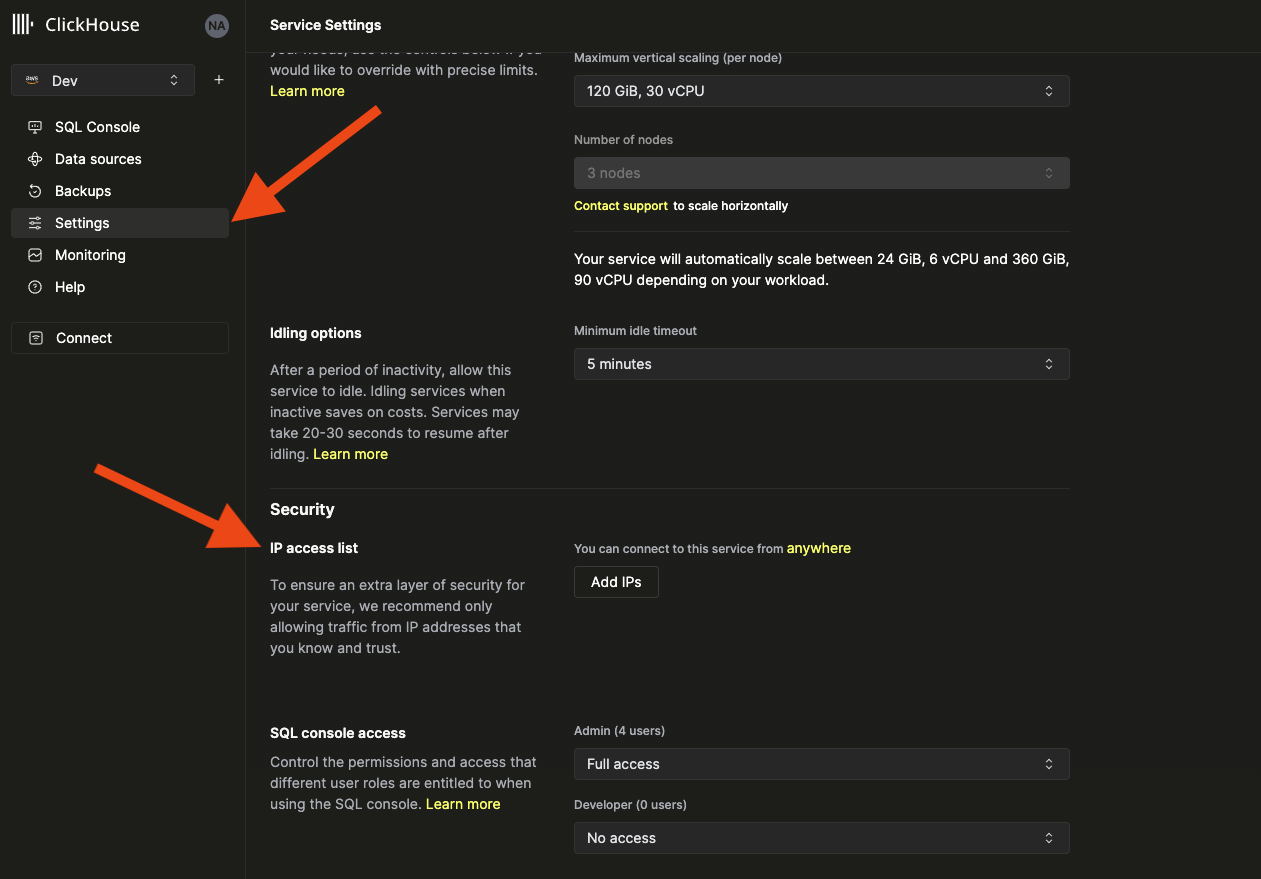 Add the Propel IPs to the list.
 ## Step 3: Create a ClickHouse Data Pool in Propel
A Propel Data Pool will represent a table in your ClickHouse server.
Go to the **"Data Pools"** section of the Console and click **"Create Data Pool"**.
## Step 3: Create a ClickHouse Data Pool in Propel
A Propel Data Pool will represent a table in your ClickHouse server.
Go to the **"Data Pools"** section of the Console and click **"Create Data Pool"**.
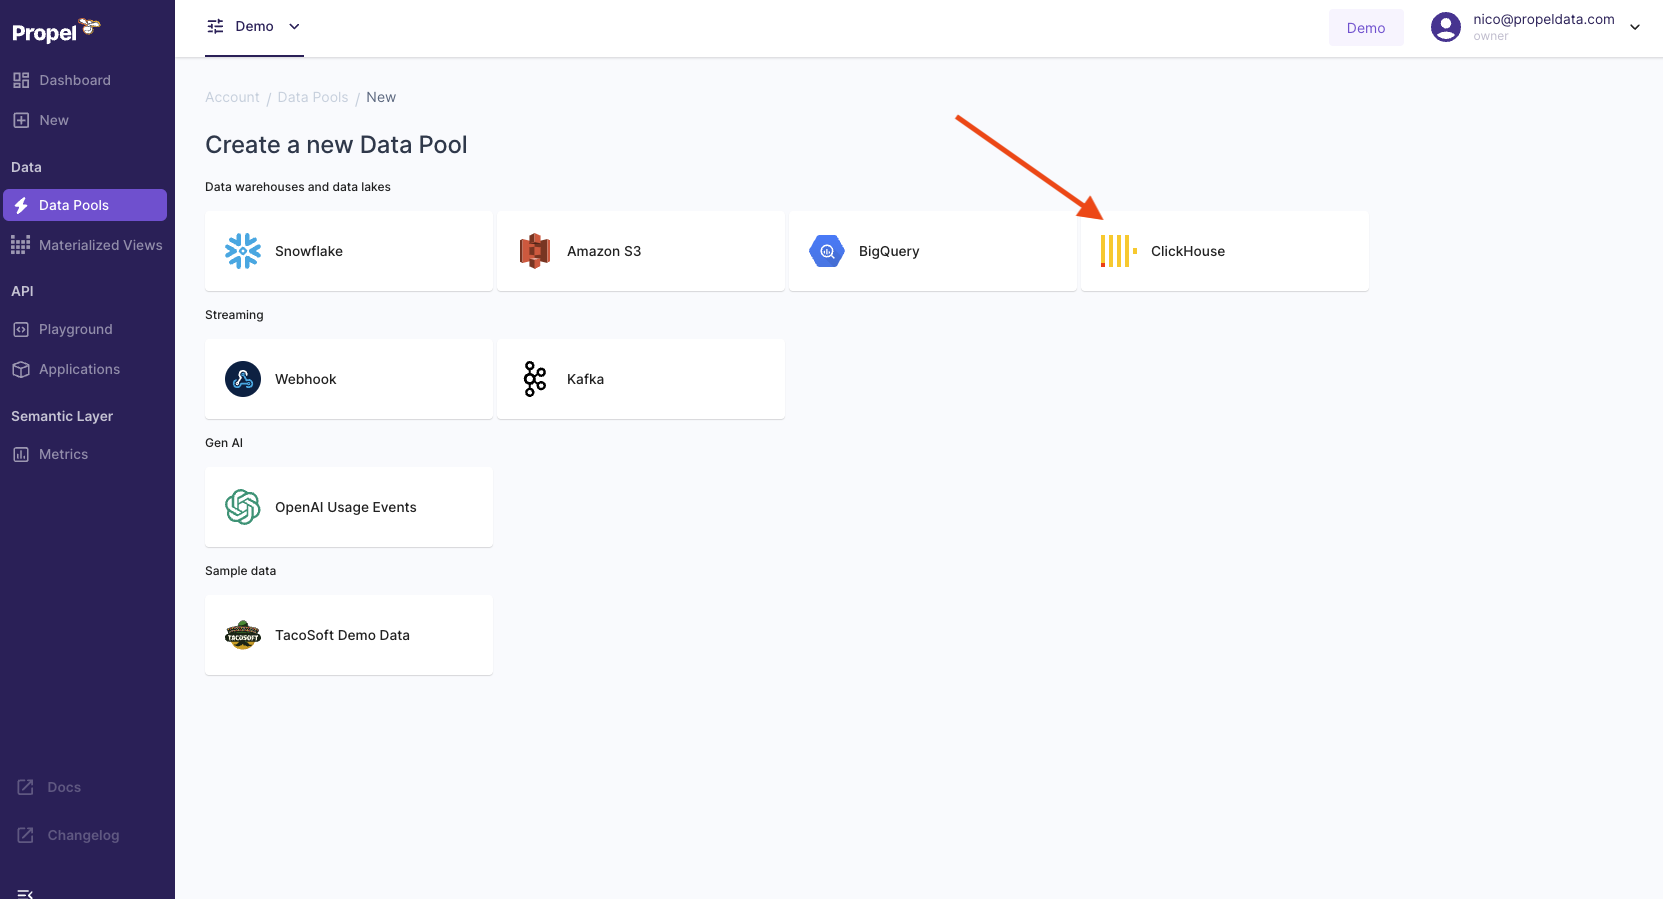
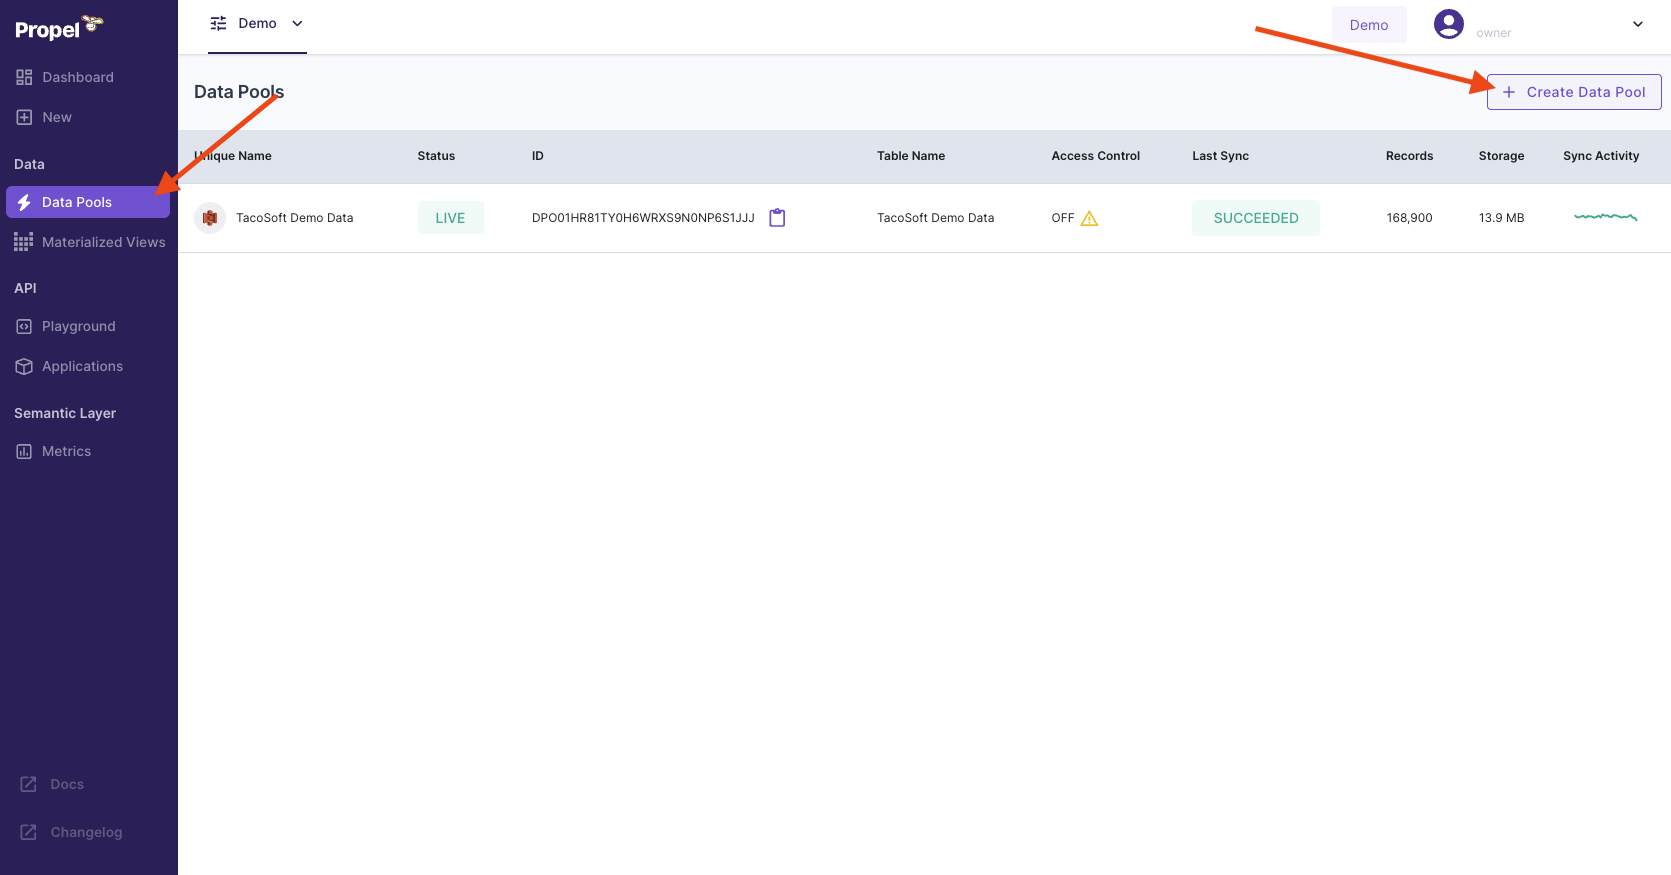 In the new Data Pool page, select **"ClickHouse"**.
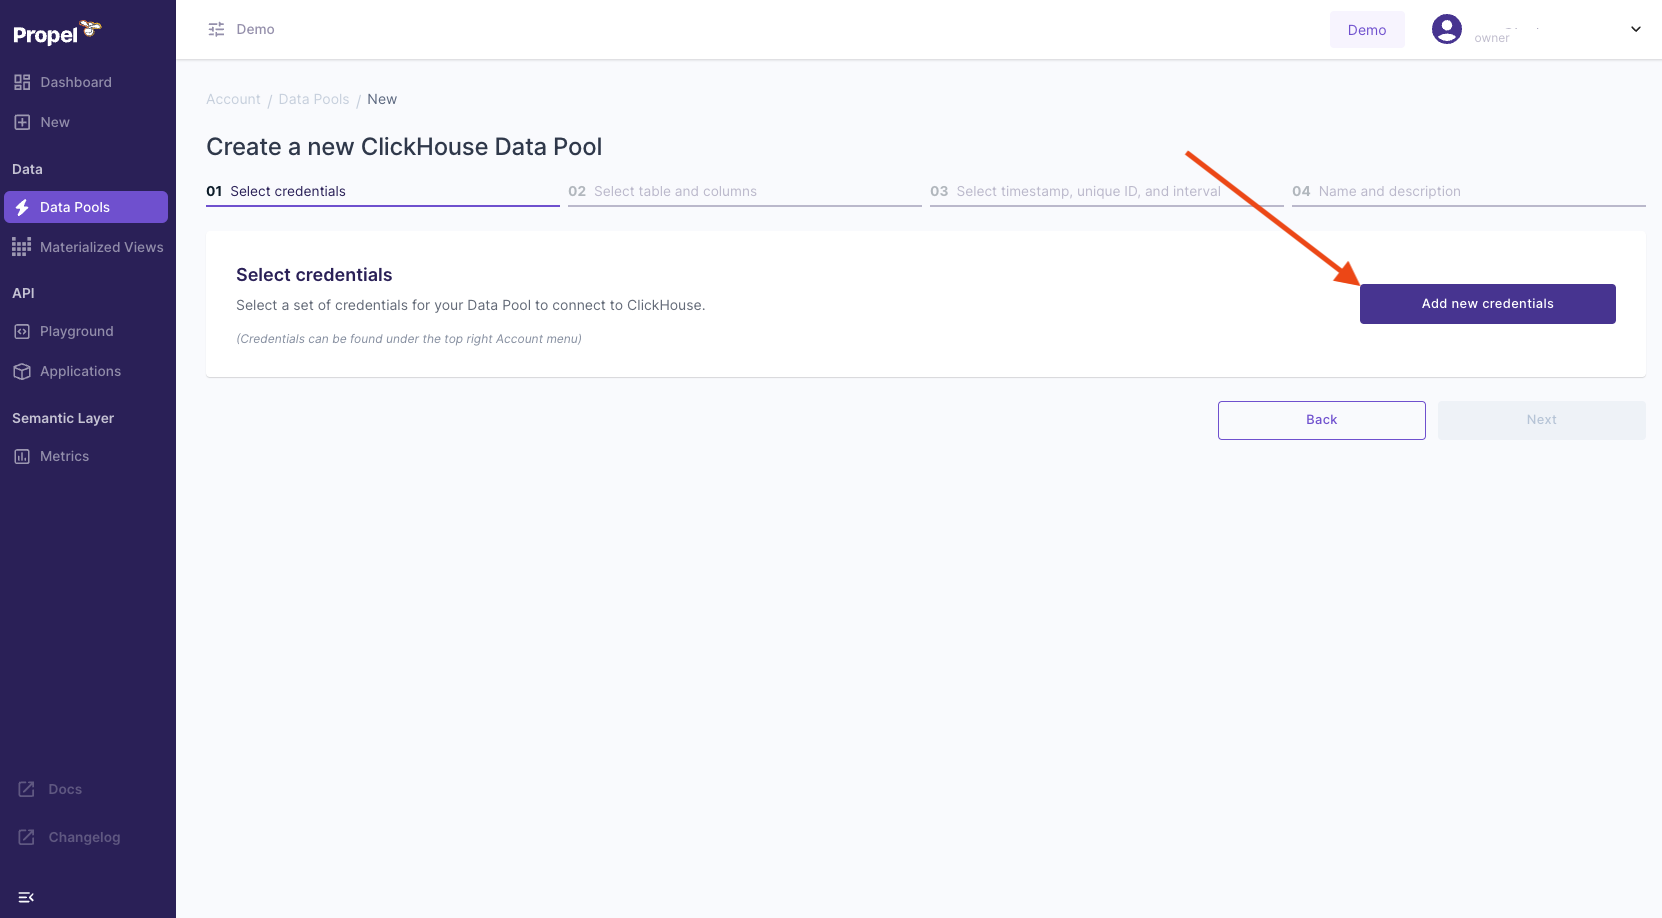
 Select **"Add Credentials"**.
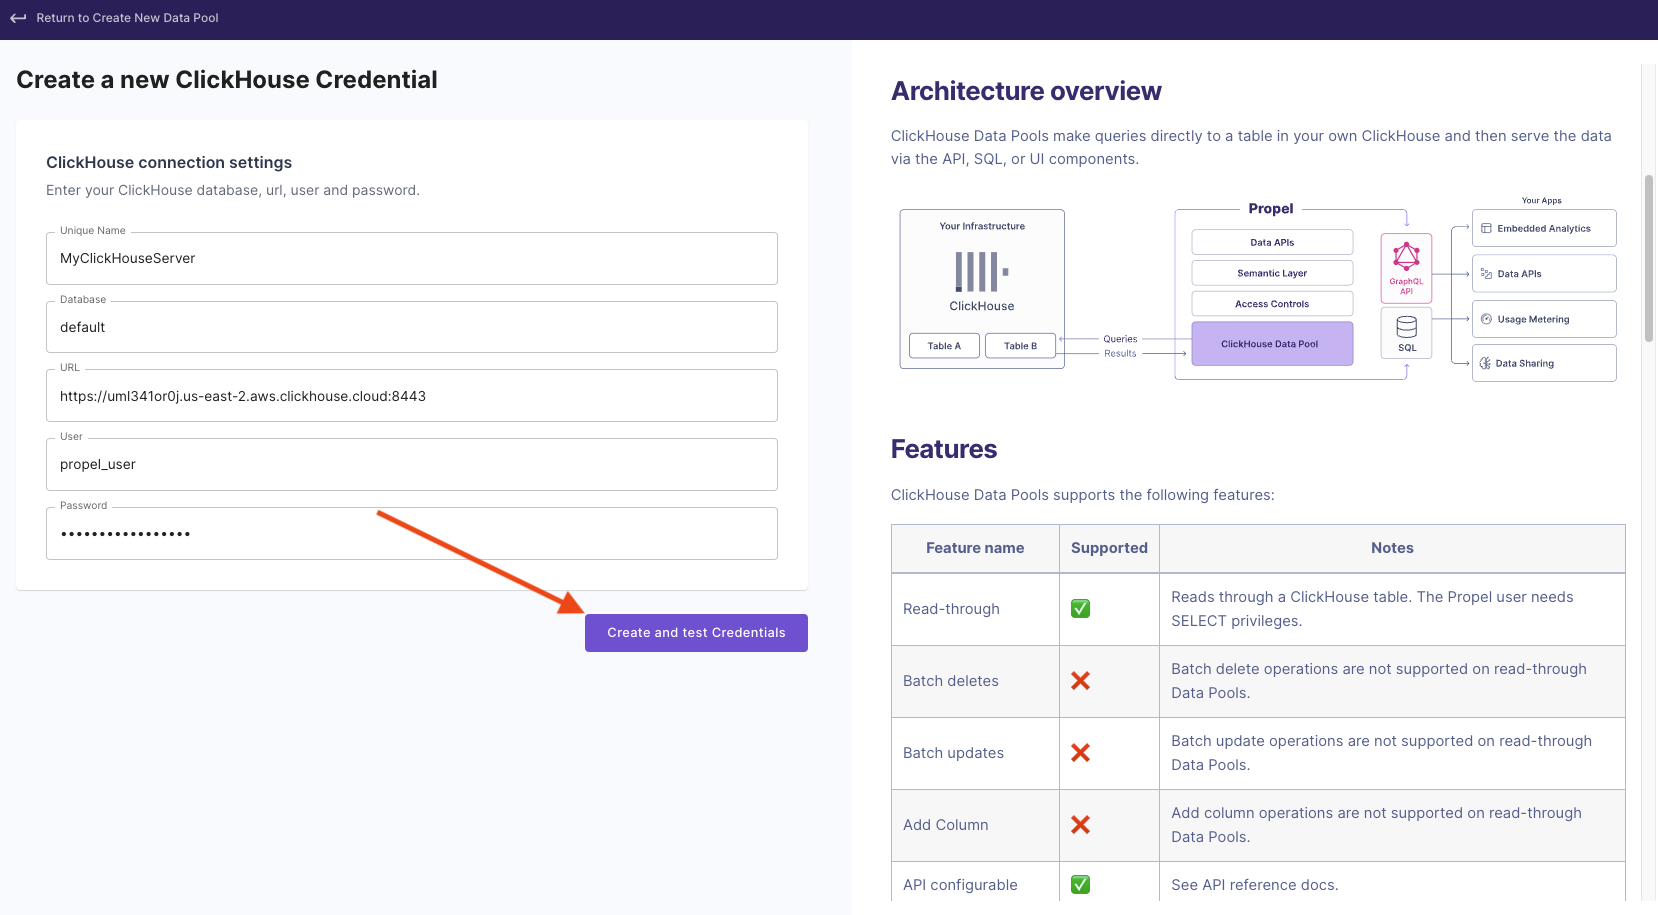
 Enter your ClickHouse connection details and click **"Test Credentials"**.
 Wait until Propel connects and runs all the tests, then click **"Next"**.
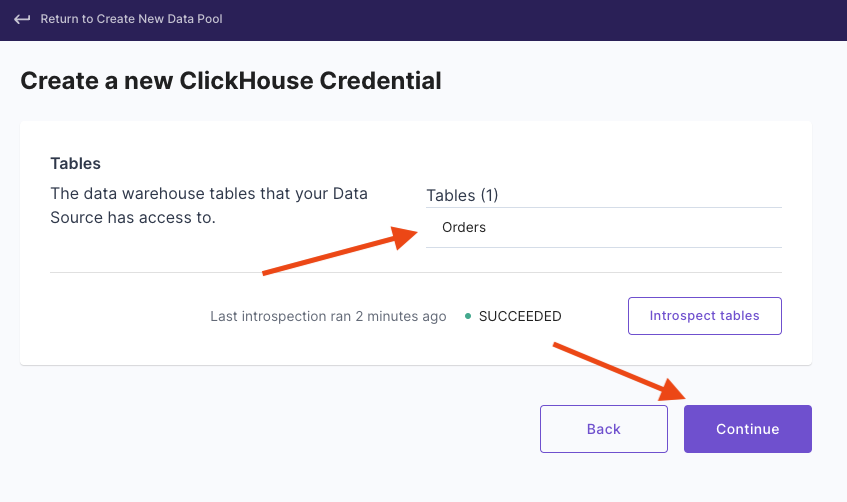
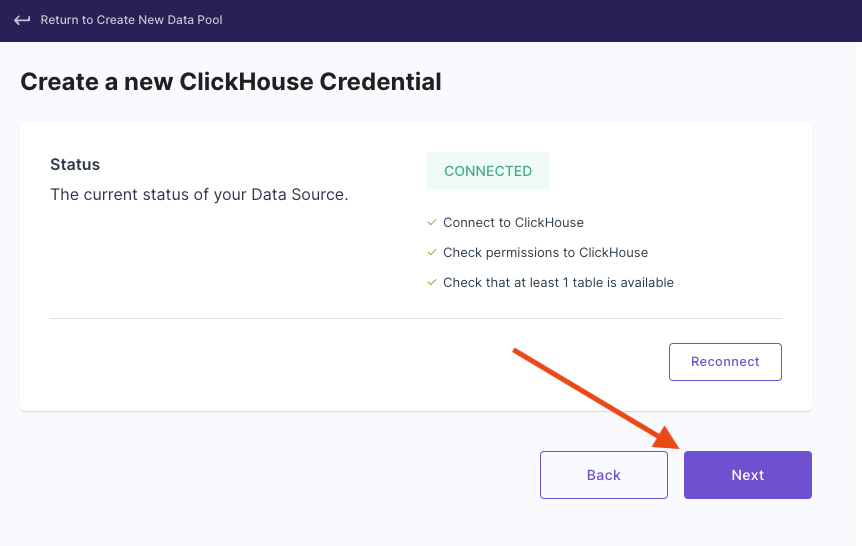 Check that Propel has access to all the tables you need, and click **"Continue"** to finish setting up your first ClickHouse Data Pool.
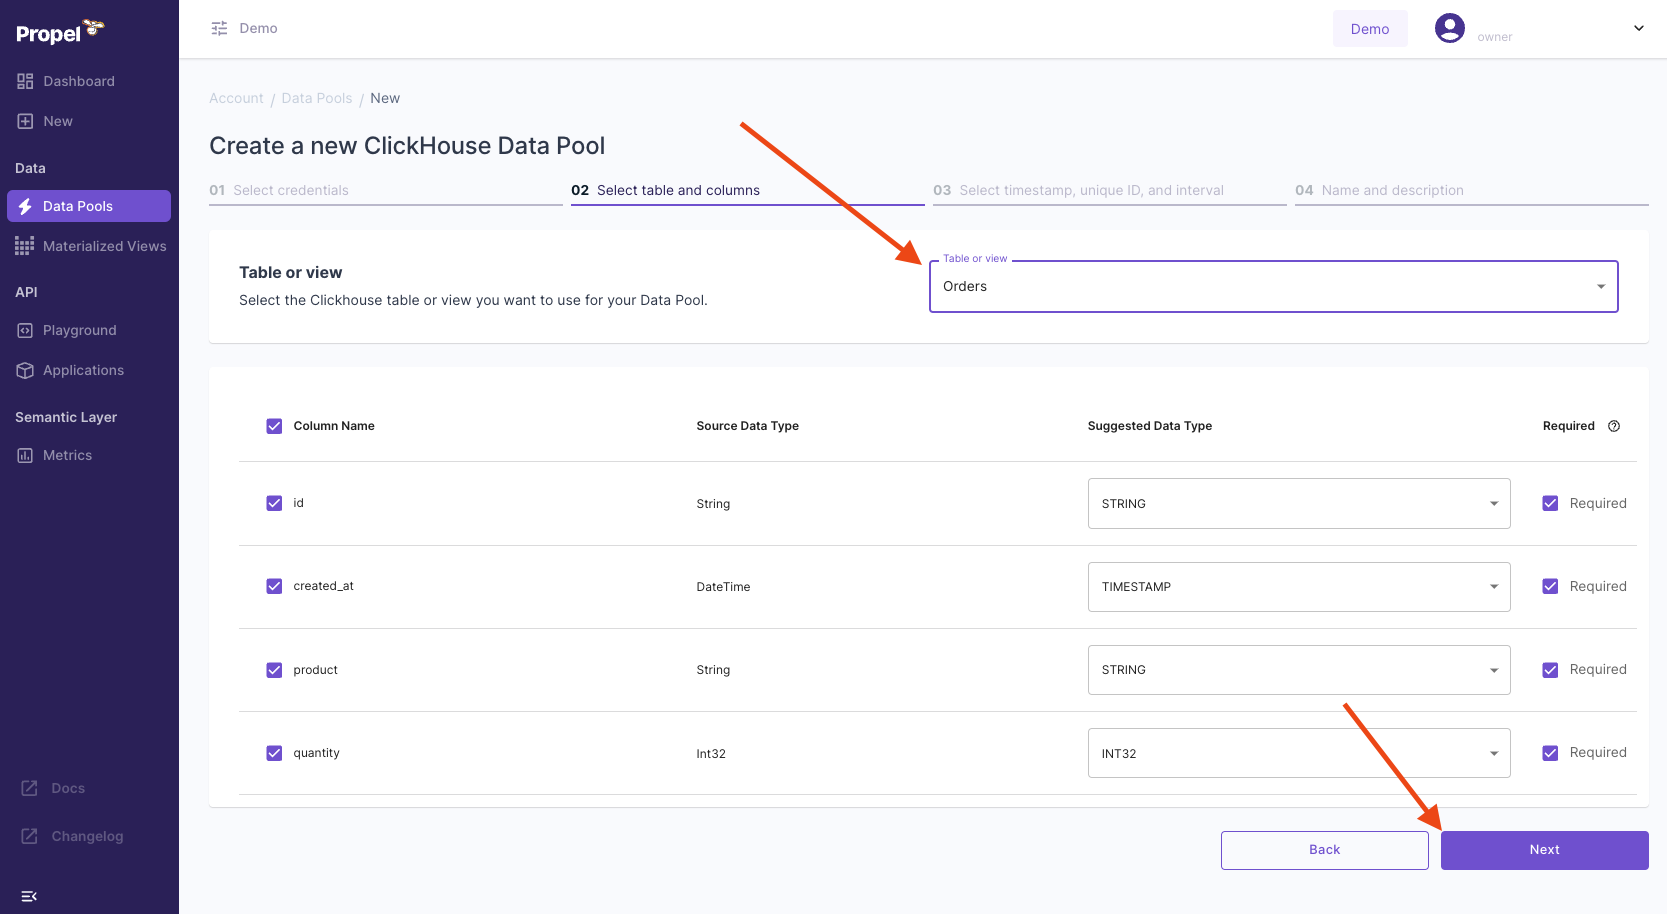
 Select the table and columns you want to connect to Propel and click **"Next"**.
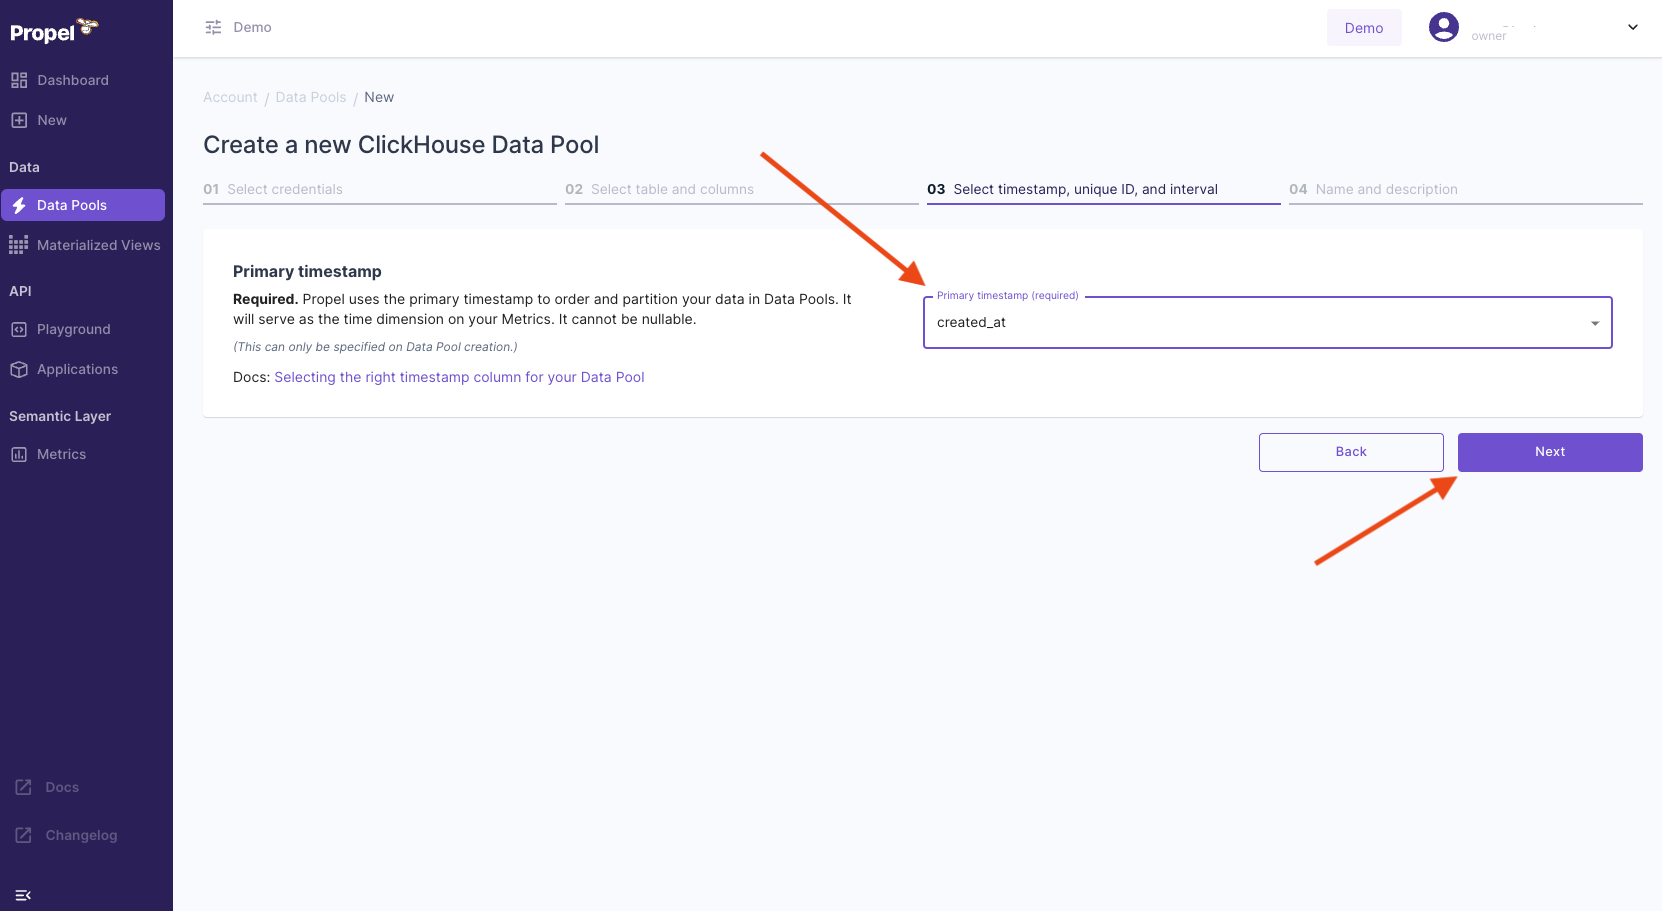
 Select the primary timestamp of the table and click **"Next"**.
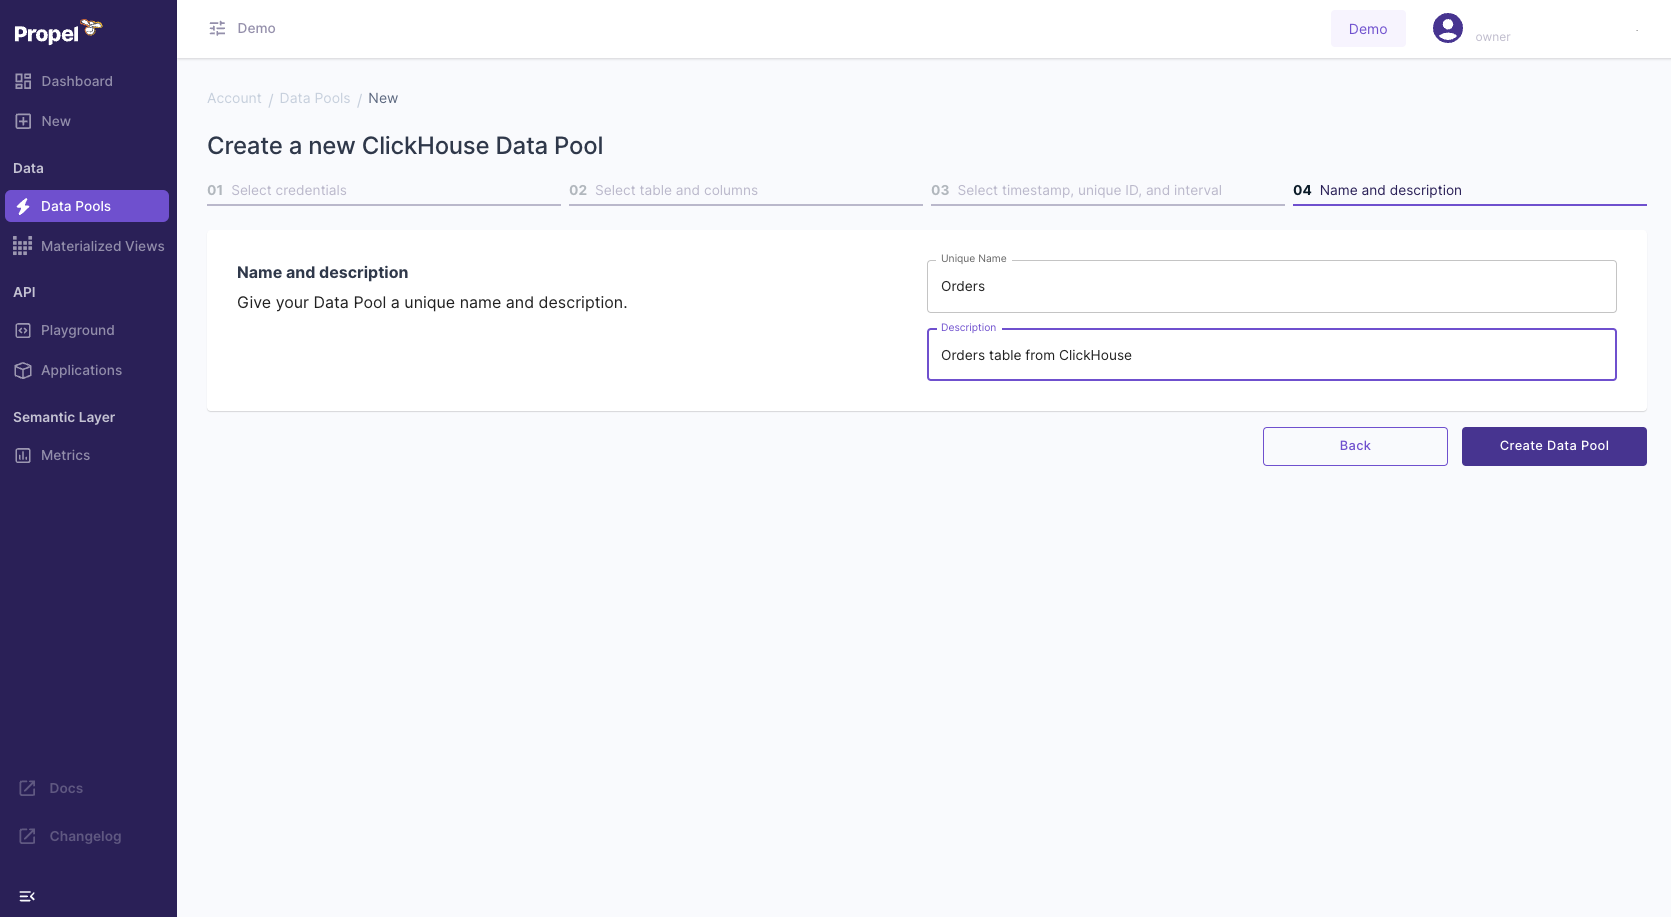
 Give your Data Pool a name and a description, and click **"Create Data Pool"**.
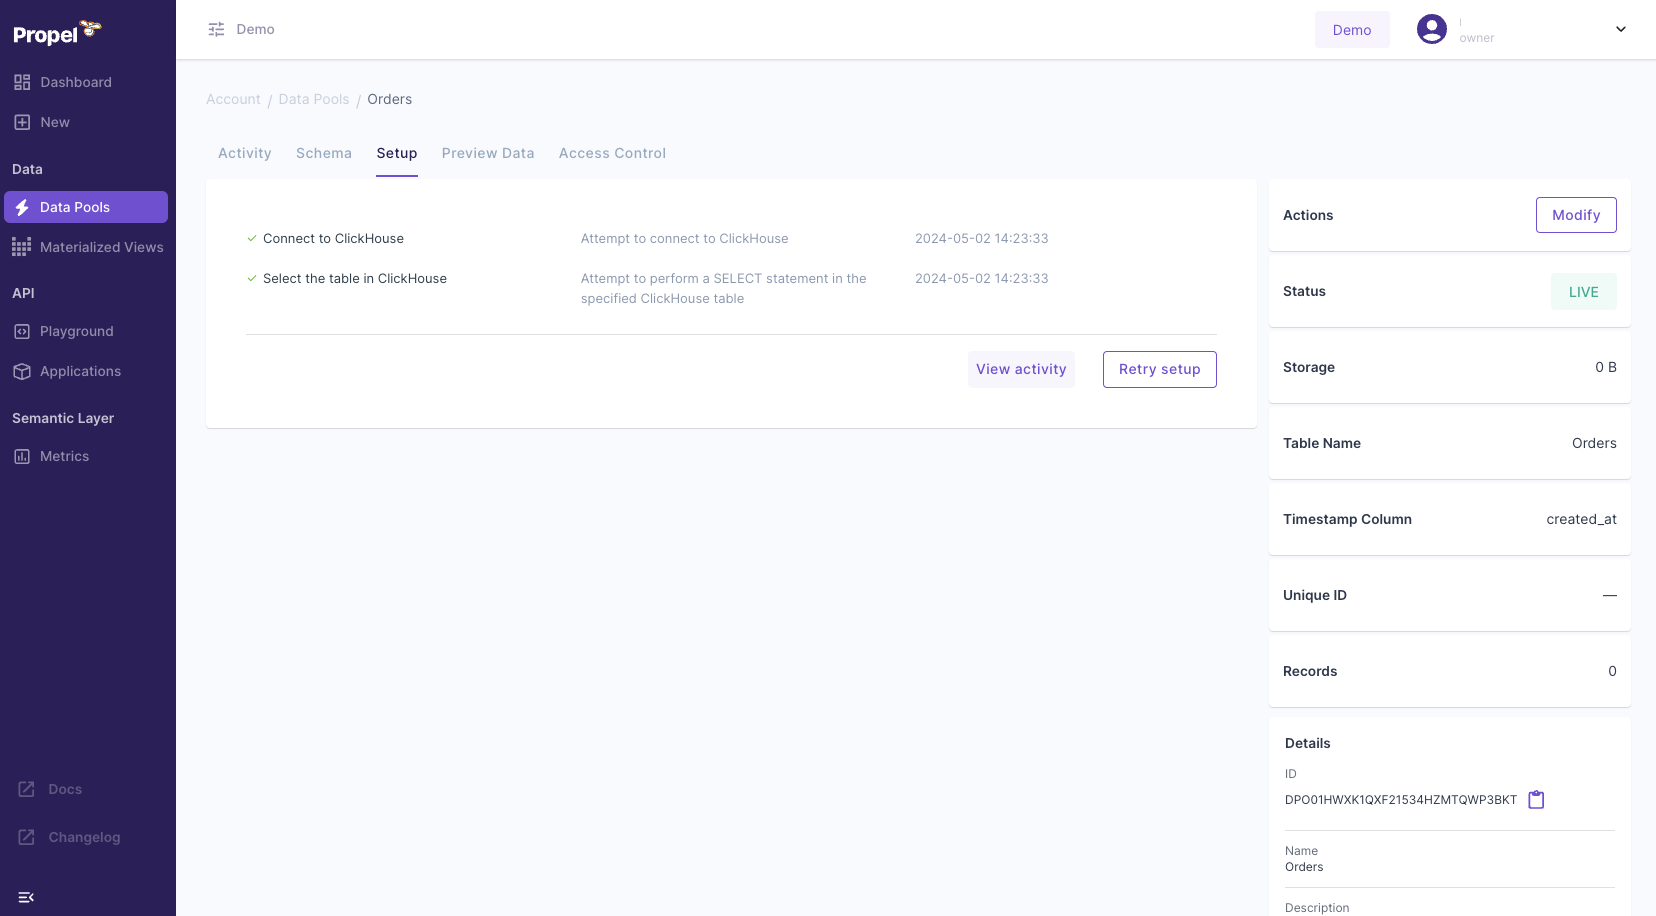
 You should see the setup tasks completed successfully, and then you're all done!
 ## Step 4: Preview and query your data
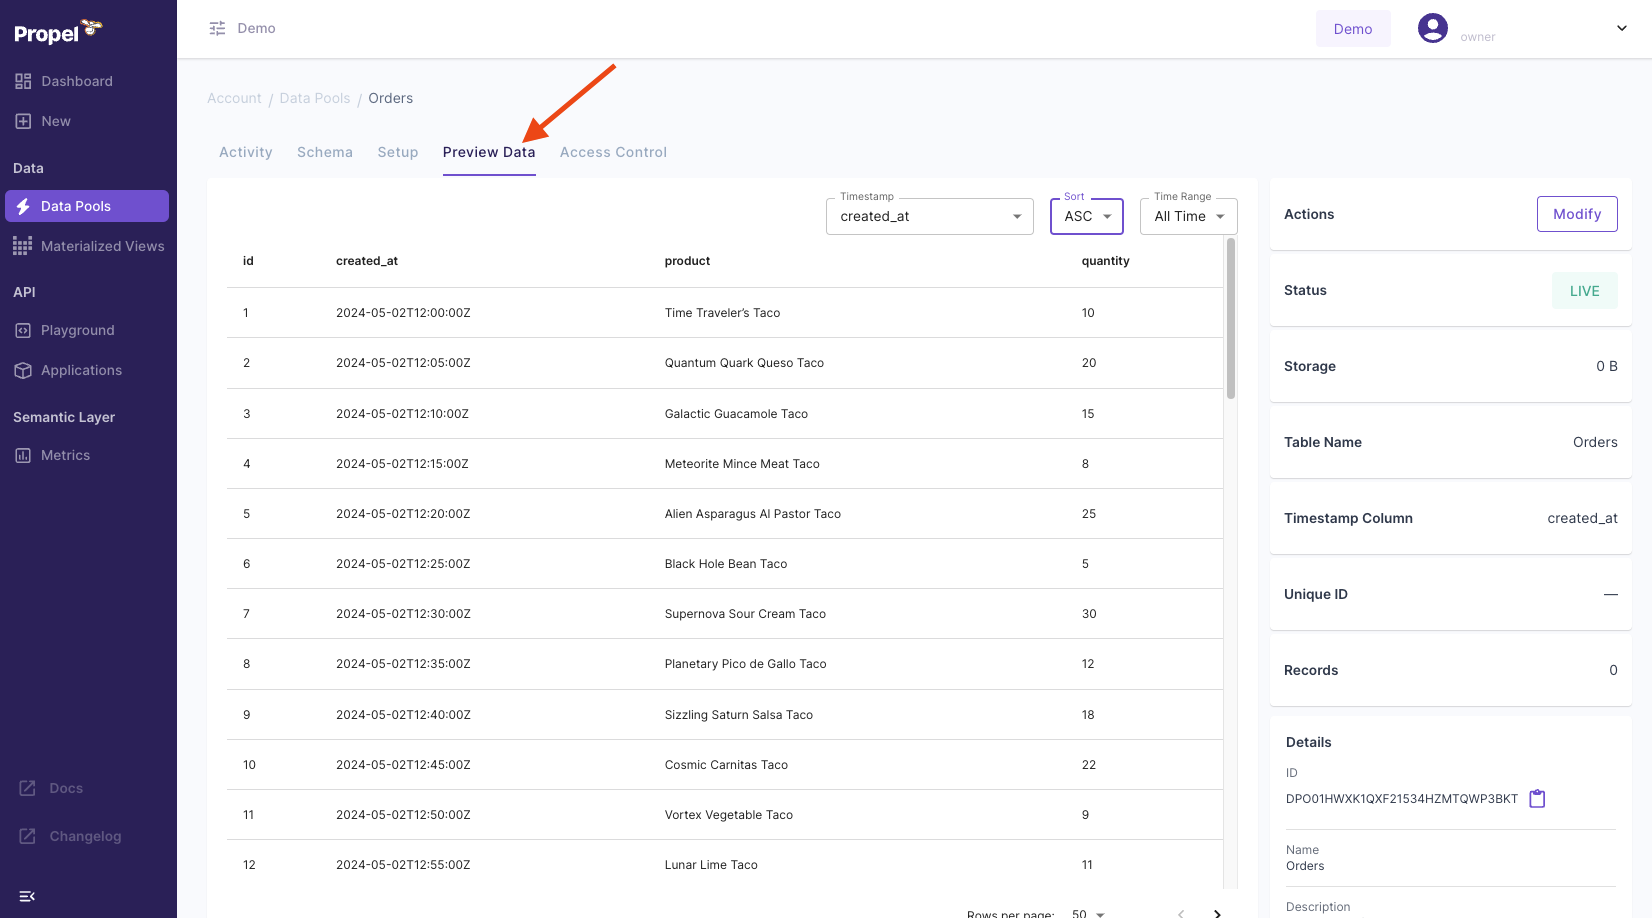
Click on the **"Preview Data"** tab.
## Step 4: Preview and query your data
Click on the **"Preview Data"** tab.
 Click the **"Playground"** section and select **"SQL"** from the API dropdown.
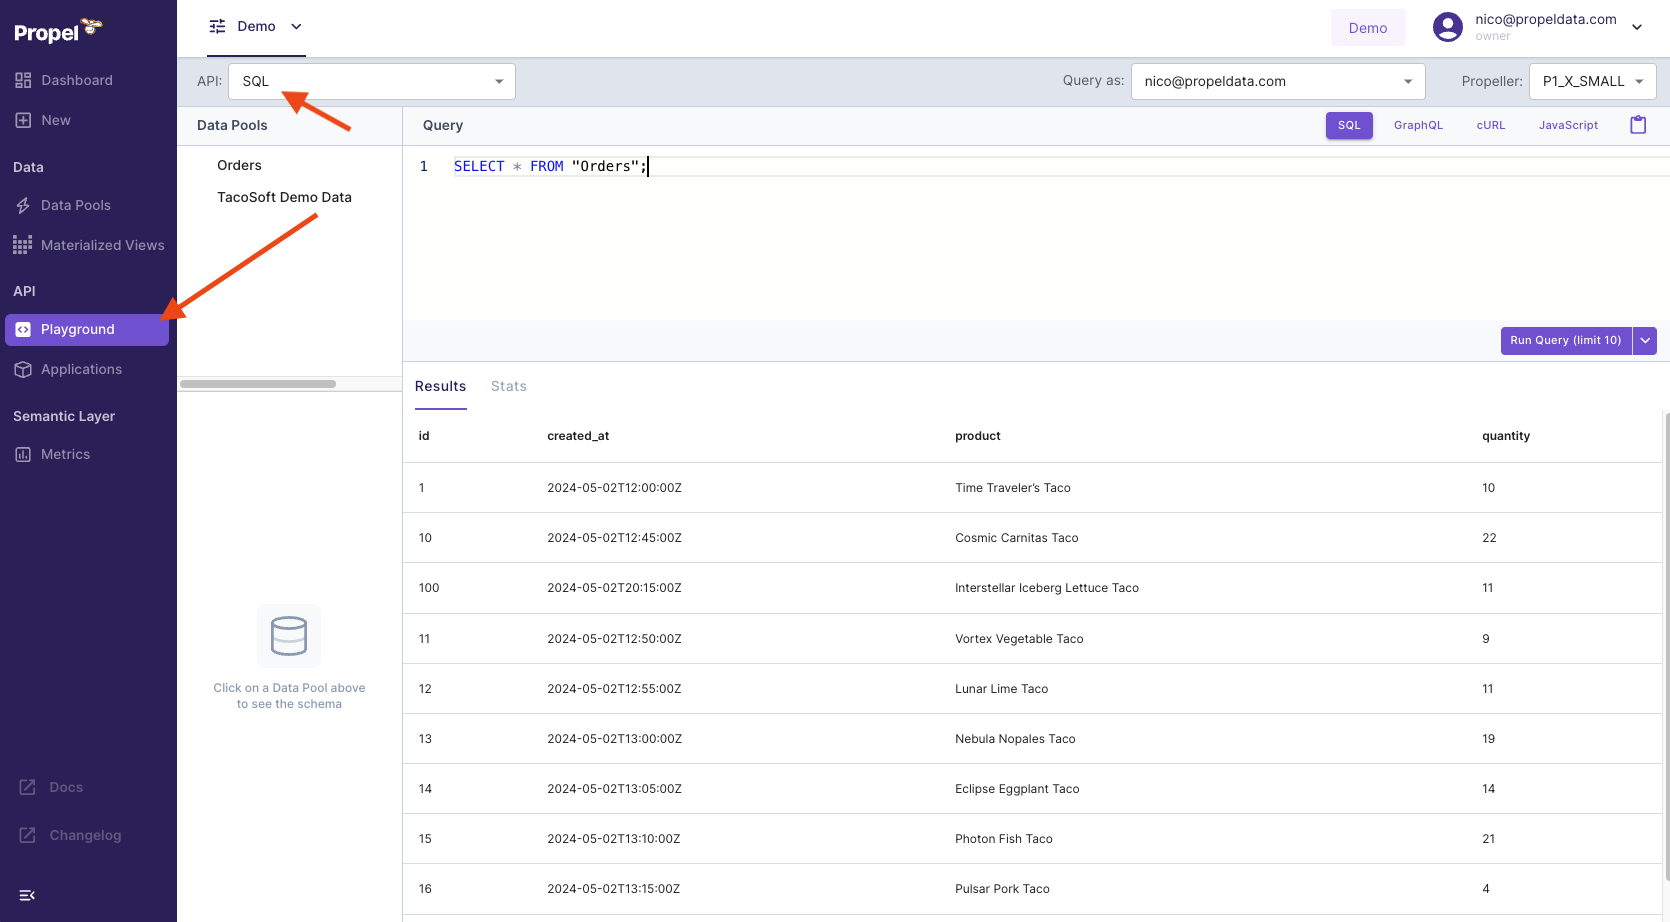 Click the **"Playground"** section and select **"GraphQL"** from the API dropdown.