> ## Documentation Index
> Fetch the complete documentation index at: https://www.propeldata.com/llms.txt
> Use this file to discover all available pages before exploring further.
# Amazon Data Firehose setup guide
> Ingesting data from Amazon Data Firehose streams to Propel
This guide covers how to:
1. [Create a Amazon Data Firehose Data Pool](#step-1-create-a-amazon-data-firehose-data-pool)
2. [Create the Data Firehose stream](#step-2-create-the-data-firehose-stream)
3. [Send test data](#step-3-send-test-data)
4. [Preview data in Propel](#step-4-preview-data-in-propel)
***
## Requirements
* You have a [Propel account](https://console.propeldata.com/get-started).
* You have an AWS account.
***
## Step 1: Create a Amazon Data Firehose Data Pool
First, create a Amazon Data Firehose Data Pool in Propel.
This will give you a dedicated HTTP endpoint for Amazon Data Firehose to send data to.
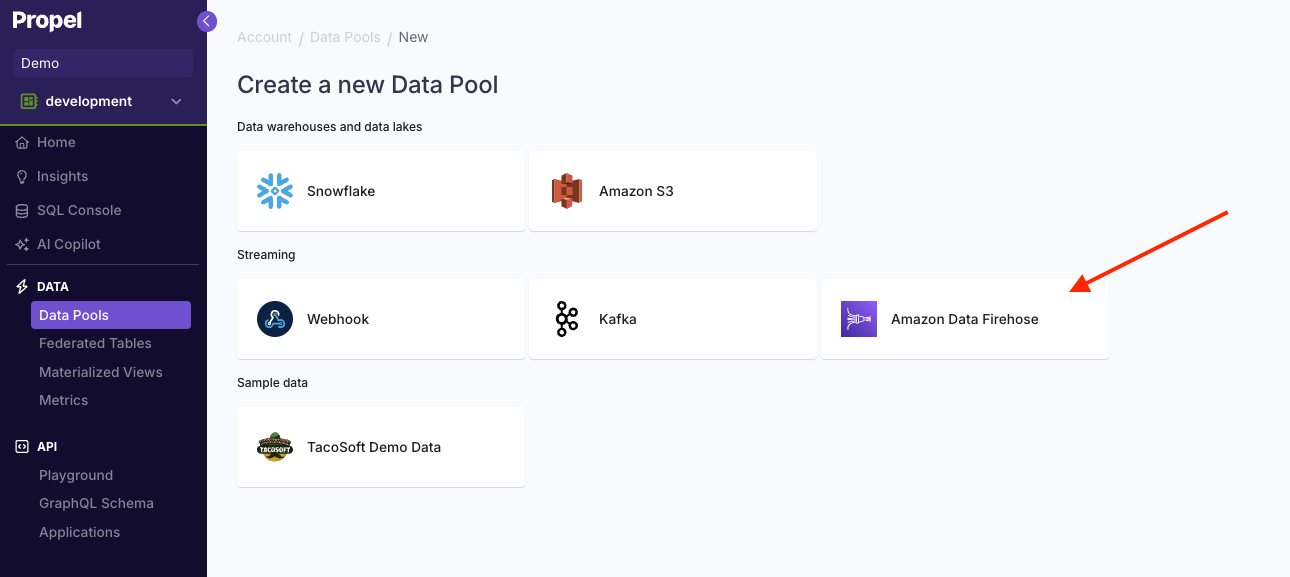
In the Console, click on **"Data Pools"** in the left-hand menu. Click on **"Create Data Pool"** and select **"Amazon Data Firehose"**.
 Propel will automatically unpack the Amazon Data Firehose events into individual rows.
This means that there is **NO** need to unpack the standard `requestId`, `timestamp`, and `records` fields.
The default schema contains two columns:
| Column | Type | Description |
| --------------------- | --------- | -------------------------------------------------- |
| `_propel_received_at` | TIMESTAMP | The timestamp when the event was collected in UTC. |
| `_propel_payload` | JSON | The value in the `records[i].data` of the event. |
By providing a sample event, you can add columns to the Data Pool to match the structure of your data.
Propel will automatically unpack the Amazon Data Firehose events into individual rows.
This means that there is **NO** need to unpack the standard `requestId`, `timestamp`, and `records` fields.
The default schema contains two columns:
| Column | Type | Description |
| --------------------- | --------- | -------------------------------------------------- |
| `_propel_received_at` | TIMESTAMP | The timestamp when the event was collected in UTC. |
| `_propel_payload` | JSON | The value in the `records[i].data` of the event. |
By providing a sample event, you can add columns to the Data Pool to match the structure of your data.
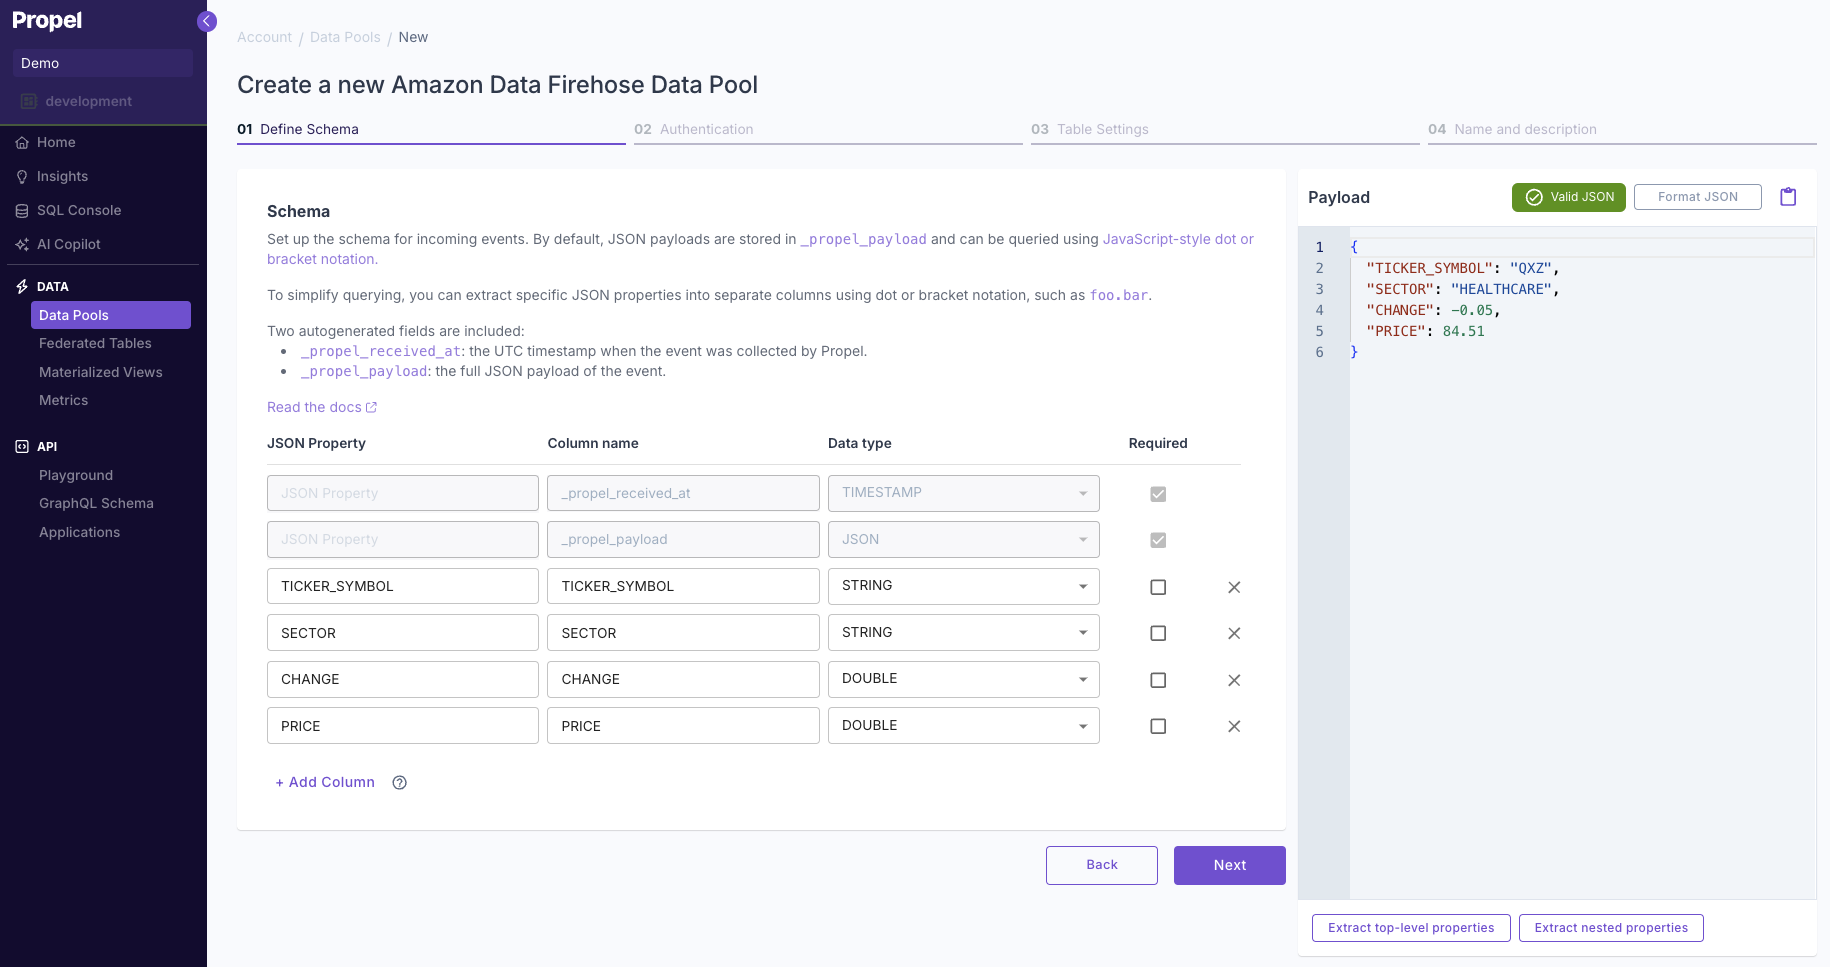 For this guide, we'll use the TacoSoft sample event:
```json theme={"system"}
{
"TICKER_SYMBOL": "QXZ",
"SECTOR": "HEALTHCARE",
"CHANGE": -0.05,
"PRICE": 84.51
}
```
After adding the sample JSON, click on:
* **Extract top-level properties** to create columns representing the top-level keys.
* **Extract nested properties** to create columns representing the nested JSON keys.
If a required field is missing from the sample event, Propel will reject the event with an `HTTP 400 Bad Request` error.
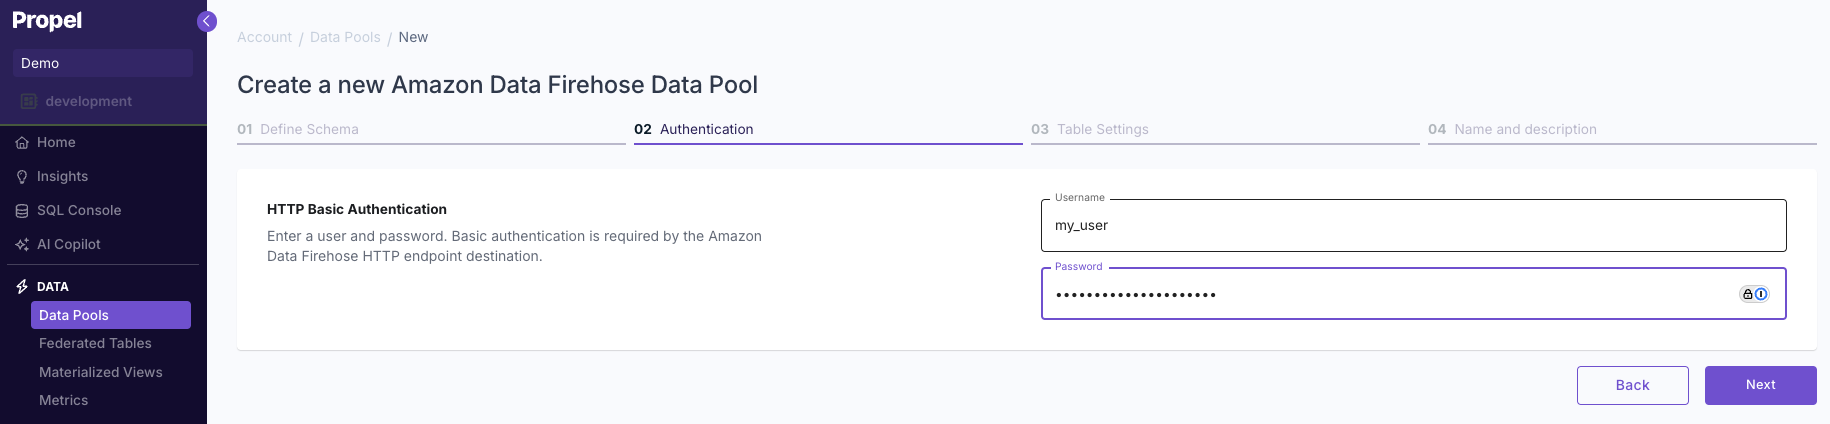
You'll need to enable basic authentication with a user and a secure password.
You will need the user and password to configure the Amazon Data Firehose.
After configuring, click **"Next"** to proceed.
For this guide, we'll use the TacoSoft sample event:
```json theme={"system"}
{
"TICKER_SYMBOL": "QXZ",
"SECTOR": "HEALTHCARE",
"CHANGE": -0.05,
"PRICE": 84.51
}
```
After adding the sample JSON, click on:
* **Extract top-level properties** to create columns representing the top-level keys.
* **Extract nested properties** to create columns representing the nested JSON keys.
If a required field is missing from the sample event, Propel will reject the event with an `HTTP 400 Bad Request` error.
You'll need to enable basic authentication with a user and a secure password.
You will need the user and password to configure the Amazon Data Firehose.
After configuring, click **"Next"** to proceed.
 Select whether your data is "Append-only" or "Mutable data".
To learn more, read out guide on [Selecting table engine and sorting key](/docs/guides/table-engine-and-sorting-key).
Select whether your data is "Append-only" or "Mutable data".
To learn more, read out guide on [Selecting table engine and sorting key](/docs/guides/table-engine-and-sorting-key).
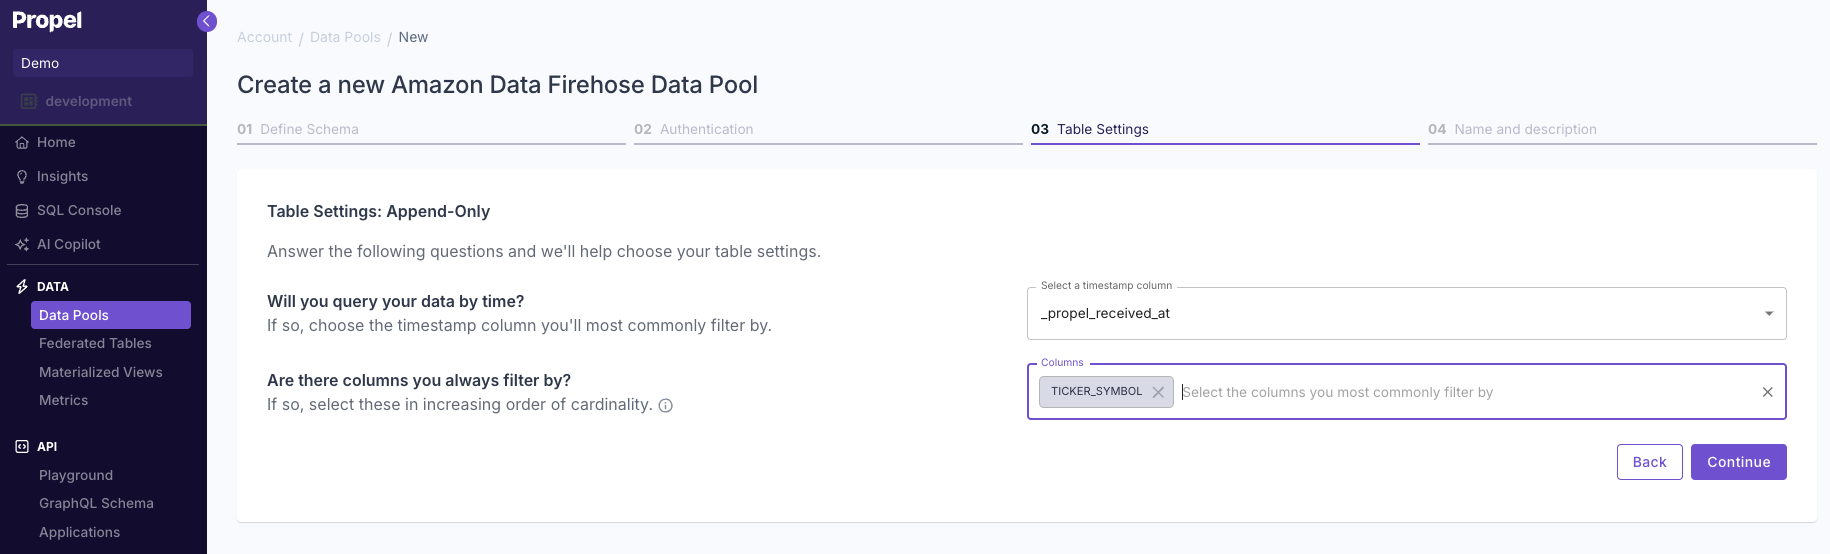
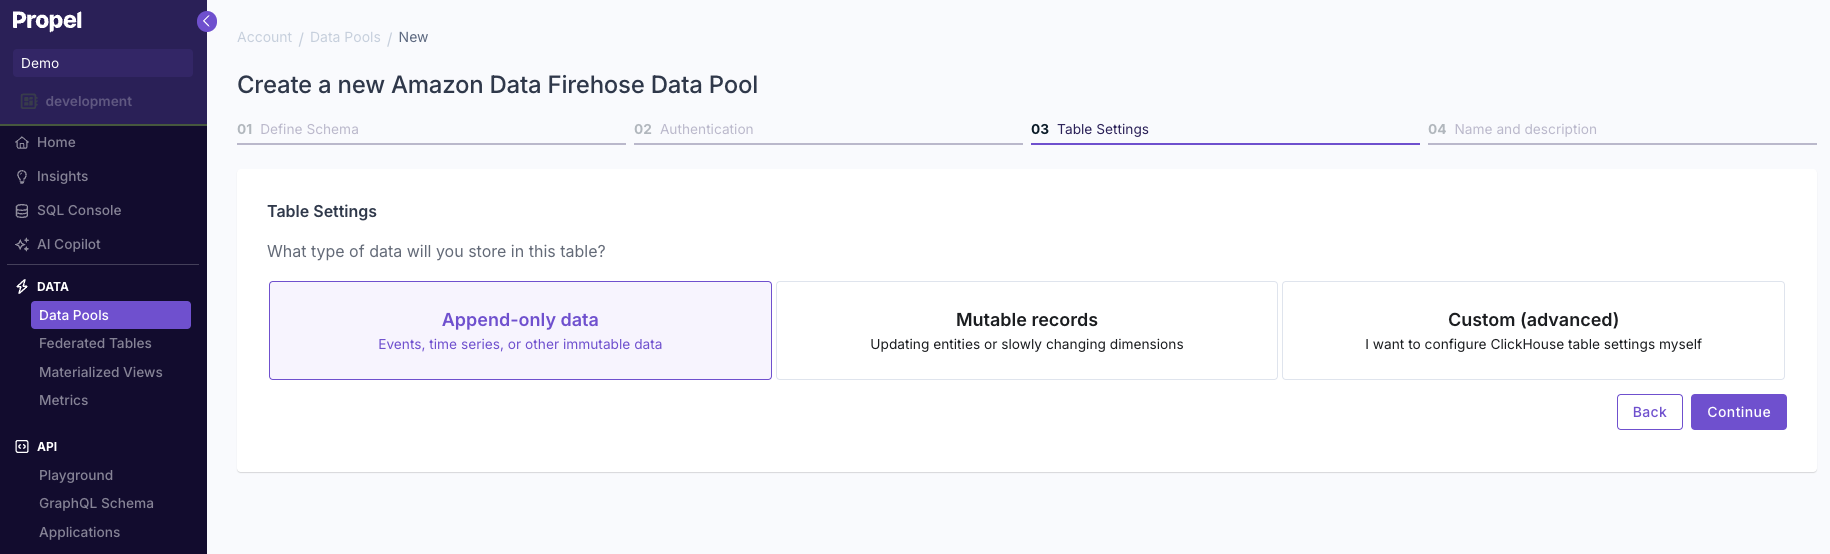 Answer the questions in the wizard to complete the setup.
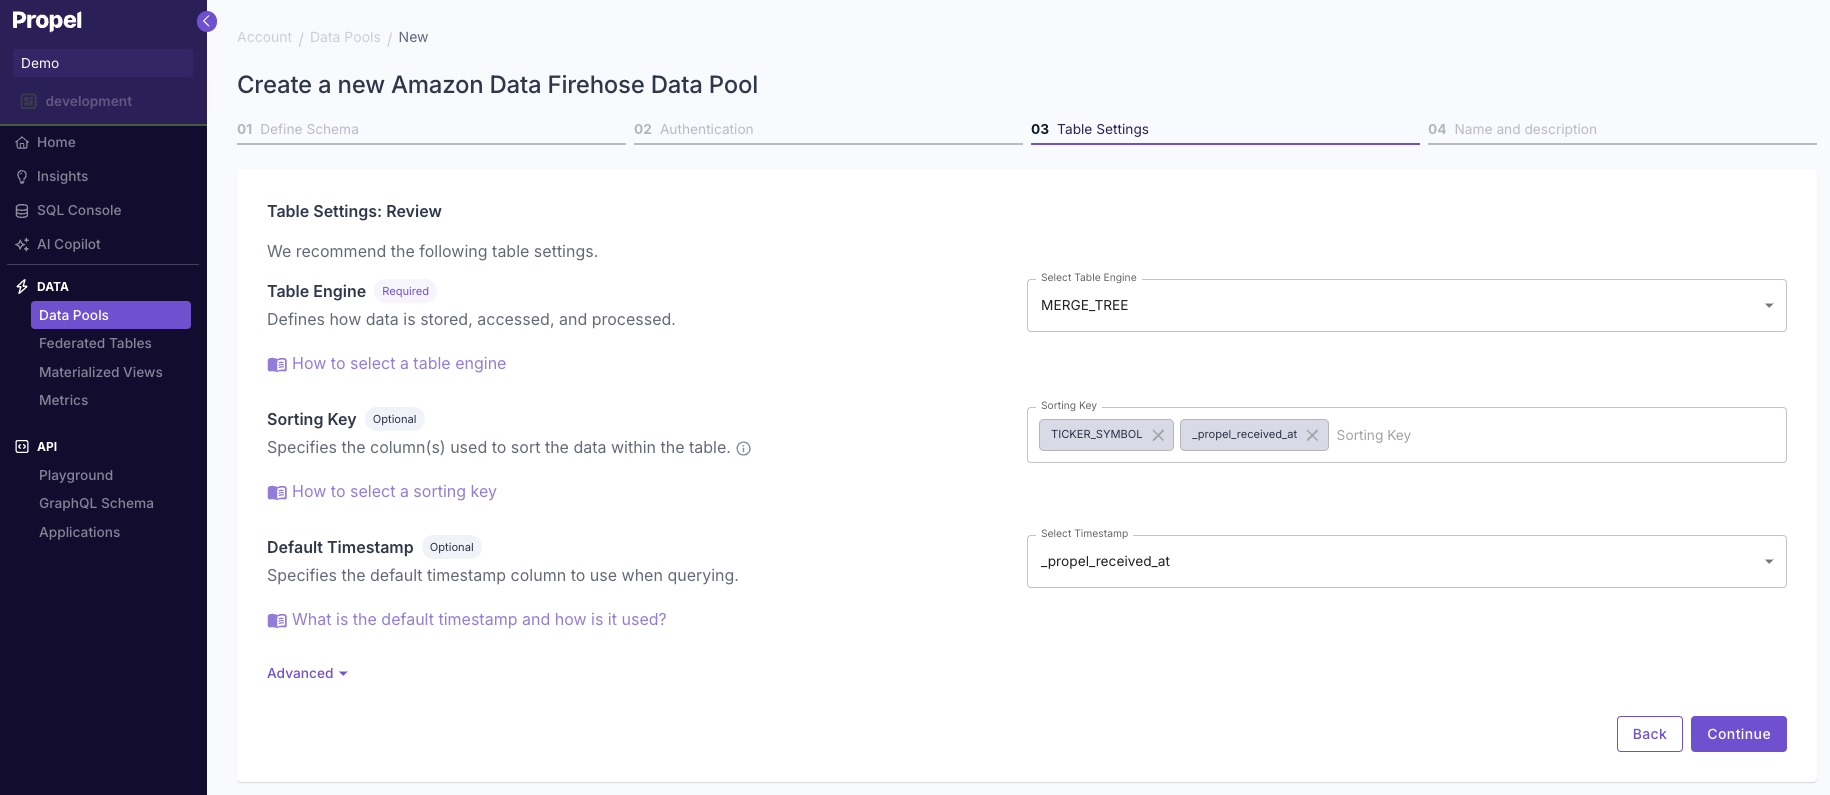
 Confirm your table settings and click **"Continue"**.
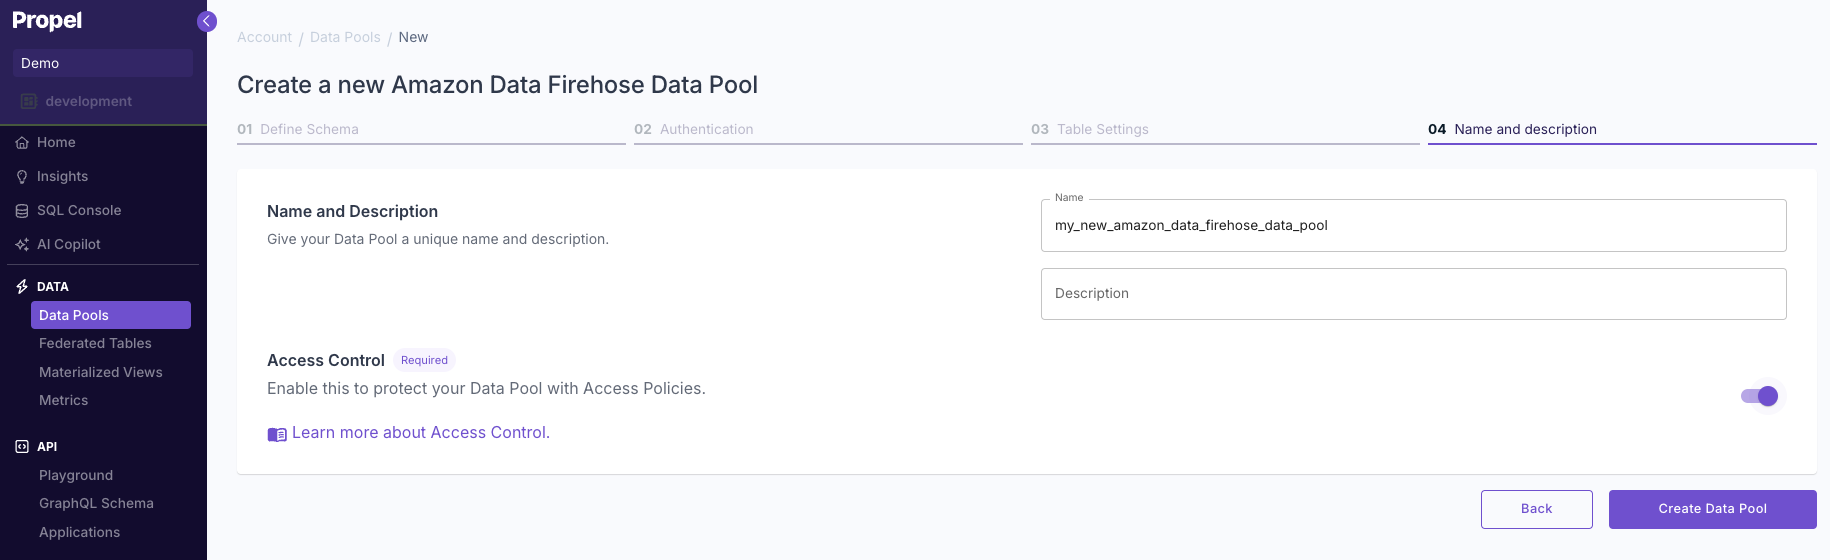
 Enter a name and description for your new Data Pool and click **"Next"**.
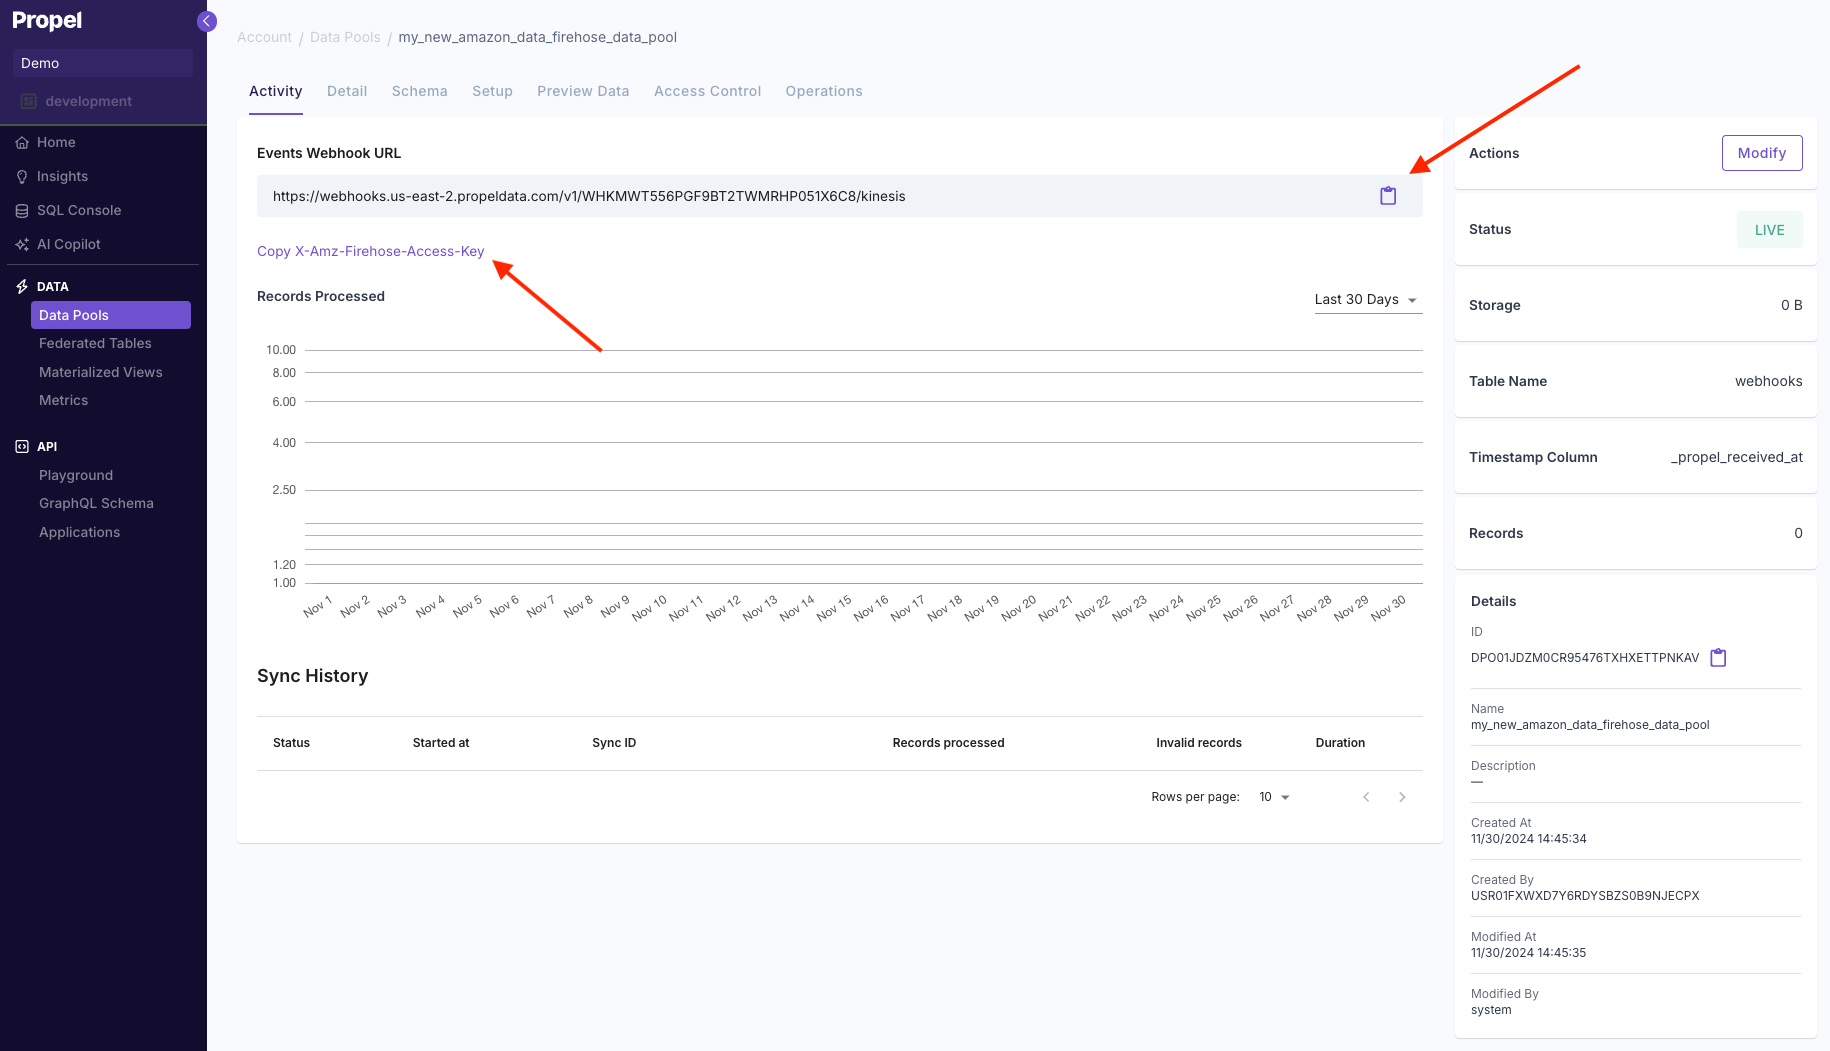
 After creating the Data Pool, you'll be provided with a unique HTTP endpoint and a `X-Amz-Firehose-Access-Key` key.
You'll need this endpoint and key to configure your Amazon Data Firehose HTTP endpoint destination.
After creating the Data Pool, you'll be provided with a unique HTTP endpoint and a `X-Amz-Firehose-Access-Key` key.
You'll need this endpoint and key to configure your Amazon Data Firehose HTTP endpoint destination.
 For the Amazon Data Firehose Data Pool, creating the Data Source below automatically creates the Data Pool.
```graphql theme={"system"}
mutation {
createAmazonDataFirehoseDataSource(input: {
uniqueName: "my_amazon_data_firehose_data_pool"
description:"My Amazon Data Firehose Data Pool"
connectionSettings: {
basicAuth: {
username: ""
password: ""
}
columns: [
{ name: "ticker_symbol", jsonProperty: "TICKER_SYMBOL", type: STRING, nullable: false },
{ name: "sector", jsonProperty: "SECTOR", type: STRING, nullable: false },
{ name: "change", jsonProperty: "CHANGE", type: FLOAT64, nullable: false },
{ name: "price", jsonProperty: "PRICE", type: FLOAT64, nullable: false }
]
accessControlEnabled: true,
tableSettings: {
engine: {
mergeTree: {
type: MERGE_TREE
}
}
orderBy: ["_propel_received_at"],
}
}
}){
dataSource {
id
uniqueName
status
type
connectionSettings {
... on AmazonDataFirehoseConnectionSettings {
httpEndpointURL
xAmzFirehoseAccessKey
}
}
}
}
}
```
***
## Step 2: Create the Data Firehose stream
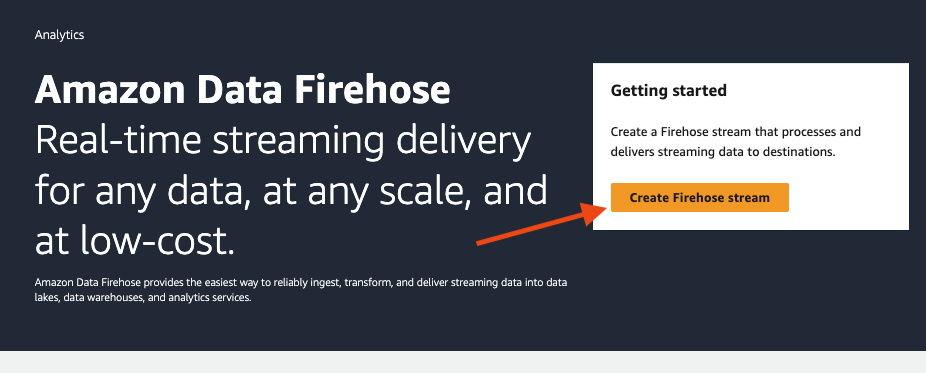
Once you have the Data Pool created, we'll need to create an Amazon Data Firehose stream with an HTTP endpoint destination that sends events to Propel.
Once you are in the **"Amazon Data Firehose"** section of the AWS console, click on **"Create Firehose stream"**.
For the Amazon Data Firehose Data Pool, creating the Data Source below automatically creates the Data Pool.
```graphql theme={"system"}
mutation {
createAmazonDataFirehoseDataSource(input: {
uniqueName: "my_amazon_data_firehose_data_pool"
description:"My Amazon Data Firehose Data Pool"
connectionSettings: {
basicAuth: {
username: ""
password: ""
}
columns: [
{ name: "ticker_symbol", jsonProperty: "TICKER_SYMBOL", type: STRING, nullable: false },
{ name: "sector", jsonProperty: "SECTOR", type: STRING, nullable: false },
{ name: "change", jsonProperty: "CHANGE", type: FLOAT64, nullable: false },
{ name: "price", jsonProperty: "PRICE", type: FLOAT64, nullable: false }
]
accessControlEnabled: true,
tableSettings: {
engine: {
mergeTree: {
type: MERGE_TREE
}
}
orderBy: ["_propel_received_at"],
}
}
}){
dataSource {
id
uniqueName
status
type
connectionSettings {
... on AmazonDataFirehoseConnectionSettings {
httpEndpointURL
xAmzFirehoseAccessKey
}
}
}
}
}
```
***
## Step 2: Create the Data Firehose stream
Once you have the Data Pool created, we'll need to create an Amazon Data Firehose stream with an HTTP endpoint destination that sends events to Propel.
Once you are in the **"Amazon Data Firehose"** section of the AWS console, click on **"Create Firehose stream"**.
 Select your source and **"HTTP Endpoint"** as the destination.
 Give your stream a name for future reference.
 Next, we are going to configure the destination. This is where we'll need the information about the Amazon Data Firehose Data Pool we created in the step above.
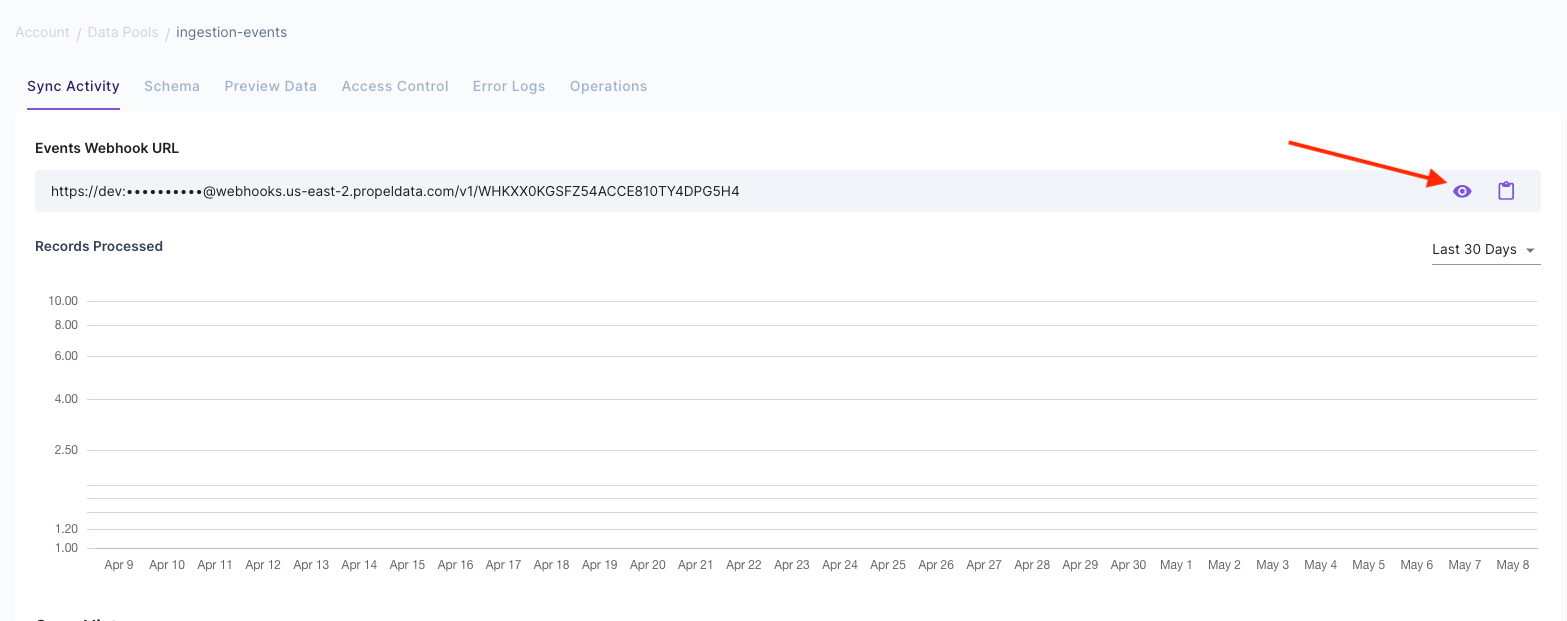
1. Get the Propel Amazon Data Firehose Data Pool HTTP endpoint and `X-Amz-Firehose-Access-Key` key.
Next, we are going to configure the destination. This is where we'll need the information about the Amazon Data Firehose Data Pool we created in the step above.
1. Get the Propel Amazon Data Firehose Data Pool HTTP endpoint and `X-Amz-Firehose-Access-Key` key.
 3. Enter the destination details
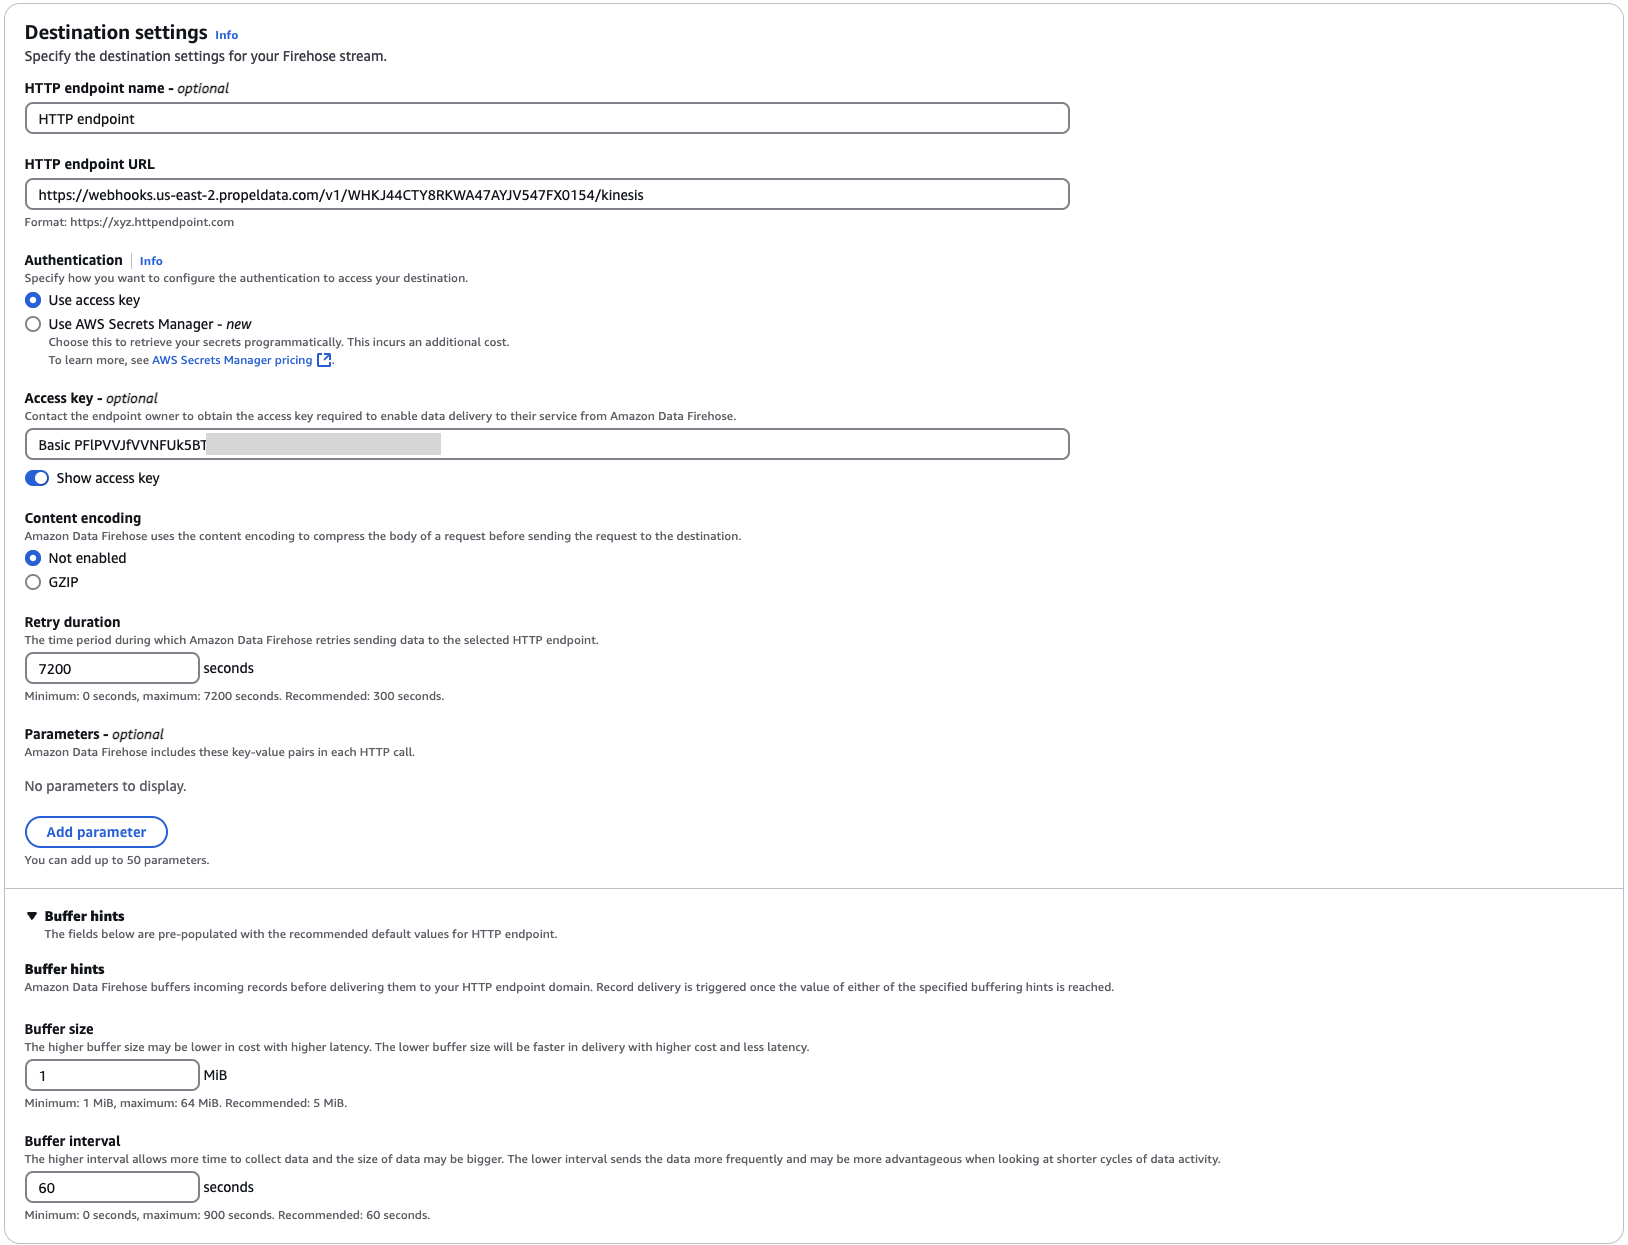 1. **"HTTP endpoint name"** - Give the endpoint a name. For example: "firehose-to-propel"
2. **"HTTP endpoint URL"** - Enter the Amazon Data Firehose Data Pool HTTP endpoint. It should look like: `https://webhooks.us-east-2.propeldata.com/v1/WHKXXXXXX/kinesis`.
3. **"Access key"** - Copy the access key you copied above. For example, `Basic Zml6ejpidXp6`.
4. **"Retry duration"** - Set as the maximum seconds: "7200".
5. **"Content encoding"** - Set as **"Not enabled"**
6. **"Buffer hints"** - Set Buffer size to **1MiB**.
Requests above 1MiB will get a `413 Request Entity Too Large` error.
7. **"Buffer hints"** - Set Buffer interval to desired value. Recommended to set to **60 seconds**.
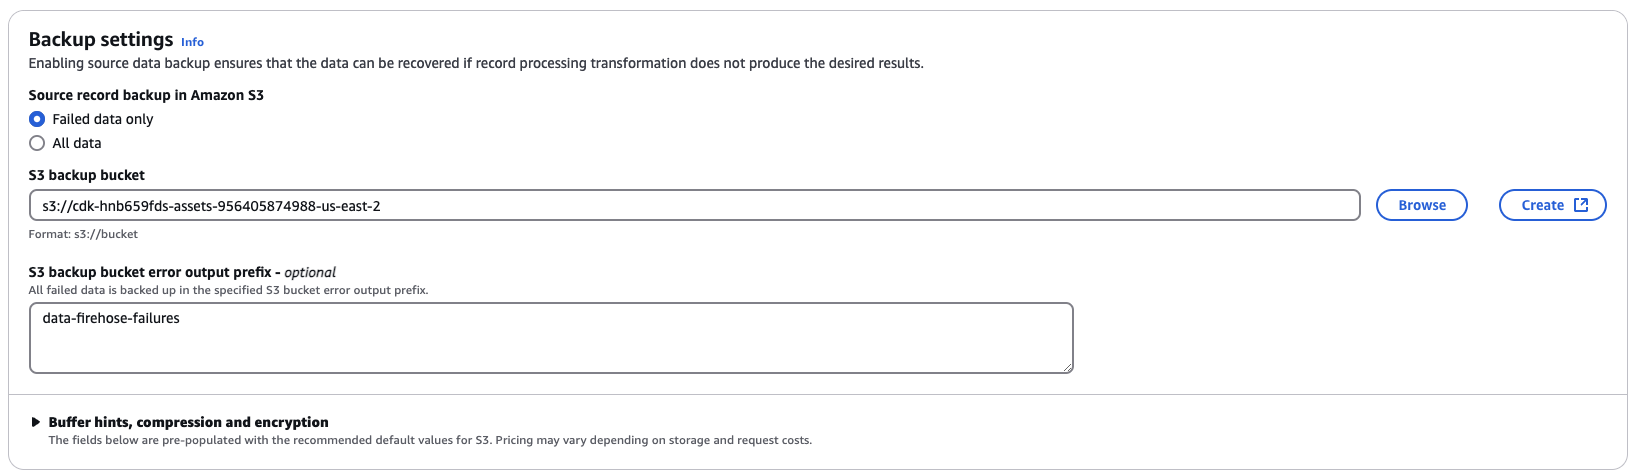
8. Create an S3 bucket for failed deliveries
If deliveries fail, you don't want to lose events. You must capture failed events in an S3 bucket (required to create the stream).
To configure it, go to "**Backup settings**" and configure a bucket.
1. **"HTTP endpoint name"** - Give the endpoint a name. For example: "firehose-to-propel"
2. **"HTTP endpoint URL"** - Enter the Amazon Data Firehose Data Pool HTTP endpoint. It should look like: `https://webhooks.us-east-2.propeldata.com/v1/WHKXXXXXX/kinesis`.
3. **"Access key"** - Copy the access key you copied above. For example, `Basic Zml6ejpidXp6`.
4. **"Retry duration"** - Set as the maximum seconds: "7200".
5. **"Content encoding"** - Set as **"Not enabled"**
6. **"Buffer hints"** - Set Buffer size to **1MiB**.
Requests above 1MiB will get a `413 Request Entity Too Large` error.
7. **"Buffer hints"** - Set Buffer interval to desired value. Recommended to set to **60 seconds**.
8. Create an S3 bucket for failed deliveries
If deliveries fail, you don't want to lose events. You must capture failed events in an S3 bucket (required to create the stream).
To configure it, go to "**Backup settings**" and configure a bucket.
 Click **"Create Firehose stream"** and you are done!
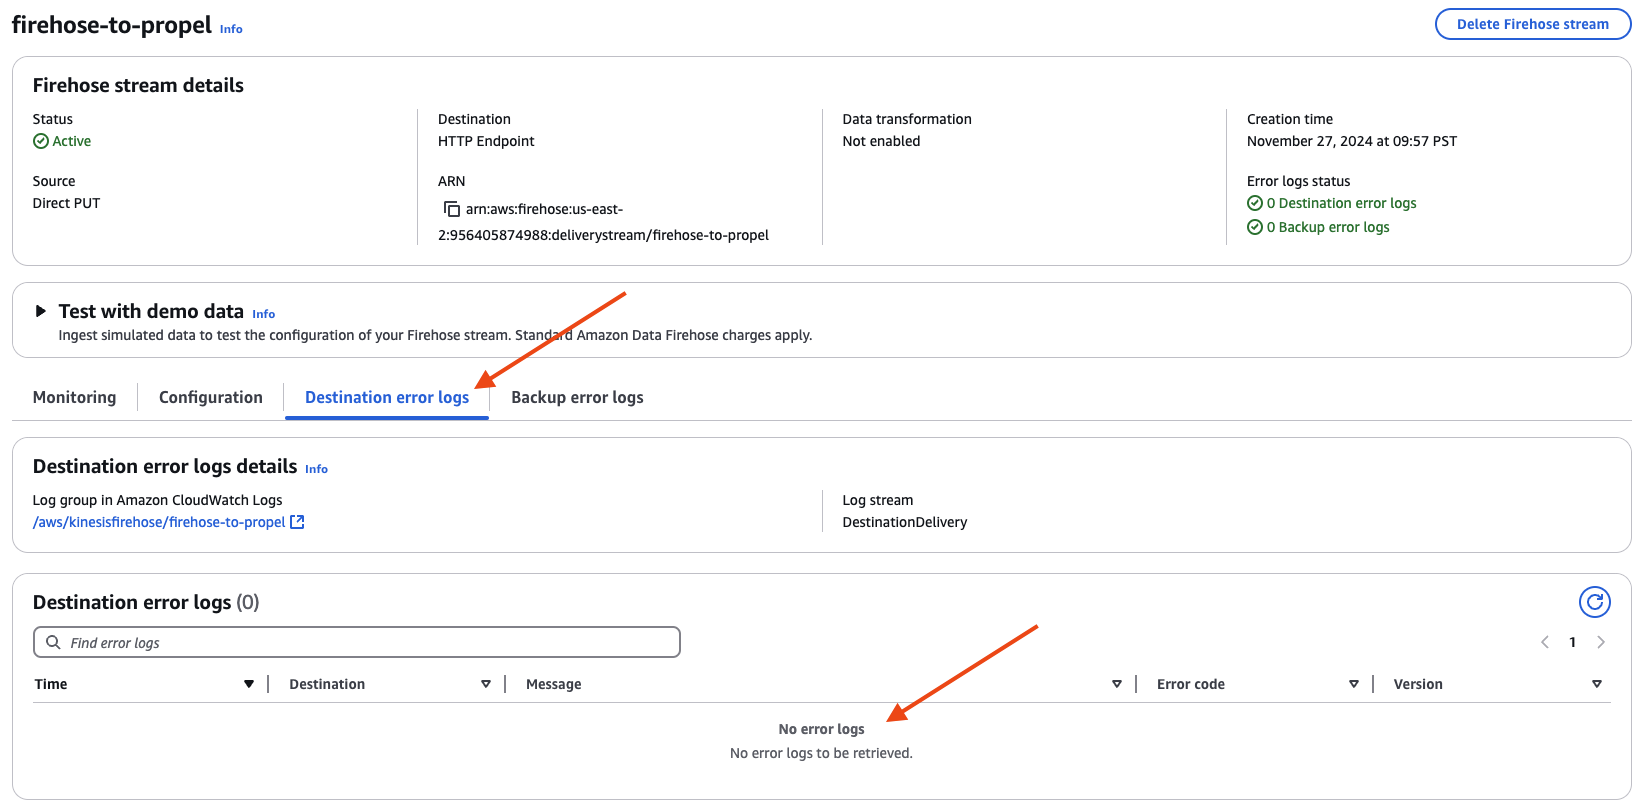
 If everything is set up correctly, you should not see any deliveries to the logs.
 ***
For further reference, see the [Understand HTTP endpoint delivery request and response specifications](https://docs.aws.amazon.com/firehose/latest/dev/httpdeliveryrequestresponse.html) documentation.
## Step 3: Send test data
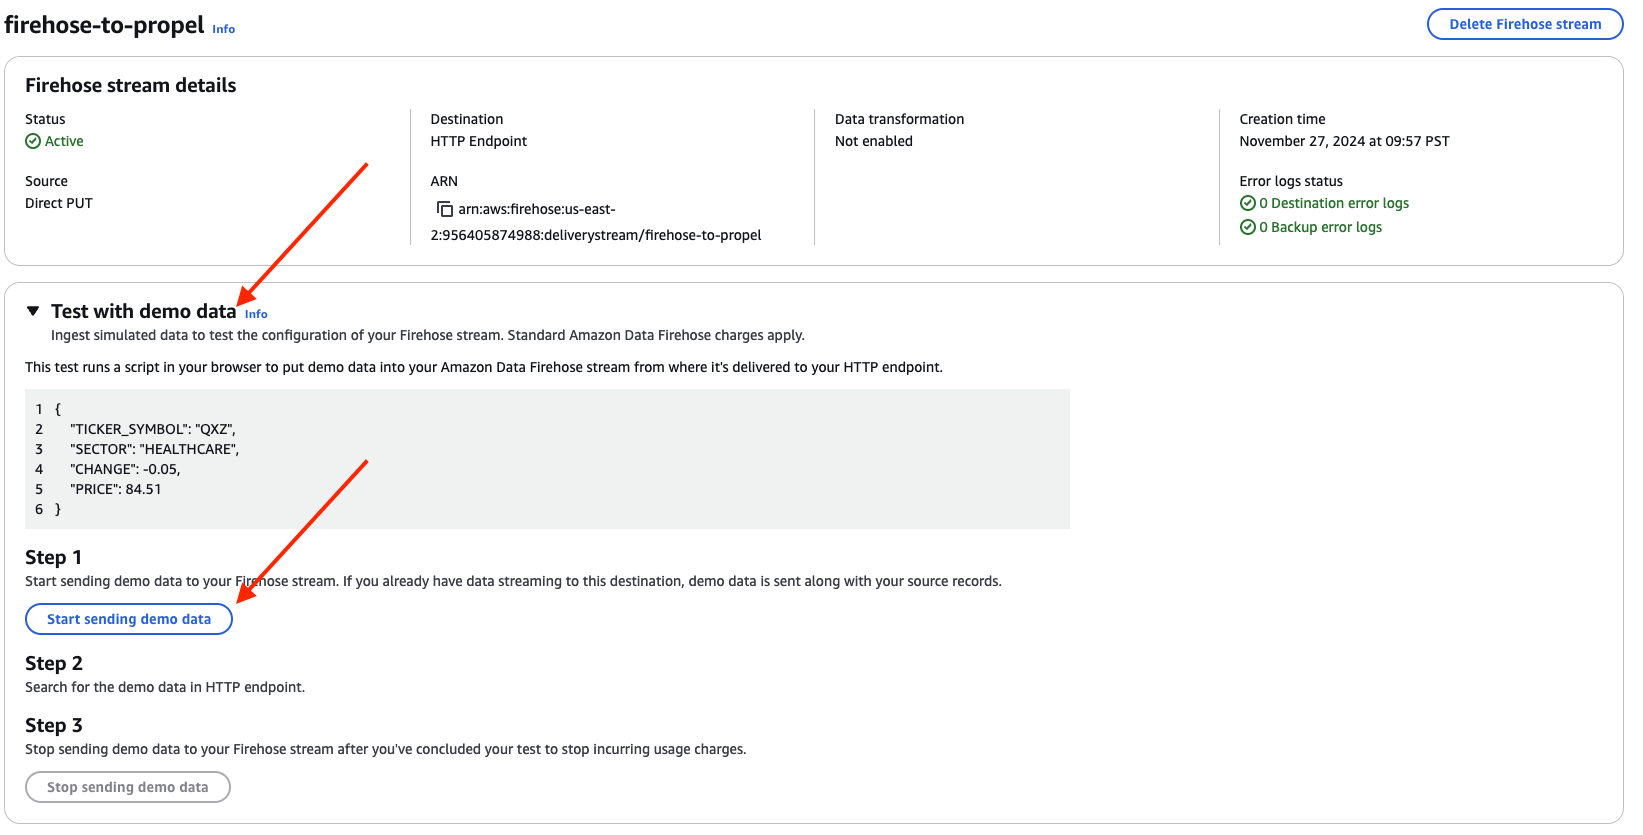
Once you have the Data Firehose stream created, you can send test data to it.
***
For further reference, see the [Understand HTTP endpoint delivery request and response specifications](https://docs.aws.amazon.com/firehose/latest/dev/httpdeliveryrequestresponse.html) documentation.
## Step 3: Send test data
Once you have the Data Firehose stream created, you can send test data to it.
 ## Step 4: Preview data in Propel
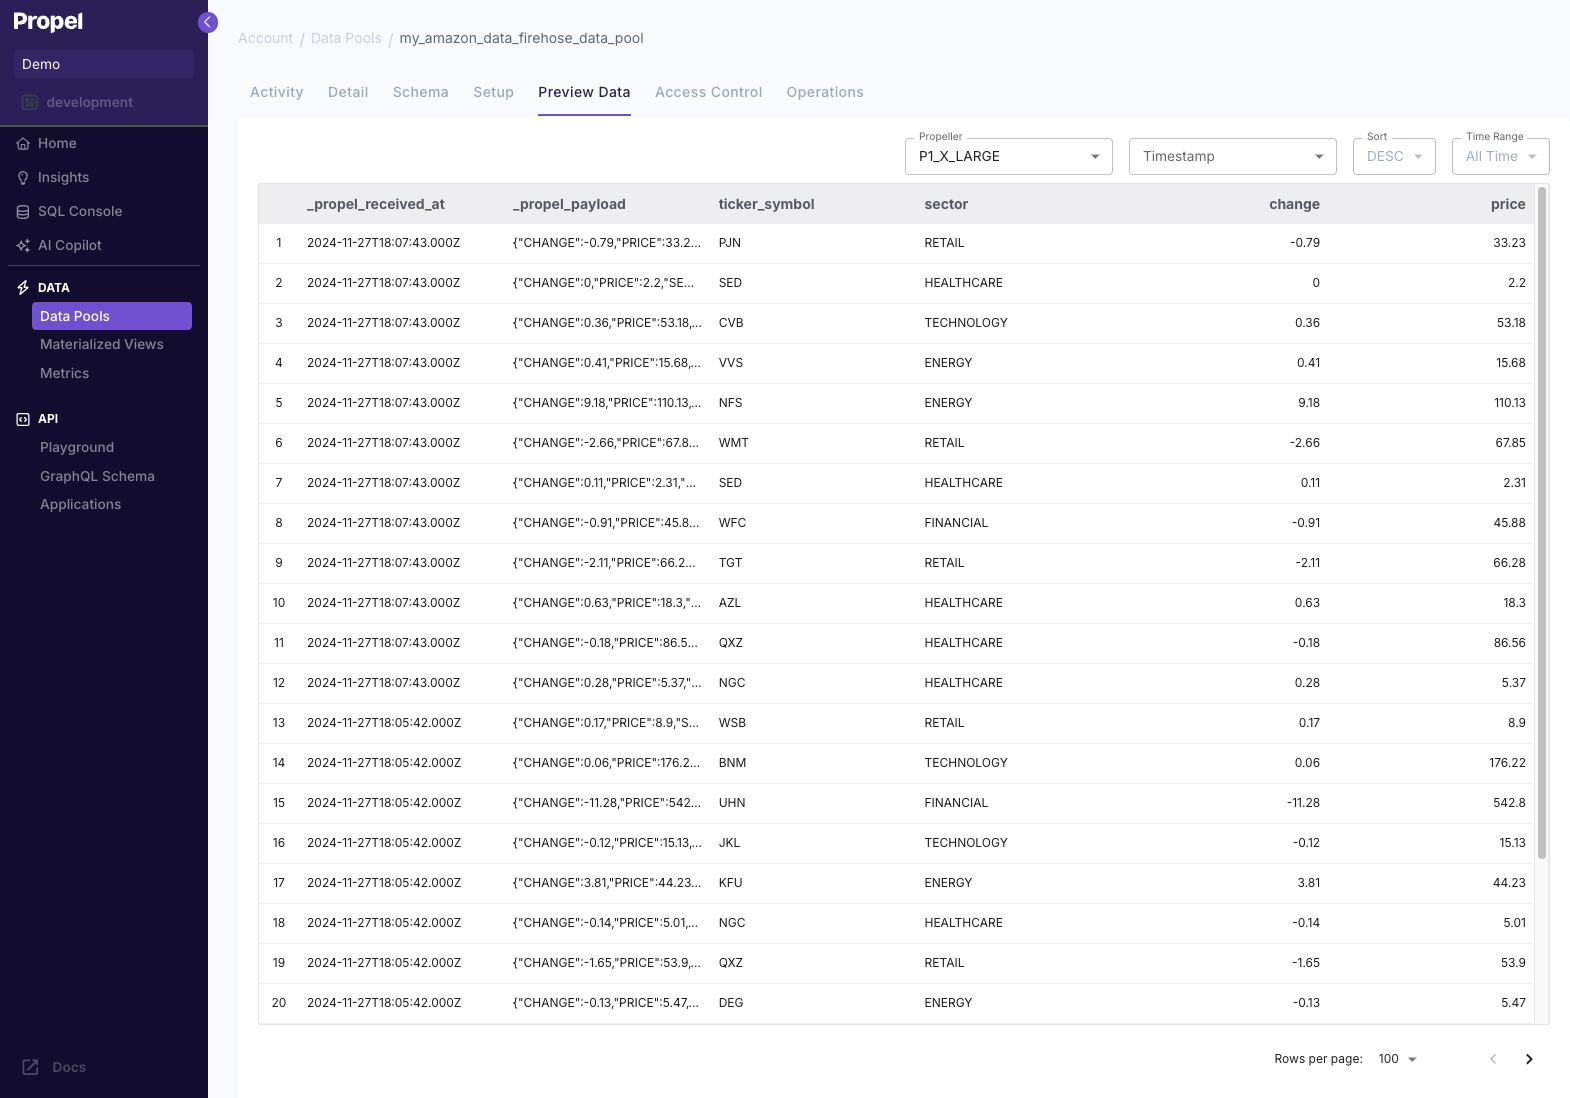
Once events are in your Amazon Data Firehose stream, they are ingested directly to Propel.
By going to your Data Pool and clicking **"Preview Data"**, you'll be able to see the records as they land.
## Step 4: Preview data in Propel
Once events are in your Amazon Data Firehose stream, they are ingested directly to Propel.
By going to your Data Pool and clicking **"Preview Data"**, you'll be able to see the records as they land.