> ## Documentation Index
> Fetch the complete documentation index at: https://www.propeldata.com/llms.txt
> Use this file to discover all available pages before exploring further.
# Amazon DynamoDB setup guide
> Ingesting data from Amazon DynamoDB to Propel
This guide covers how to:
1. [Configure the DynamoDB Stream](#step-1-configure-the-dynamodb-stream)
2. [Create a Propel DynamoDB Data Pool](#step-2-create-a-propel-dynamodb-data-pool)
3. [Create the Data Firehose stream to deliver events to Propel](#step-3-create-the-data-firehose-stream-to-deliver-events-to-propel)
4. [Transform DynamoDB events in Propel](#step-4-transform-dynamodb-events-in-propel)
***
## Requirements
* You have a [Propel account](https://console.propeldata.com/get-started).
* You have an AWS account.
***
## Step 1: Configure the DynamoDB Stream
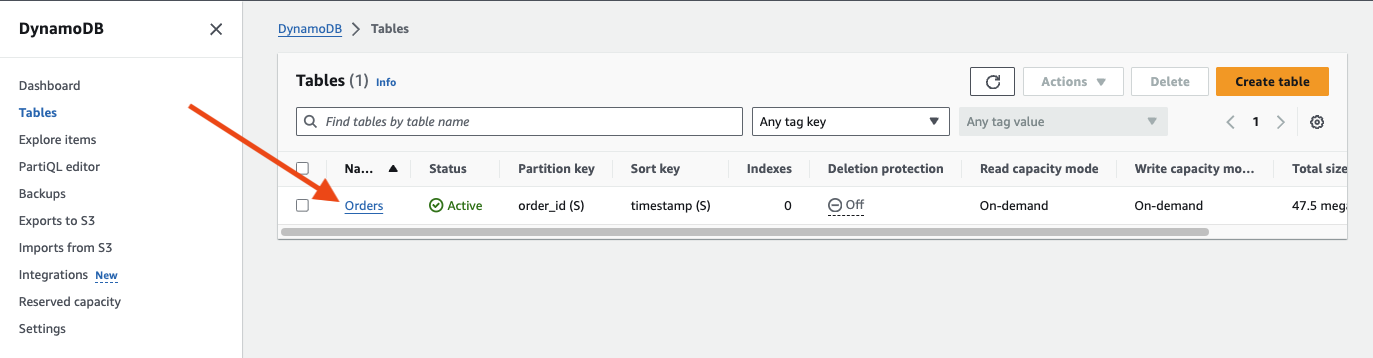
Go to your DynamoDB dashboard in the AWS Console and click "**Tables**".
When you are in the tables section, click on the table that you need to replicate to Propel.
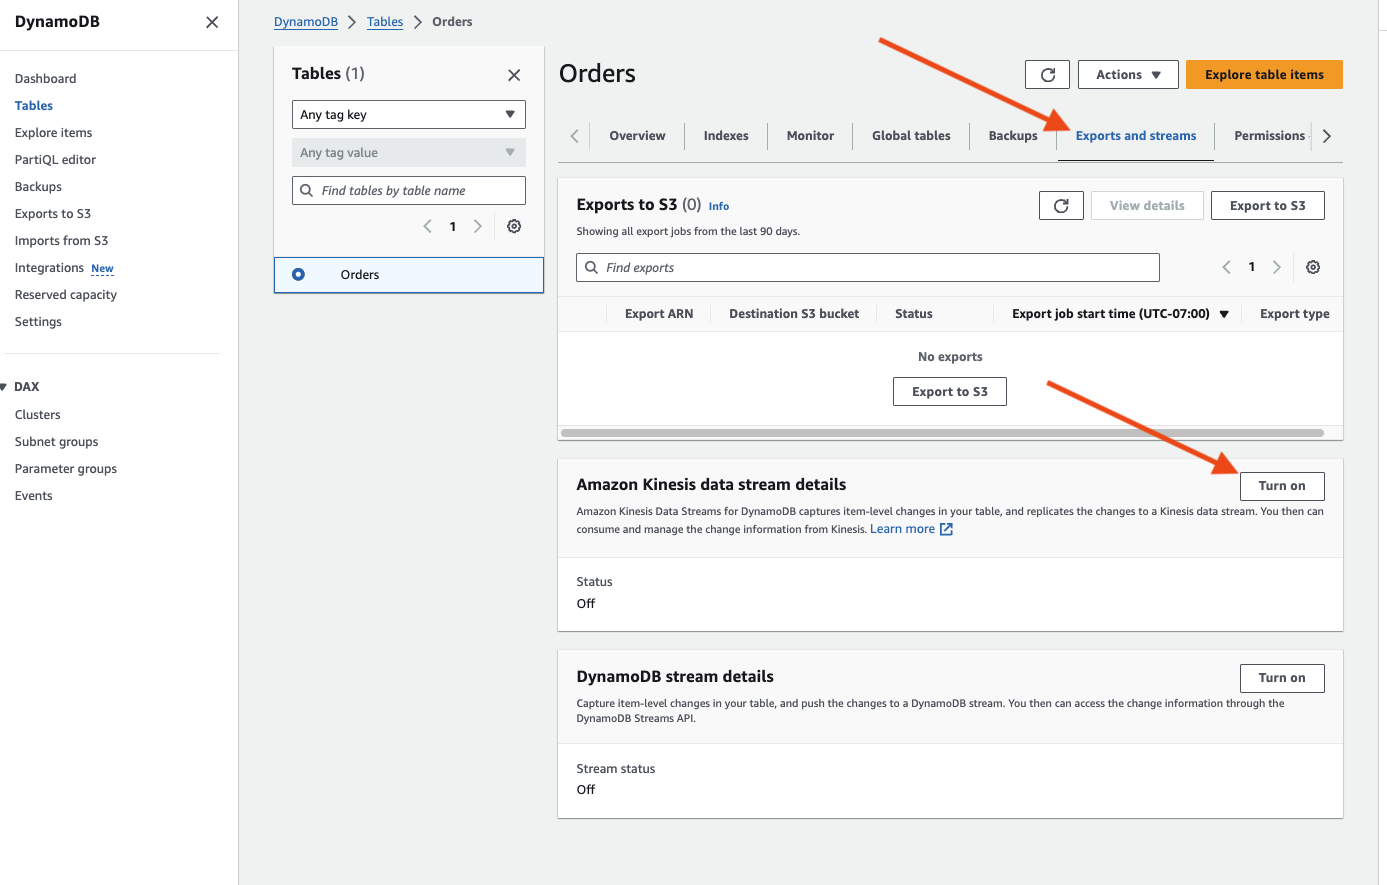
 Go to "**Exports and streams**" and then click on "**Turn on**" the "**Amazon Kinesis stream details**".
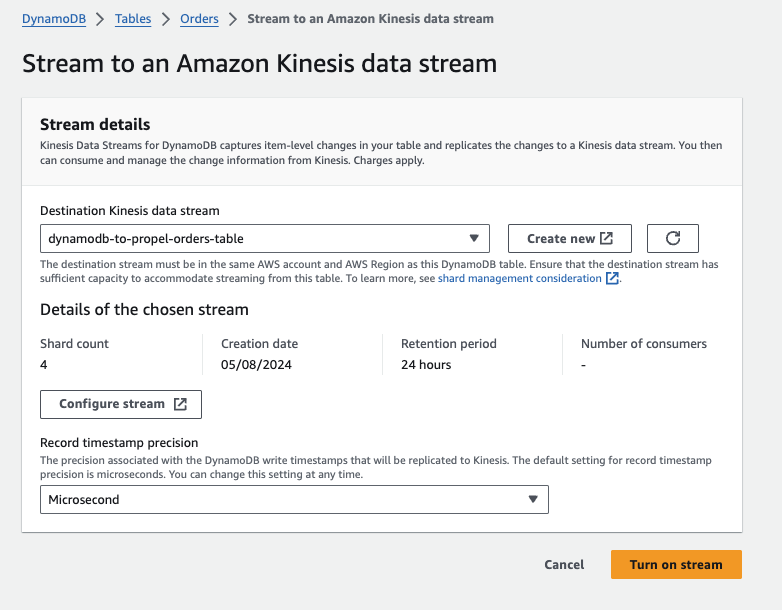
 Choose an existing Kinesis data stream or create a new one.
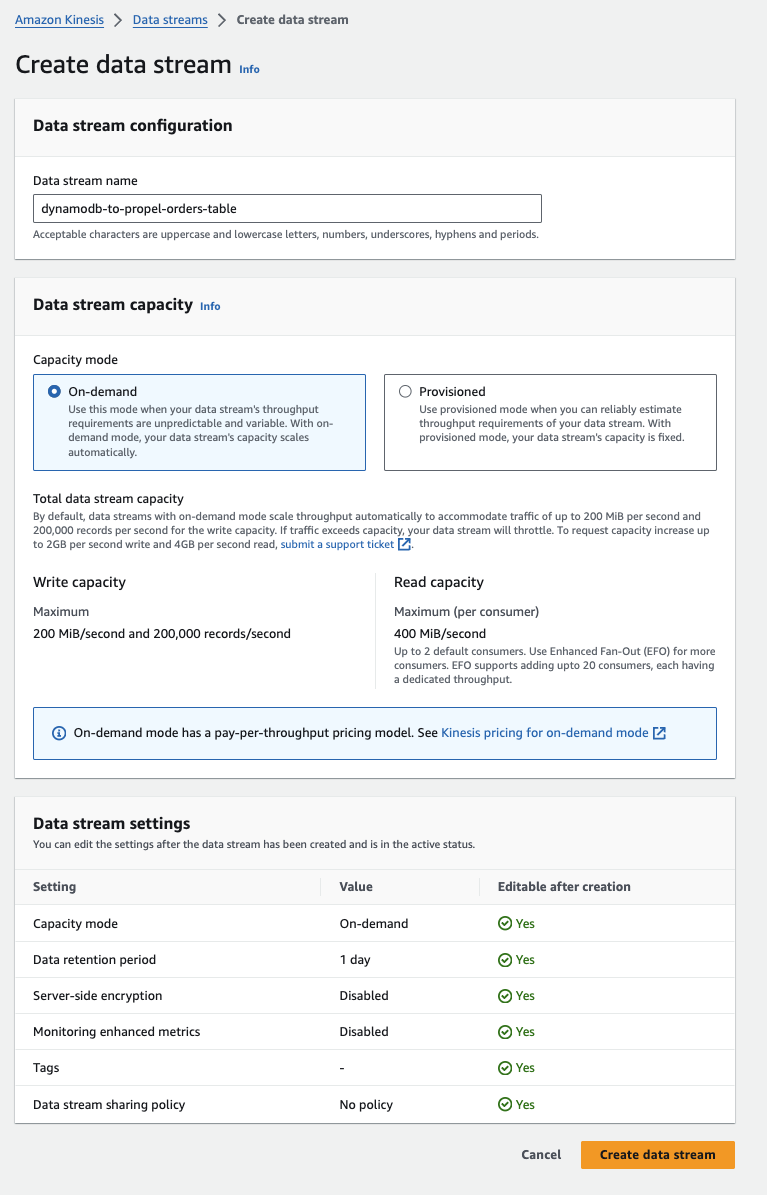
 If you need to create a new one, click on "**Create New**".
 Once turned on, you will see your stream with an "**On**" status.
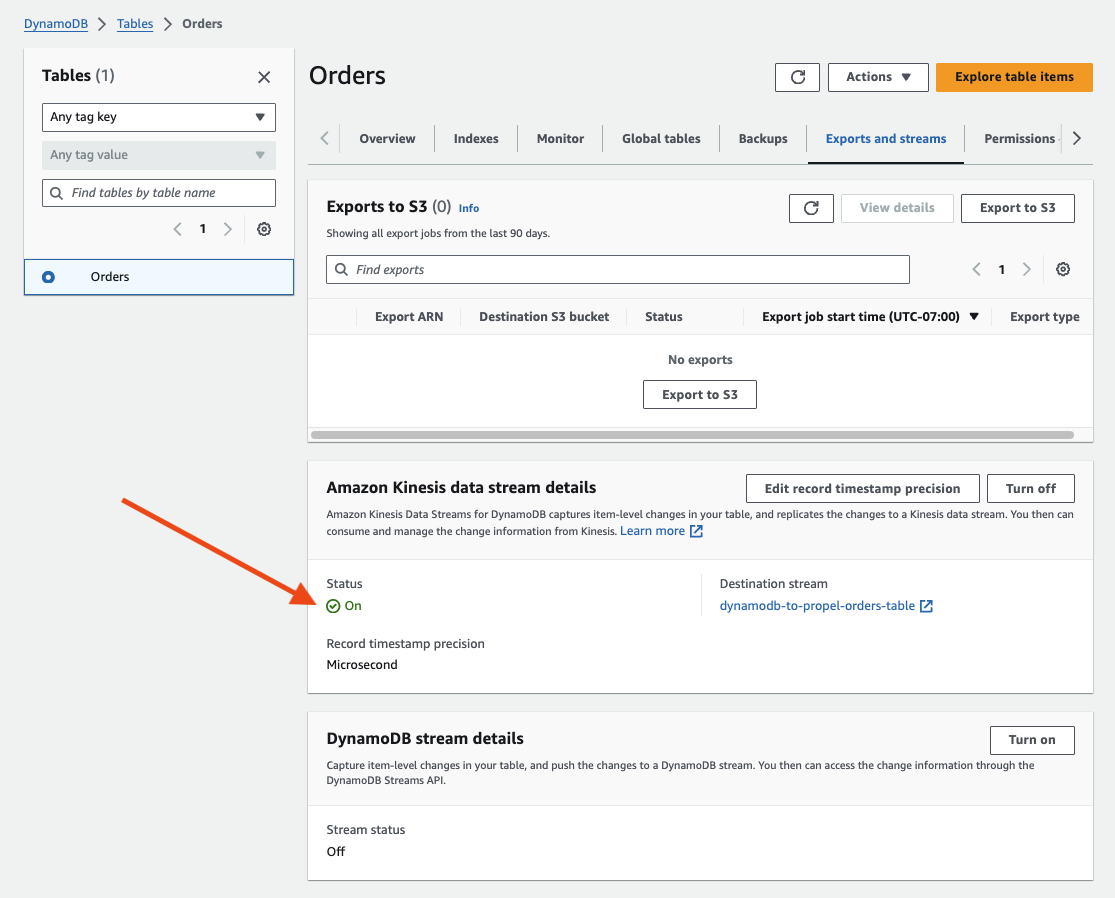 And you are all set for this step. You have all your DynamoDB changes flowing into a Kinesis data stream.
## Step 2: Create a Propel DynamoDB Data Pool
Next, we'll need to create a DynamoDB Data Pool in Propel. This is the table where the data will be stored.
Log into the [Propel Console](https://console.propeldata.com/login), click on "Data Pools" on the left menu, and then click on "**Create Data Pool**."
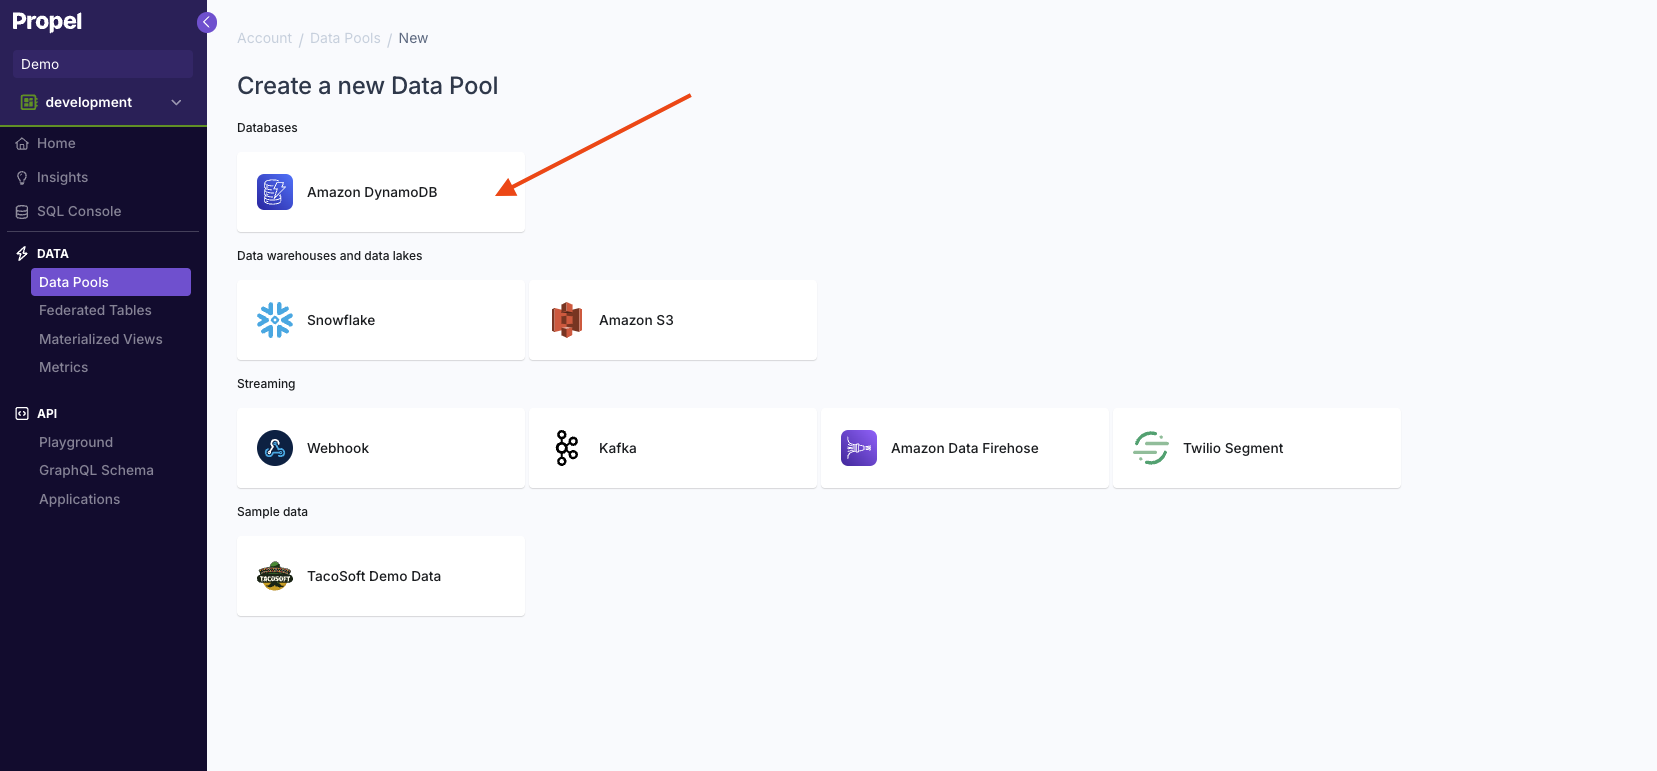
Then, select "**DynamoDB**".
And you are all set for this step. You have all your DynamoDB changes flowing into a Kinesis data stream.
## Step 2: Create a Propel DynamoDB Data Pool
Next, we'll need to create a DynamoDB Data Pool in Propel. This is the table where the data will be stored.
Log into the [Propel Console](https://console.propeldata.com/login), click on "Data Pools" on the left menu, and then click on "**Create Data Pool**."
Then, select "**DynamoDB**".
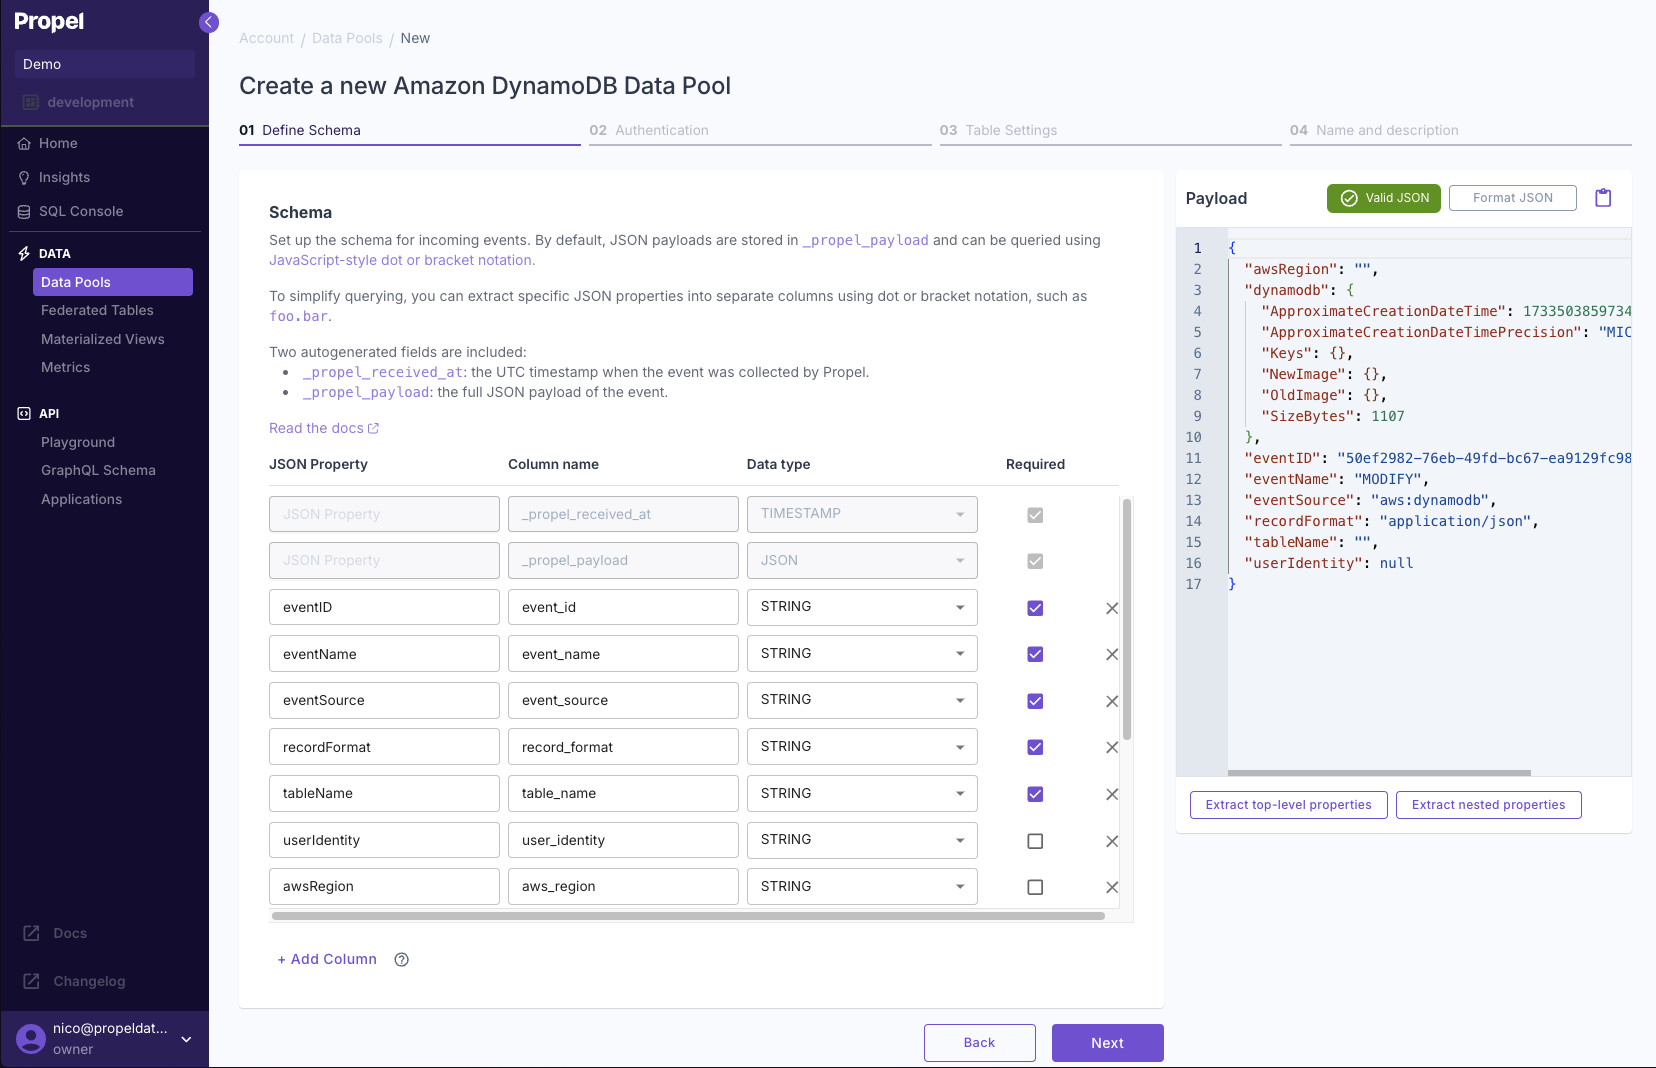
 In the "**Define schema**" section, leave the defaults as we want to land the data in its original DynamoDB change data format and transform it later using Materialized Views if necessary.
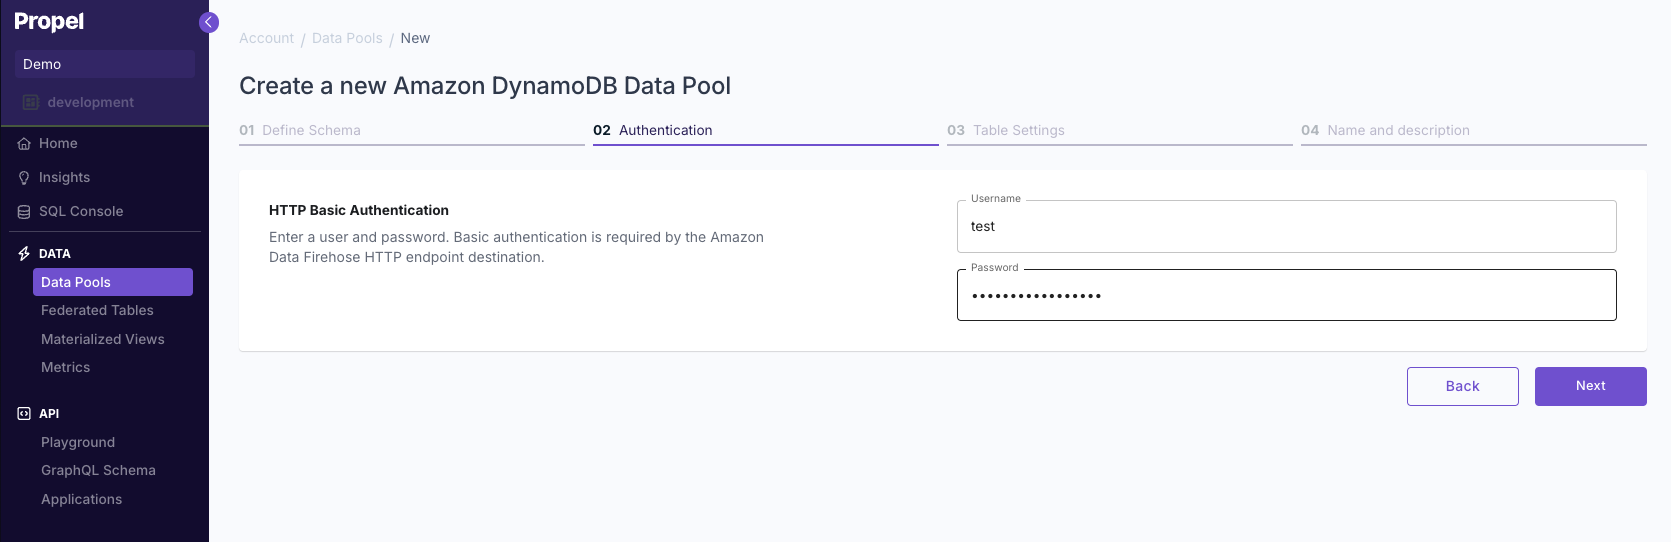
 Enter a user and password for the Basic Authentication required by Amazon Data Firehose.
 Select whether your data is **"Append-only"** or **"Mutable data"**. For collecting change data capture events, select **"Append-only data"**.
To learn more, read out guide on [Selecting table engine and sorting key](/docs/guides/table-engine-and-sorting-key).
Select whether your data is **"Append-only"** or **"Mutable data"**. For collecting change data capture events, select **"Append-only data"**.
To learn more, read out guide on [Selecting table engine and sorting key](/docs/guides/table-engine-and-sorting-key).
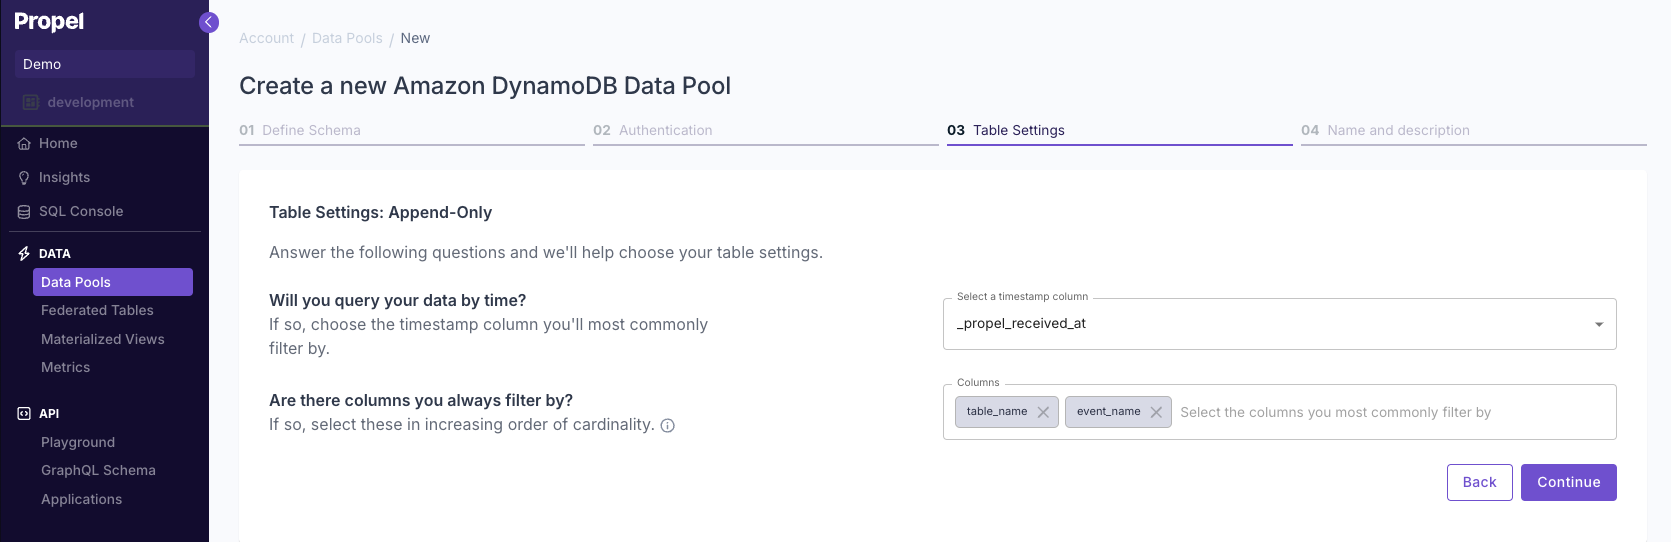
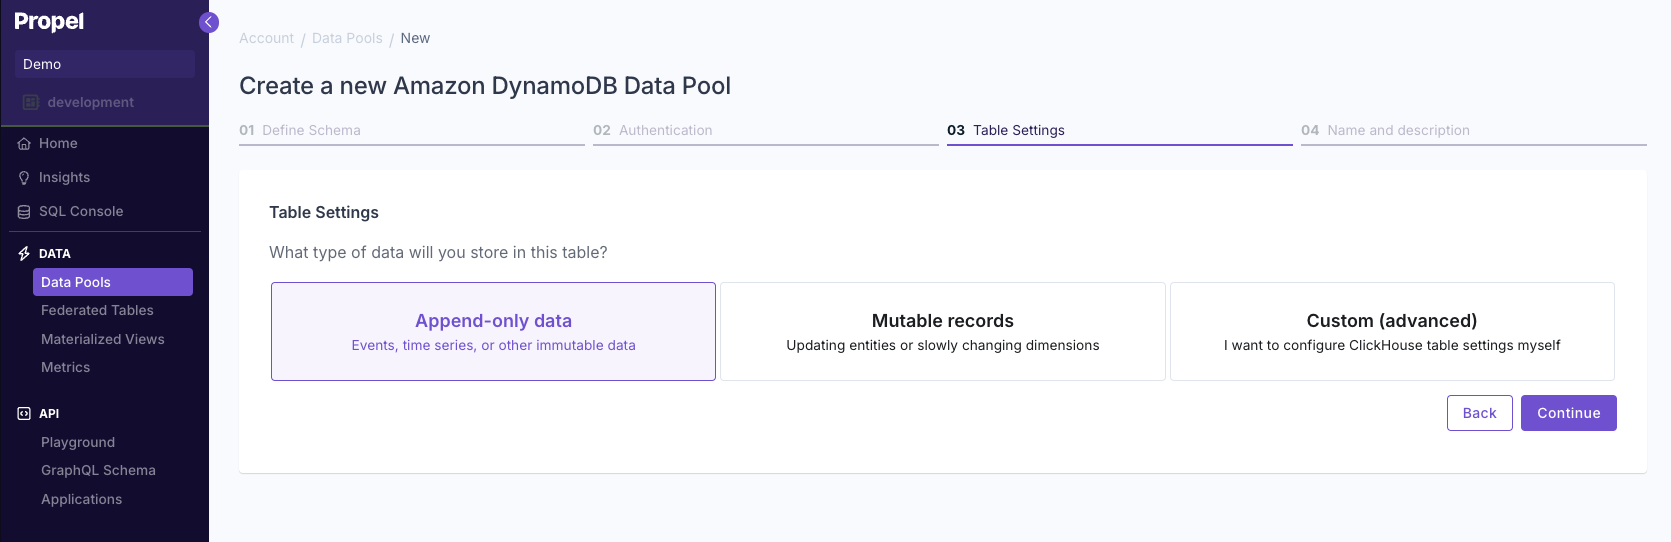 Answer the questions in the wizard to complete the setup.
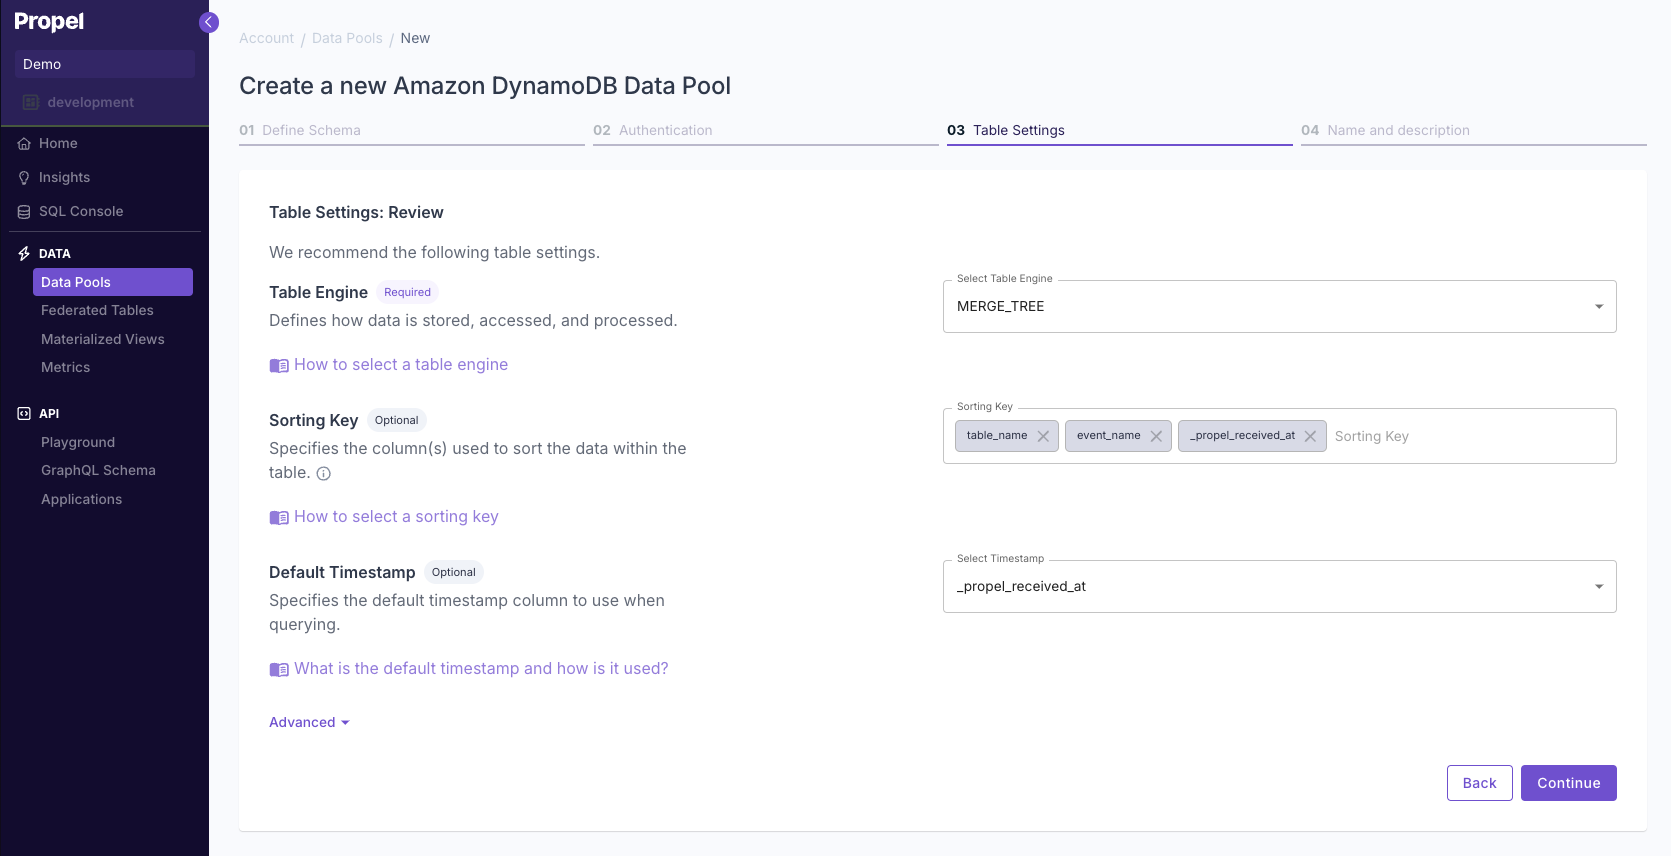
 Confirm your table settings and click **"Continue"**.
 Name your Data Pool and give it a description
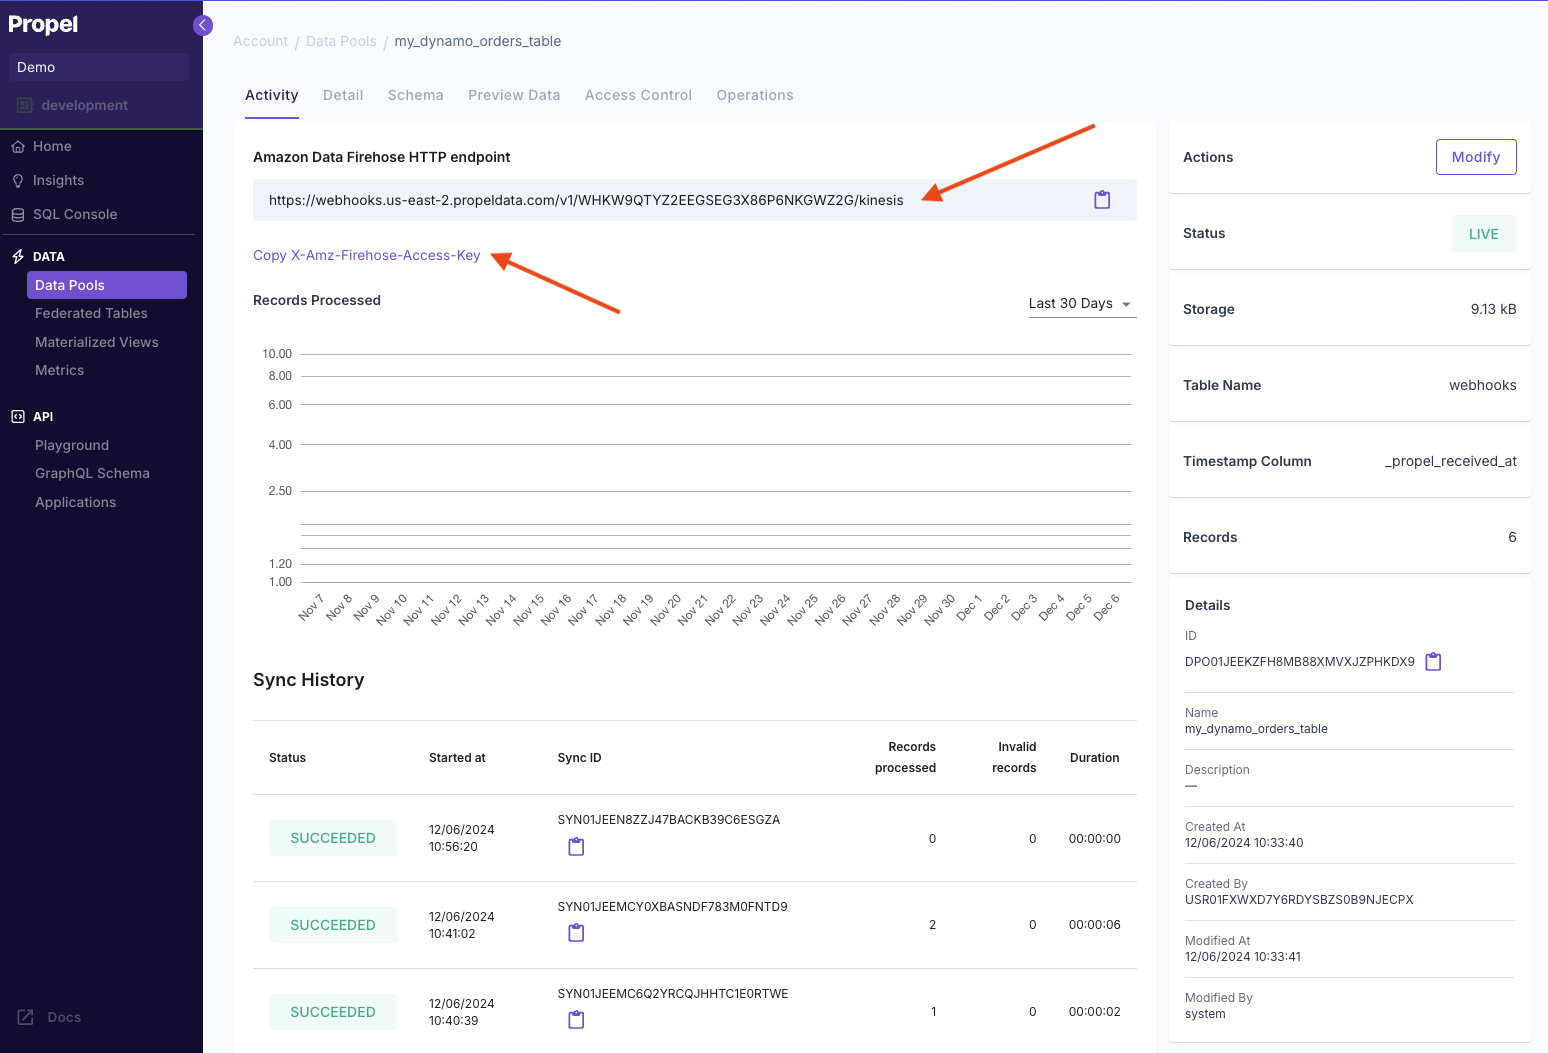
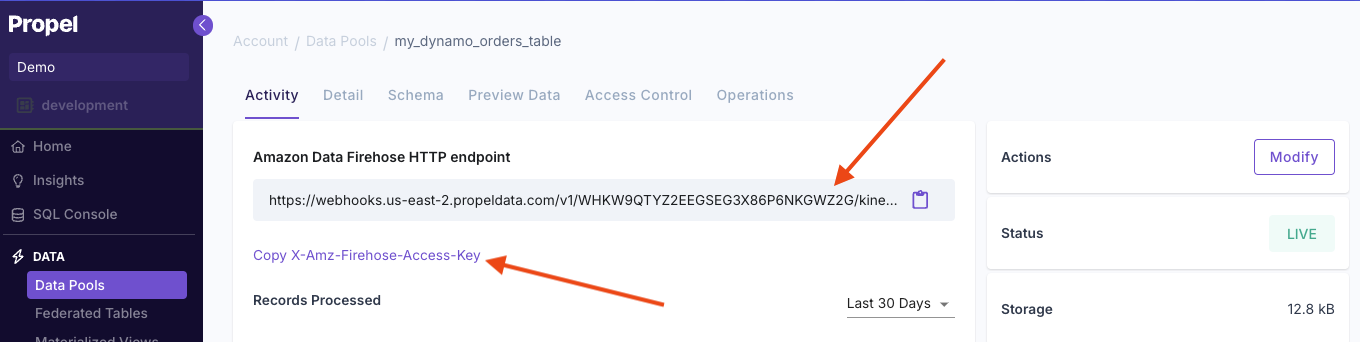
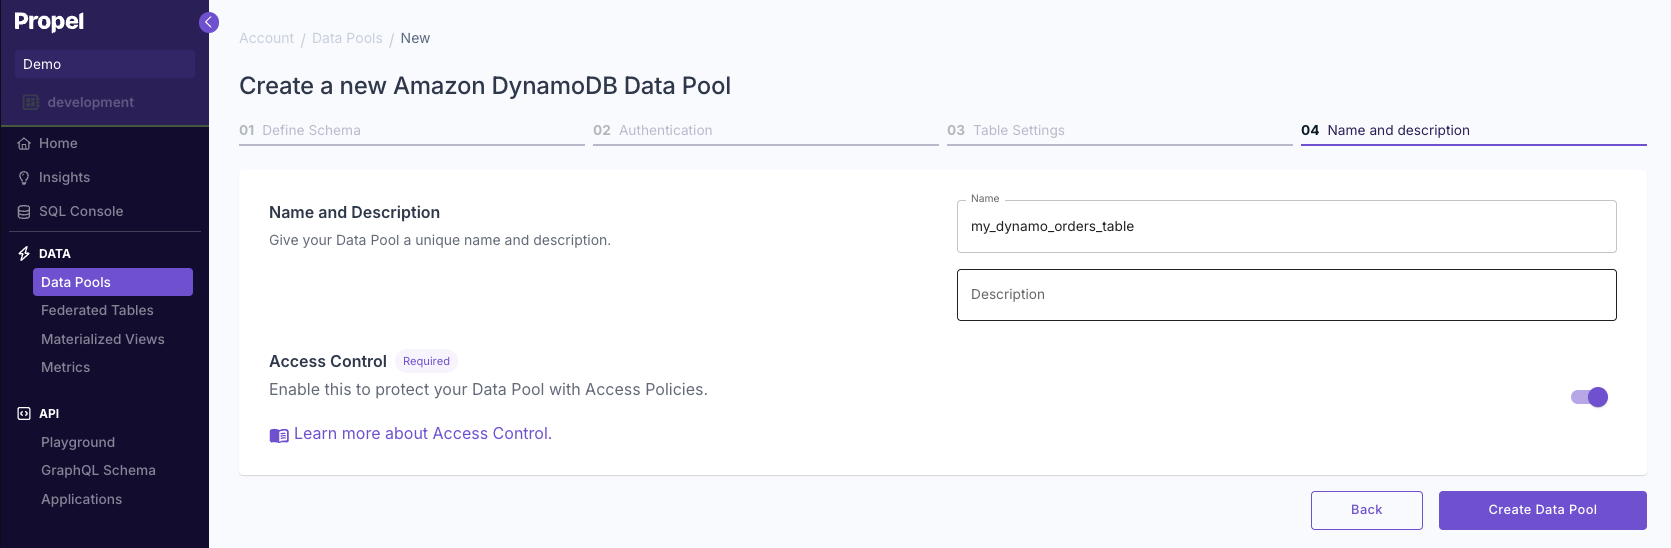 You're done! You've created a DynamoDB Data Pool. Note the Amazon Data Firehose HTTP endpoint and `X-Amz-Firehose-Access-Key` key, you'll need this to configure the Amazon Data Firehose.
 ## Step 3: Create the Data Firehose stream to deliver events to Propel
Once you have the DynamoDB Data Pool created, we'll need to create an Amazon Data Firehose that takes the events from the Kinesis data stream and sends them to Propel via HTTP POST request.
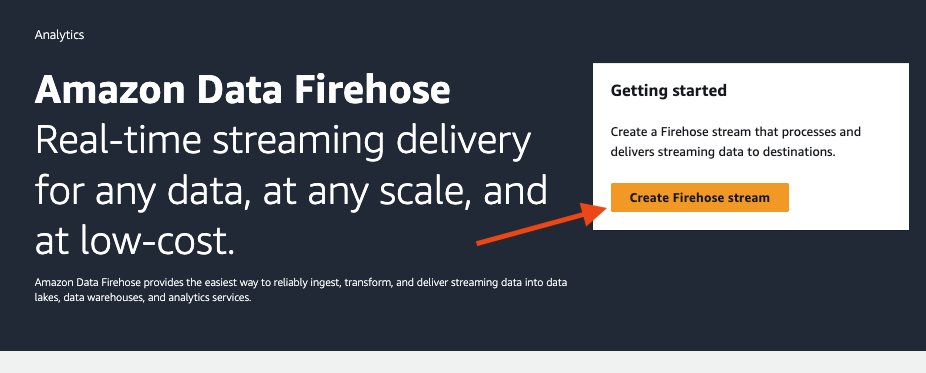
Navigate to the "**Amazon Data Firehose**" console and click on "**Create Firehose stream**".
## Step 3: Create the Data Firehose stream to deliver events to Propel
Once you have the DynamoDB Data Pool created, we'll need to create an Amazon Data Firehose that takes the events from the Kinesis data stream and sends them to Propel via HTTP POST request.
Navigate to the "**Amazon Data Firehose**" console and click on "**Create Firehose stream**".
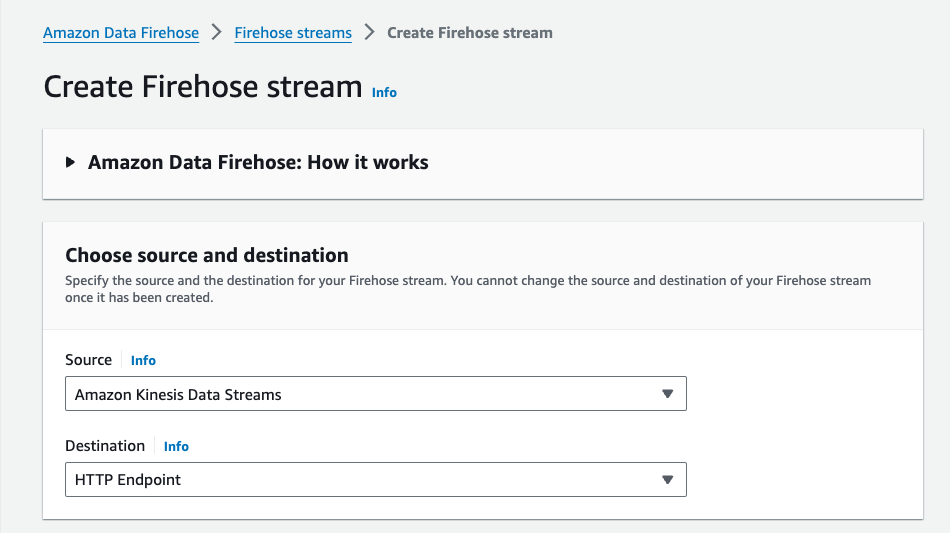
 Select "**Kinesis Data streams**" as the source and "**HTTP Endpoint**" as the destination.
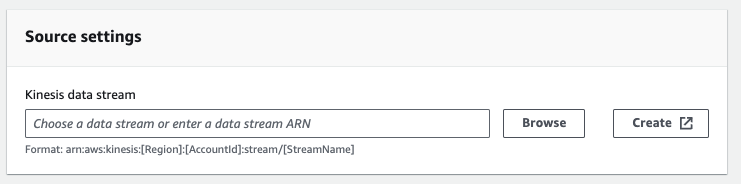
 In the "**Source settings**," click "**Browse**."
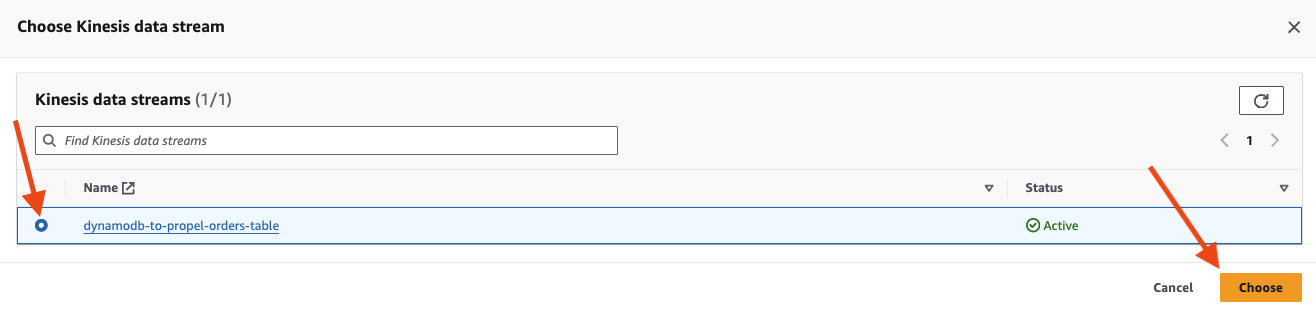
 Select the Kinesis data stream from your DynamoDB table.
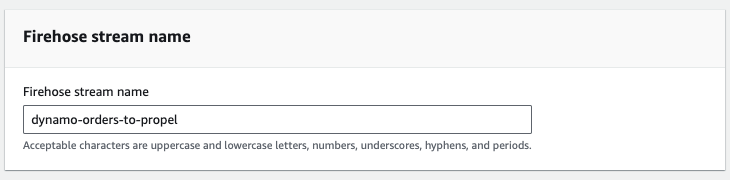
 Give your stream a name for future reference.
 We'll need the information about the Propel Data Pool we created earlier.
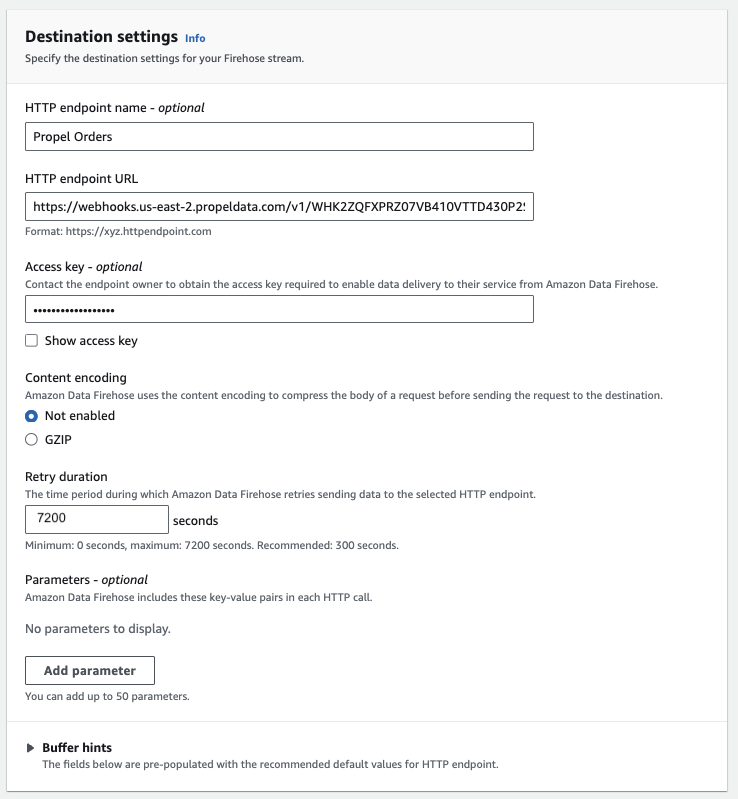
 1. Enter the destination details:
* **"HTTP endpoint name"** - Name your endpoint (e.g. "Propel Orders")
* **"HTTP endpoint URL"** - Enter the DynamoDB Data Pool HTTP endpoint URL.
* **"Access key"** - Enter the `X-Amz-Firehose-Access-Key` key that you'll find under the Data Pool's HTTP endpoint in the Propel Console.
* **"Retry duration"** - Set to "7200"
* **"Content encoding"** - Set to "**Not enabled**"
1. Enter the destination details:
* **"HTTP endpoint name"** - Name your endpoint (e.g. "Propel Orders")
* **"HTTP endpoint URL"** - Enter the DynamoDB Data Pool HTTP endpoint URL.
* **"Access key"** - Enter the `X-Amz-Firehose-Access-Key` key that you'll find under the Data Pool's HTTP endpoint in the Propel Console.
* **"Retry duration"** - Set to "7200"
* **"Content encoding"** - Set to "**Not enabled**"
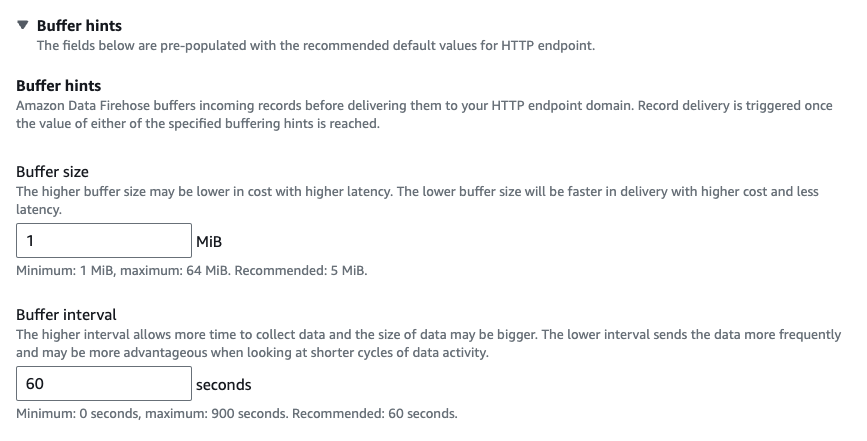
 * **"Buffer hints"** - Set Buffer size to 1MiB
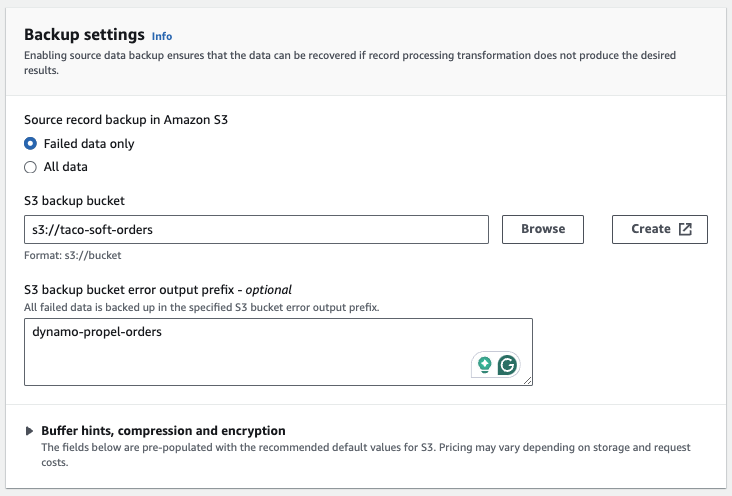
 Set up an S3 bucket for failed deliveries under "**Backup settings**".
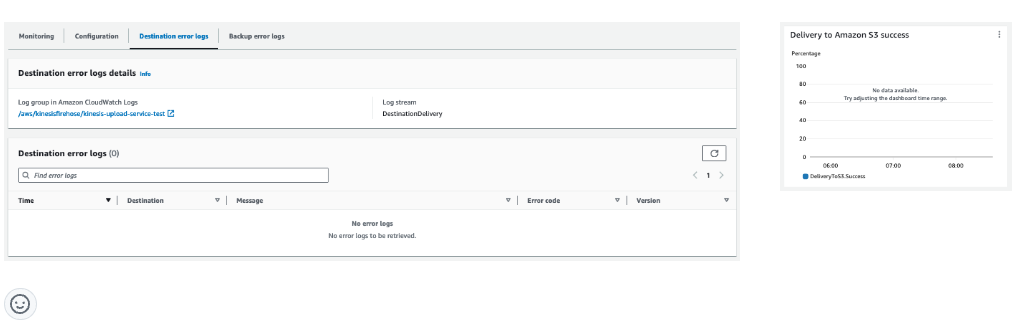
 Click "**Create Firehose stream**" to complete the setup.
If everything is set up correctly, you should not see any deliveries to the S3 bucket.
Click "**Create Firehose stream**" to complete the setup.
If everything is set up correctly, you should not see any deliveries to the S3 bucket.
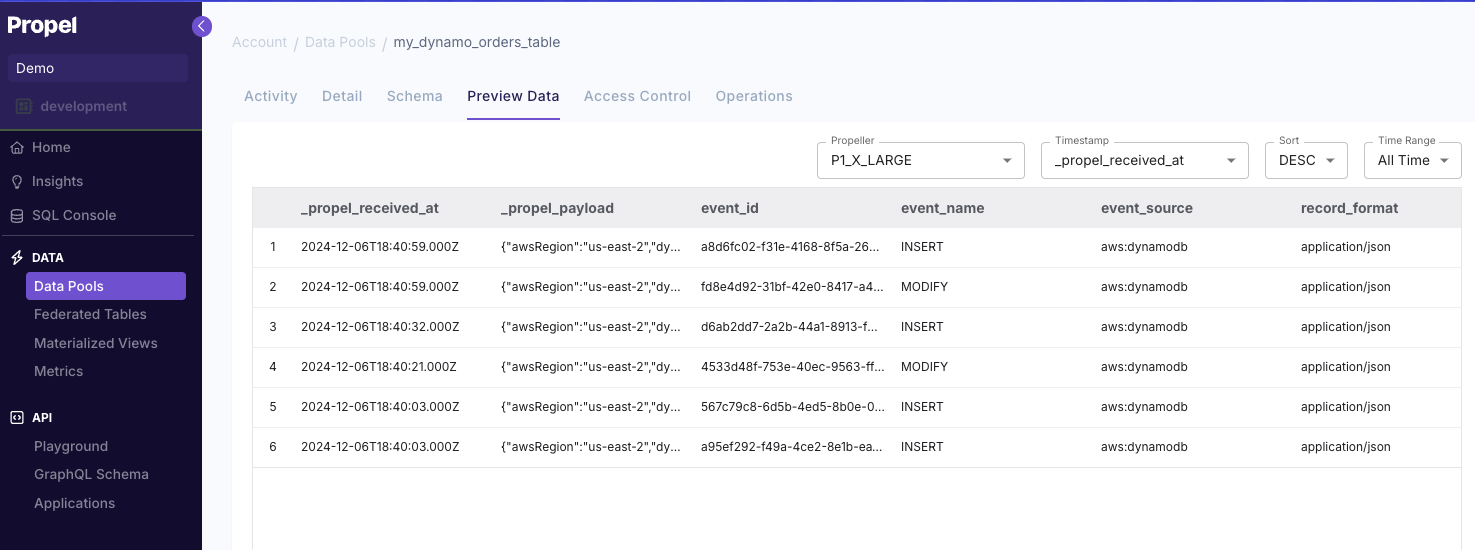
 Once items are inserted into your DynamoDB table, they stream directly to Propel. By going to your Data Pool and clicking **"Preview Data"**, you'll be able to see the records as they land.
 ## Step 4: Transform DynamoDB events in Propel
Now that we are collecting DynamoDB change data capture events in Propel, we can transform them into an entity table.
The following is an example SQL query that flattens the DynamoDB event into an entity table.
```SQL theme={"system"}
SELECT
-- The unique identifier for the entity
keys.order_id.S AS order_id, -- DynamoDB Partition key
parseDateTimeBestEffort(keys.timestamp.S) AS timestamp, -- DynamoDB Sorting key
-- Save the deleted flag
if(event_name = 'REMOVE', true, false) AS deleted,
--All the columns you want to flatten, for example
toString(new_image.taqueria.S) AS taqueria,
toInt32OrNull(new_image.quantity.N) AS quantity,
toFloat64OrNull(new_image.total_price.S) AS total_price,
new_image.orderItems AS order_items,
--Always save the new and old image
new_image,
old_image
FROM my_dynamo_orders_change_events
```
Replace `my_dynamo_orders_change_events` with your table's name and customize the columns to your needs.
You can test the SQL Query in the “SQL Console” to make sure it works for your events and make any necessary changes.
Once you've tested the SQL query, you can create a Materialized View.
1. Go to the **"Materialized Views"** section in the Console and click **"Create Materialized View"**.
2. Enter the SQL above in the SQL to define the Materialized View.
3. Select **"New Data Pool"**.
4. Give your new Data Pool a name, for example, `dynamodb_`. Replace `` with the name of your table.
5. Select **"Mutable records"**, as the records are updatable.
6. Answer the following questions to set the Table settings.
1. **"Which columns uniquely identify your records?"**
Select the columns that uniquely identify a record. In DynamoDB, the combination of the PartitionKey and the SortingKey uniquely identifies a record. In the example above, `order_id` uniquely identifies a record.
2. **"Will you query your data by time?"**
Select the timestamp column.
3. **"Are there columns you always filter by?"**
For small tables (under 100M records), leave empty. For very large tables, see the [Handling updates in large tables guide](https://www.propeldata.com/docs/serverless-clickhouse/guides/table-engine-and-sorting-key#handling-large-updating-tables).
4. **"Is there an `updated_at` or `version` column?"**
Leave empty. New records that arrive will replace old ones.
7. Confirm the table settings. You should see:
1. Table engine: `REPLACING_MERGE_TREE`
2. Sorting key: `order_id`
3. Default timestamp: `timestamp`
8. Select **"Backfill"** to ensure that existing records get copied over.
9. Give your Materialized View a name and description, for example, `flattened_dynamodb__materialized_view` .
Now that you have created a Data Pool for your table, you can go to the **"Data Pools"** section and click on your Data Pool. You can click on **"Preview Data"** to see your transformed data.
## Step 4: Transform DynamoDB events in Propel
Now that we are collecting DynamoDB change data capture events in Propel, we can transform them into an entity table.
The following is an example SQL query that flattens the DynamoDB event into an entity table.
```SQL theme={"system"}
SELECT
-- The unique identifier for the entity
keys.order_id.S AS order_id, -- DynamoDB Partition key
parseDateTimeBestEffort(keys.timestamp.S) AS timestamp, -- DynamoDB Sorting key
-- Save the deleted flag
if(event_name = 'REMOVE', true, false) AS deleted,
--All the columns you want to flatten, for example
toString(new_image.taqueria.S) AS taqueria,
toInt32OrNull(new_image.quantity.N) AS quantity,
toFloat64OrNull(new_image.total_price.S) AS total_price,
new_image.orderItems AS order_items,
--Always save the new and old image
new_image,
old_image
FROM my_dynamo_orders_change_events
```
Replace `my_dynamo_orders_change_events` with your table's name and customize the columns to your needs.
You can test the SQL Query in the “SQL Console” to make sure it works for your events and make any necessary changes.
Once you've tested the SQL query, you can create a Materialized View.
1. Go to the **"Materialized Views"** section in the Console and click **"Create Materialized View"**.
2. Enter the SQL above in the SQL to define the Materialized View.
3. Select **"New Data Pool"**.
4. Give your new Data Pool a name, for example, `dynamodb_`. Replace `` with the name of your table.
5. Select **"Mutable records"**, as the records are updatable.
6. Answer the following questions to set the Table settings.
1. **"Which columns uniquely identify your records?"**
Select the columns that uniquely identify a record. In DynamoDB, the combination of the PartitionKey and the SortingKey uniquely identifies a record. In the example above, `order_id` uniquely identifies a record.
2. **"Will you query your data by time?"**
Select the timestamp column.
3. **"Are there columns you always filter by?"**
For small tables (under 100M records), leave empty. For very large tables, see the [Handling updates in large tables guide](https://www.propeldata.com/docs/serverless-clickhouse/guides/table-engine-and-sorting-key#handling-large-updating-tables).
4. **"Is there an `updated_at` or `version` column?"**
Leave empty. New records that arrive will replace old ones.
7. Confirm the table settings. You should see:
1. Table engine: `REPLACING_MERGE_TREE`
2. Sorting key: `order_id`
3. Default timestamp: `timestamp`
8. Select **"Backfill"** to ensure that existing records get copied over.
9. Give your Materialized View a name and description, for example, `flattened_dynamodb__materialized_view` .
Now that you have created a Data Pool for your table, you can go to the **"Data Pools"** section and click on your Data Pool. You can click on **"Preview Data"** to see your transformed data.