> ## Documentation Index
> Fetch the complete documentation index at: https://www.propeldata.com/llms.txt
> Use this file to discover all available pages before exploring further.
# Webhooks setup guide
> Ingesting webhook events into Propel
This guide will show you how to send JSON events to Propel over HTTPS from any application or SaaS service.
You will learn how to:
1. [Create a Webhook Data Pool](#step-1-create-a-webhook-data-pool)
2. [Send events to the Webhook Data Pool](#step-2-send-events-to-the-webhook-data-pool)
3. [View your events in the Data Pool](#step-3-view-your-events-in-the-data-pool)
***
## Requirements
* You have a [Propel account](https://console.propeldata.com/get-started).
***
## Step 1: Create a Webhook Data Pool
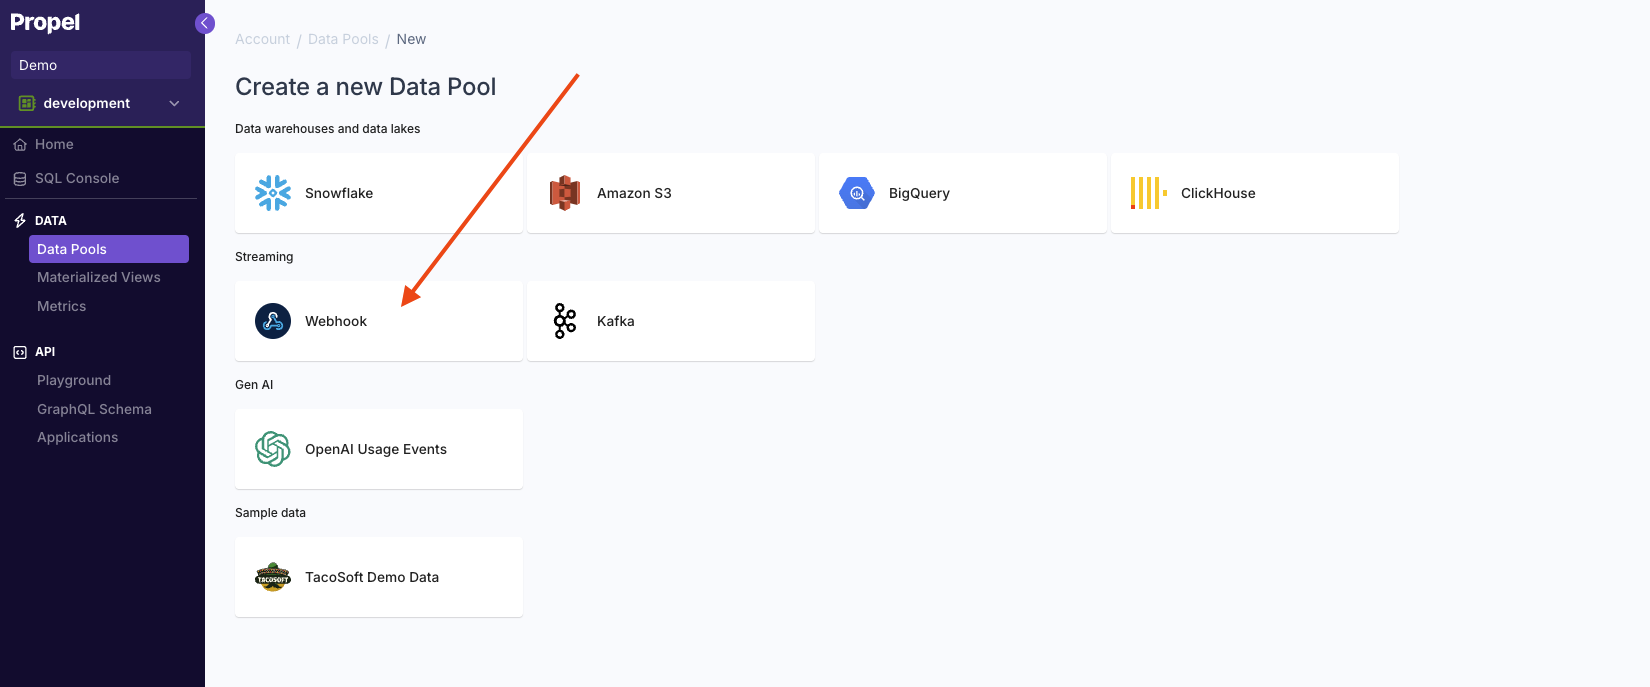
In the Console, click on **"Data Pools"** in the left-hand menu. Click on **"Create Data Pool"** and select **"Webhook"**.
 The default schema contains two columns:
| Column | Type | Description |
| ---------------------- | --------- | -------------------------------------------------- |
| \_propel\_received\_at | TIMESTAMP | The timestamp when the event was collected in UTC. |
| \_propel\_payload | JSON | The JSON Payload of the event. |
In the Payload section on the right-hand side, you can enter or paste a sample JSON event. This feature allows you to:
1. Visualize the structure of your incoming data
2. Automatically extract top-level and nested JSON keys
3. Create specific columns for these extracted keys
The default schema contains two columns:
| Column | Type | Description |
| ---------------------- | --------- | -------------------------------------------------- |
| \_propel\_received\_at | TIMESTAMP | The timestamp when the event was collected in UTC. |
| \_propel\_payload | JSON | The JSON Payload of the event. |
In the Payload section on the right-hand side, you can enter or paste a sample JSON event. This feature allows you to:
1. Visualize the structure of your incoming data
2. Automatically extract top-level and nested JSON keys
3. Create specific columns for these extracted keys
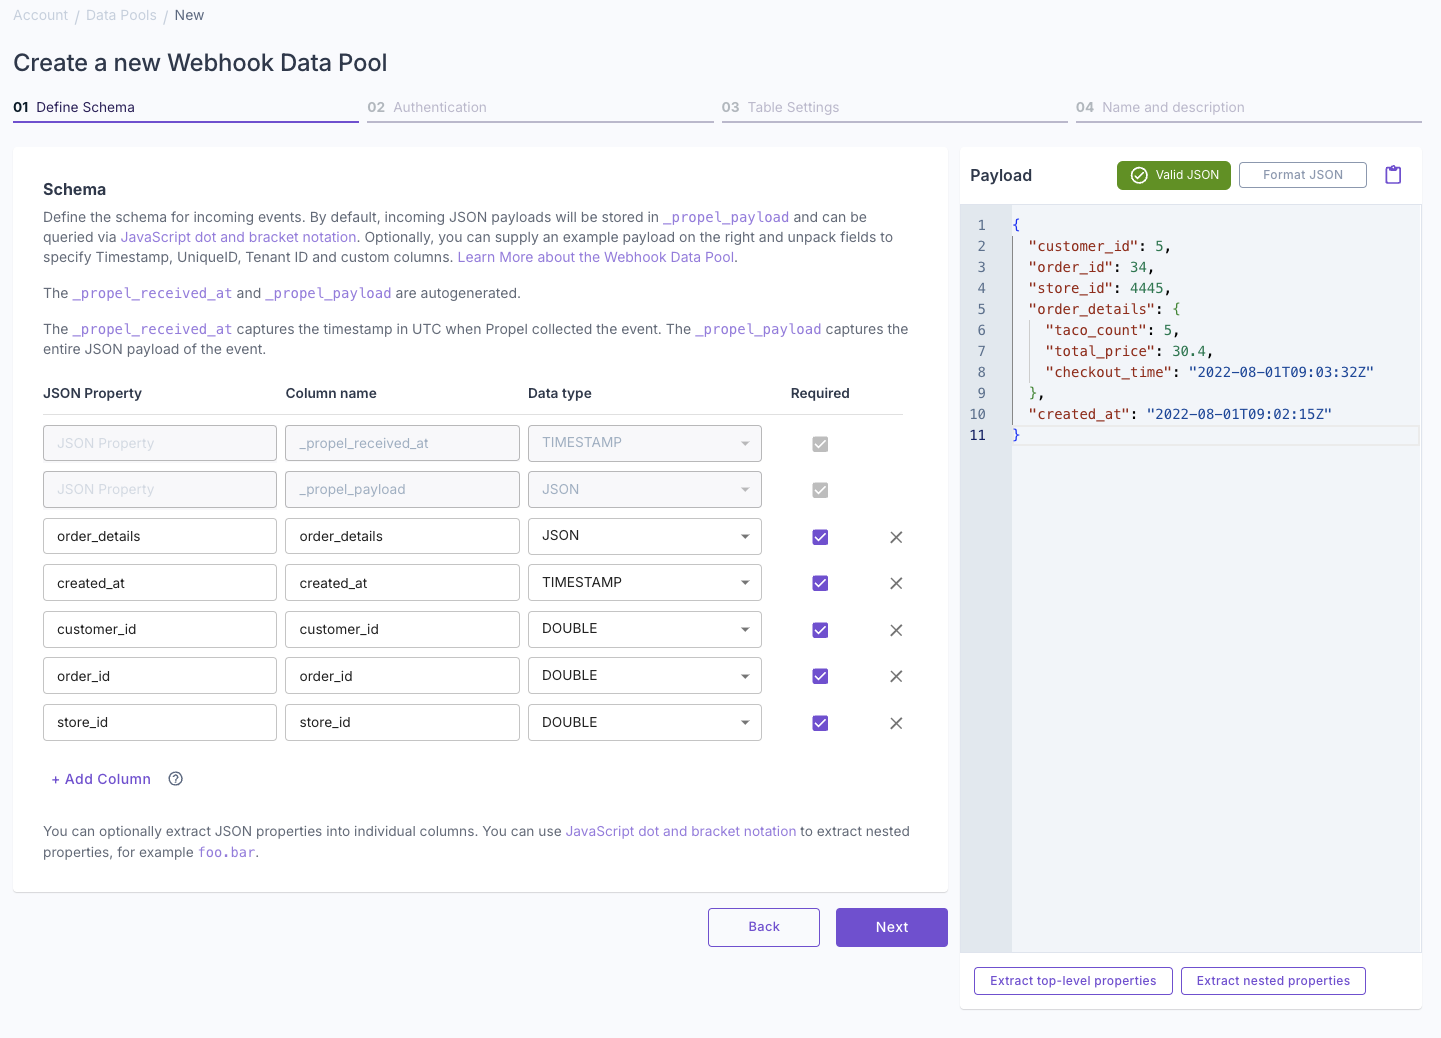 By providing a sample event, you can easily customize your Data Pool's schema to match your data structure.
For this guide, we'll use the TacoSoft sample data:
```json theme={"system"}
{
"customer_id": 5,
"order_id": 34,
"store_id": 4445,
"order_details": {
"taco_count": 5,
"total_price": 30.4,
"checkout_time": "2022-08-01T09:03:32Z"
},
"created_at": "2022-08-01T09:02:15Z"
}
```
After adding the sample JSON, click on **"Extract nested properties"** to create columns representing the nested JSON keys.
Set `created_at` as your default timestamp. Click **"Next"**.
If a required field is missing from the sample event, Propel will reject the event with an `HTTP 400 Bad Request` error.
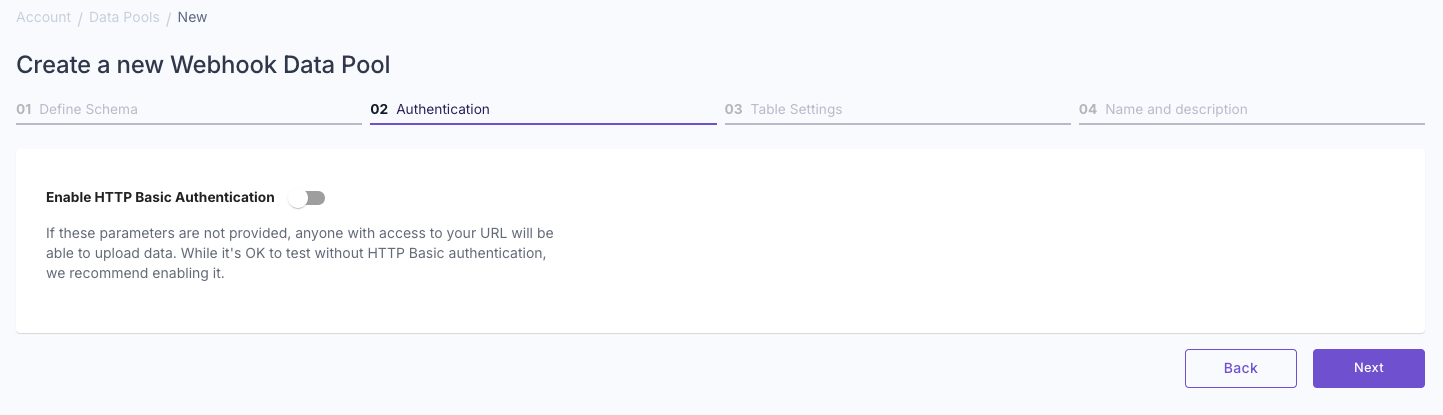
Configure authentication for your webhook URL:
* To enable HTTP basic authentication, specify a username and password.
* For initial testing, you can leave these fields blank.
* You can always edit these settings later.
After configuring (or skipping) authentication, click **"Next"** to proceed.
By providing a sample event, you can easily customize your Data Pool's schema to match your data structure.
For this guide, we'll use the TacoSoft sample data:
```json theme={"system"}
{
"customer_id": 5,
"order_id": 34,
"store_id": 4445,
"order_details": {
"taco_count": 5,
"total_price": 30.4,
"checkout_time": "2022-08-01T09:03:32Z"
},
"created_at": "2022-08-01T09:02:15Z"
}
```
After adding the sample JSON, click on **"Extract nested properties"** to create columns representing the nested JSON keys.
Set `created_at` as your default timestamp. Click **"Next"**.
If a required field is missing from the sample event, Propel will reject the event with an `HTTP 400 Bad Request` error.
Configure authentication for your webhook URL:
* To enable HTTP basic authentication, specify a username and password.
* For initial testing, you can leave these fields blank.
* You can always edit these settings later.
After configuring (or skipping) authentication, click **"Next"** to proceed.
 Select whether your data is "Append-only" or "Mutable data".
To learn more, read out guide on [Selecting table engine and sorting key](/docs/guides/table-engine-and-sorting-key).
Select whether your data is "Append-only" or "Mutable data".
To learn more, read out guide on [Selecting table engine and sorting key](/docs/guides/table-engine-and-sorting-key).
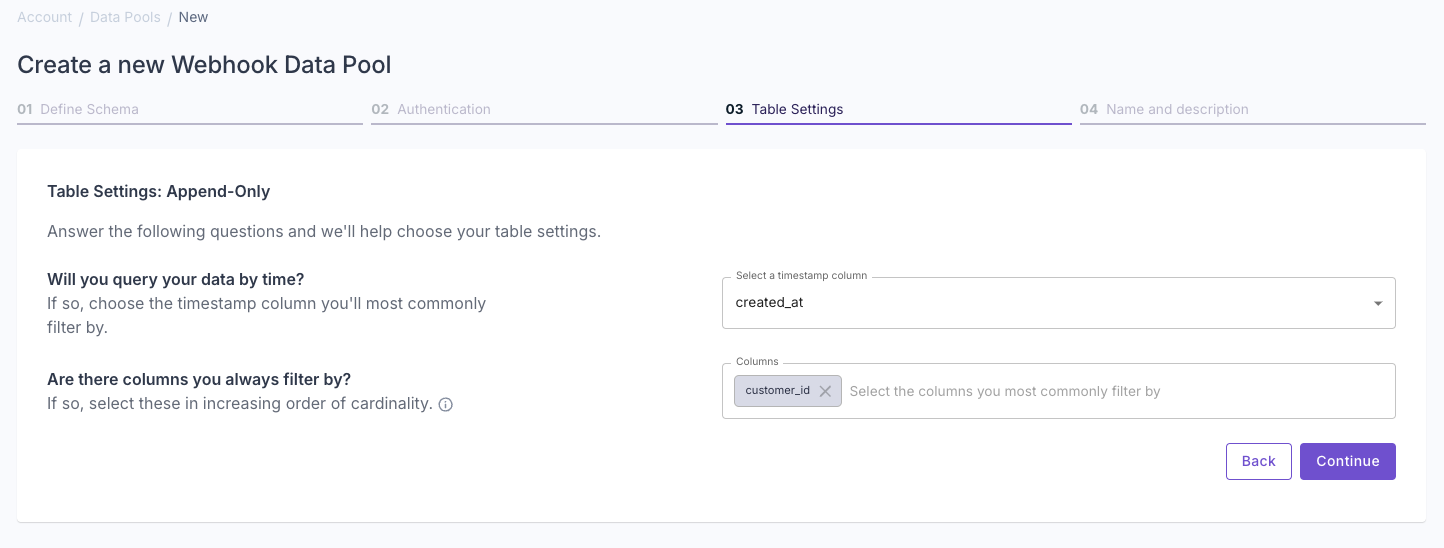
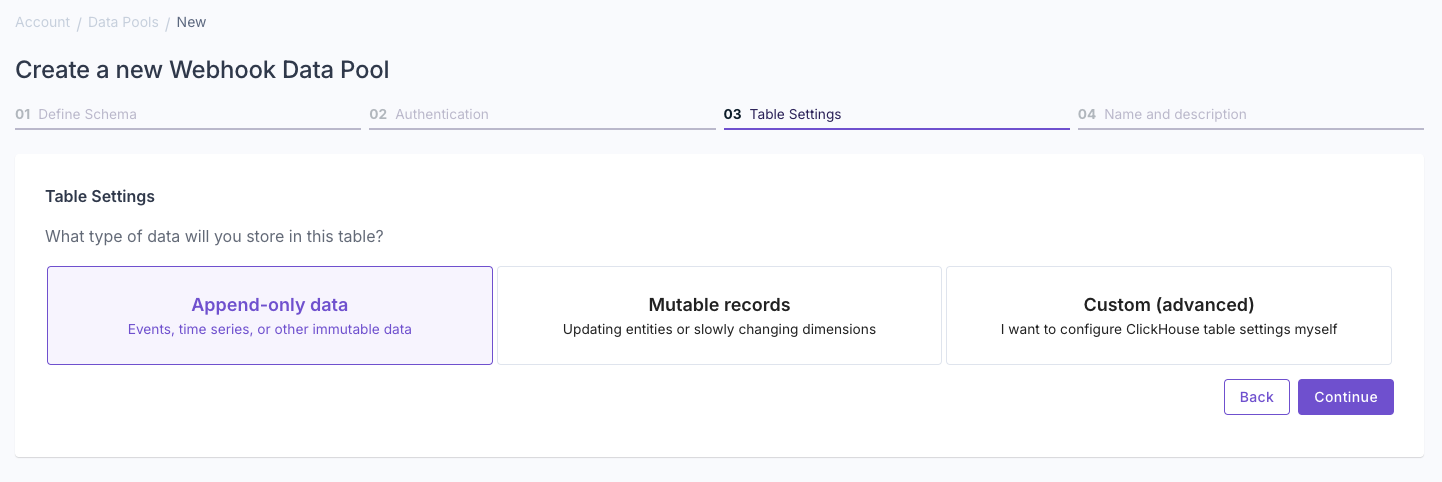 Answer the questions in the wizard to complete the setup.
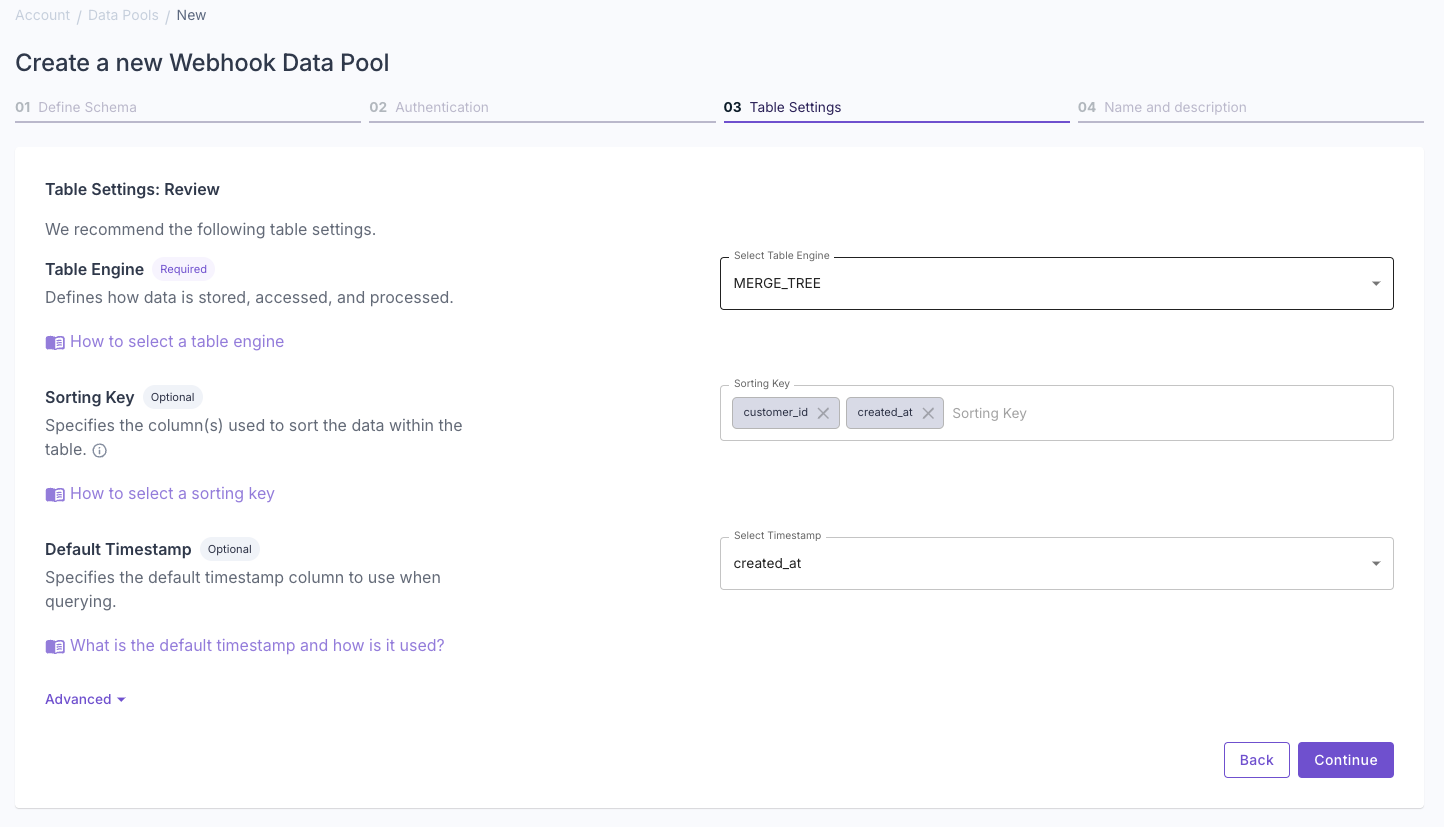
 Confirm your table settings and click **“Continue”**.
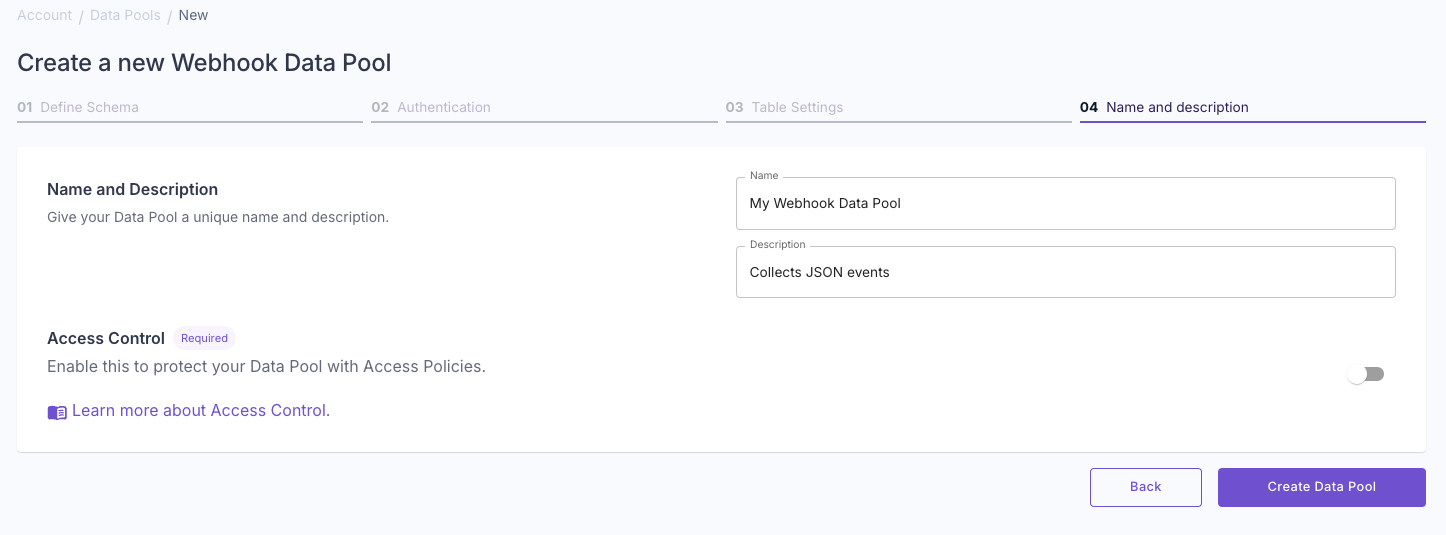
 Enter a name and description for your new Data Pool and click **"Next"**.
 After creating the Data Pool, you'll be provided with a unique HTTP URL. This URL is where you'll send your JSON data for ingestion.
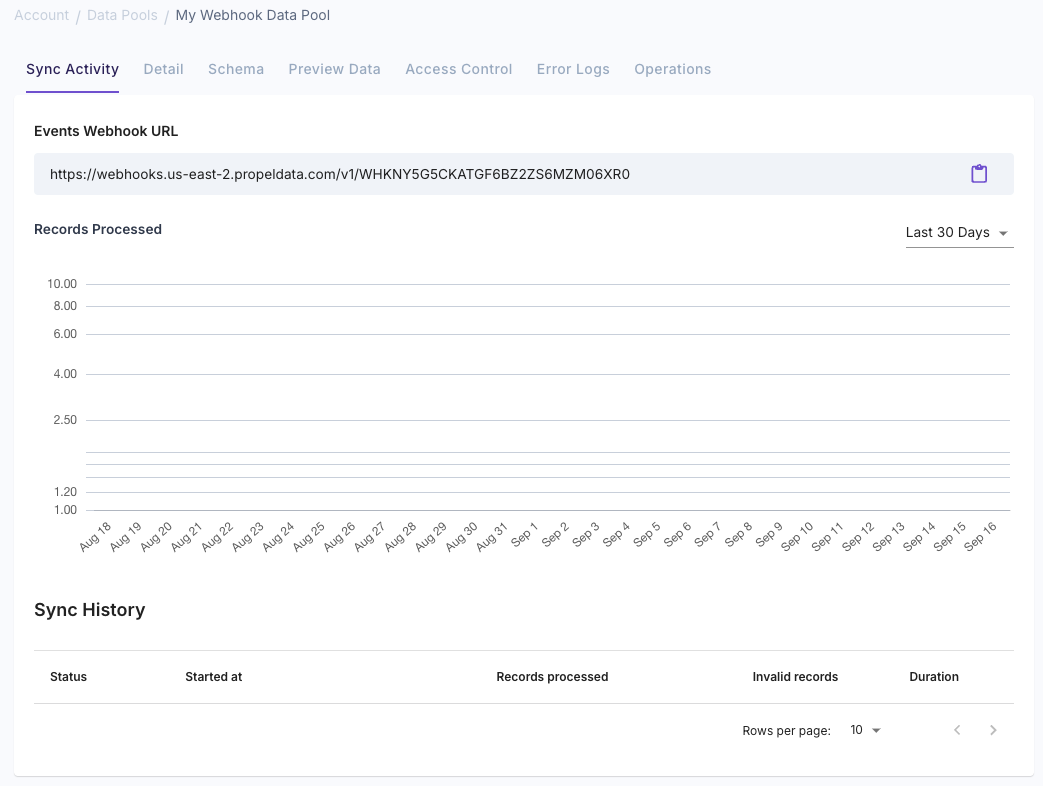 For the Webhook Data Pool, creating the Data Source below automatically creates the Data Pool.
```graphql theme={"system"}
mutation {
createWebhookDataSource(input: {
uniqueName: "WebhookCredentials"
description:"My Webhook Credentials"
connectionSettings: {
basicAuth: {
username: "propel-user"
password: ""
}
columns: [
{ name: "created_at", jsonProperty: "created_at", type: TIMESTAMP, nullable: false },
{ name: "customer_id", jsonProperty: "customer_id", type: INT32, nullable: false },
{ name: "order_id", jsonProperty: "order_id", type: INT32, nullable: false },
{ name: "store_id", jsonProperty: "store_id", type: INT32, nullable: false },
{ name: "order_details", jsonProperty: "order_details", type: JSON, nullable: false }
]
accessControlEnabled: true,
tableSettings: {
engine: {
mergeTree: {
type: MERGE_TREE
}
}
orderBy: ["created_at"],
partitionBy: ["toYYYYMM(created_at, 'UTC')"]
}
}
}){
dataSource {
id
uniqueName
status
}
}
}
```
For the Webhook Data Pool, creating the Data Source below automatically creates the Data Pool.
```hcl theme={"system"}
resource "propel_data_source" "my_webhook {
unique_name = "WebhookCredentials"
description = "My Webhook Credentials"
type = "WEBHOOK"
webhook_connection_settings {
timestamp = "created_at"
column {
name = "created_at"
type = "TIMESTAMP"
nullable = false
json_property = "created_at"
}
column {
name = "customer_id"
type = "INT32"
nullable = false
json_property = "customer_id"
}
column {
name = "order_id"
type = "INT32"
nullable = false
json_property = "order_id"
}
column {
name = "store_id"
type = "INT32"
nullable = false
json_property = "store_id"
}
column {
name = "order_details"
type = "JSON"
nullable = false
json_property = "order_details"
}
basic_auth {
username = "propel-user"
password = var.http_basic_auth_password
}
access_control_enabled = true
table_settings {
engine {
merge_tree {
type = "MERGE_TREE"
}
}
order_by = ["created_at"]
partition_by = ["toYYYYMM(created_at, 'UTC')"]
}
}
}
variable "http_basic_auth_password" {
type = string
sensitive = true
}
```
***
## Step 2: Send events to the Webhook Data Pool
Create a JSON array of events you want to send to the Webhook Data Pool.
Here's an example:
```json theme={"system"}
[
{
"customer_id": 5,
"order_id": 34,
"store_id": 4445,
"order_details": {
"taco_count": 7,
"total_price": 25.90,
"checkout_time": "2023-07-31T15:20:10Z"
},
"created_at": "2023-07-31T14:50:35Z"
},
{
"customer_id": 8,
"order_id": 22,
"store_id": 1199,
"order_details": {
"taco_count": 3,
"total_price": 15.75,
"checkout_time": "2023-07-31T12:40:21Z"
},
"created_at": "2023-07-31T12:30:55Z"
}
]
```
Send a POST request to the Webhook Data Pool's URL using curl or any HTTP client. Here's an example using curl:
```bash theme={"system"}
curl https://webhooks.us-east-2.propeldata.com/v1/WHK... \
-X POST \
-H "Content-Type: application/json" \
-d '[
{
"customer_id": 5,
"order_id": 34,
"store_id": 4445,
"order_details": {
"taco_count": 7,
"total_price": 25.90,
"checkout_time": "2023-07-31T15:20:10Z"
},
"created_at": "2023-07-31T14:50:35Z"
},
{
"customer_id": 8,
"order_id": 22,
"store_id": 1199,
"order_details": {
"taco_count": 3,
"total_price": 15.75,
"checkout_time": "2023-07-31T12:40:21Z"
},
"created_at": "2023-07-31T12:30:55Z"
}
]'
```
You should expect a `200 OK` with multiple "Event processed successfully" messages in the body of the response, one for each event.
## Step 3: View your events in the Data Pool
Click on **"Data Pools"** in the Console, and then select your Data Pool.
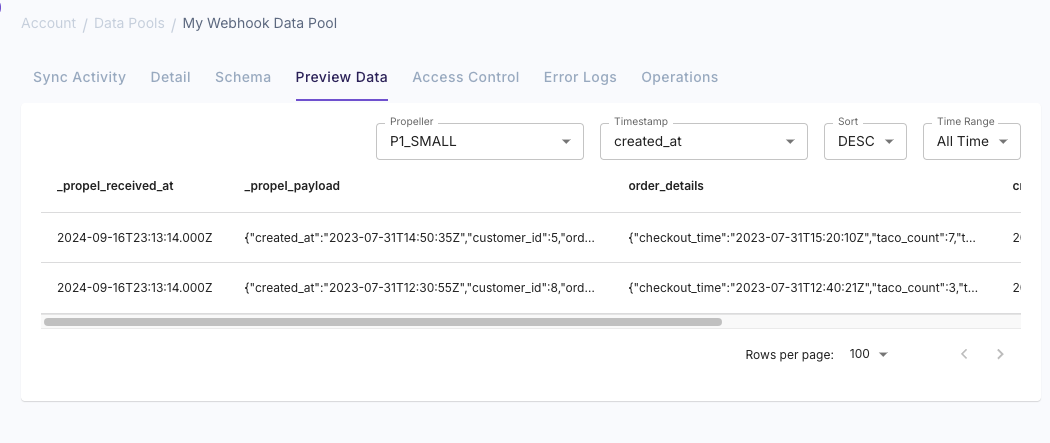
Head over to the **"Preview Data"** tab, and you should see the events data as POSTed, reflected in the schema we defined.
For the Webhook Data Pool, creating the Data Source below automatically creates the Data Pool.
```graphql theme={"system"}
mutation {
createWebhookDataSource(input: {
uniqueName: "WebhookCredentials"
description:"My Webhook Credentials"
connectionSettings: {
basicAuth: {
username: "propel-user"
password: ""
}
columns: [
{ name: "created_at", jsonProperty: "created_at", type: TIMESTAMP, nullable: false },
{ name: "customer_id", jsonProperty: "customer_id", type: INT32, nullable: false },
{ name: "order_id", jsonProperty: "order_id", type: INT32, nullable: false },
{ name: "store_id", jsonProperty: "store_id", type: INT32, nullable: false },
{ name: "order_details", jsonProperty: "order_details", type: JSON, nullable: false }
]
accessControlEnabled: true,
tableSettings: {
engine: {
mergeTree: {
type: MERGE_TREE
}
}
orderBy: ["created_at"],
partitionBy: ["toYYYYMM(created_at, 'UTC')"]
}
}
}){
dataSource {
id
uniqueName
status
}
}
}
```
For the Webhook Data Pool, creating the Data Source below automatically creates the Data Pool.
```hcl theme={"system"}
resource "propel_data_source" "my_webhook {
unique_name = "WebhookCredentials"
description = "My Webhook Credentials"
type = "WEBHOOK"
webhook_connection_settings {
timestamp = "created_at"
column {
name = "created_at"
type = "TIMESTAMP"
nullable = false
json_property = "created_at"
}
column {
name = "customer_id"
type = "INT32"
nullable = false
json_property = "customer_id"
}
column {
name = "order_id"
type = "INT32"
nullable = false
json_property = "order_id"
}
column {
name = "store_id"
type = "INT32"
nullable = false
json_property = "store_id"
}
column {
name = "order_details"
type = "JSON"
nullable = false
json_property = "order_details"
}
basic_auth {
username = "propel-user"
password = var.http_basic_auth_password
}
access_control_enabled = true
table_settings {
engine {
merge_tree {
type = "MERGE_TREE"
}
}
order_by = ["created_at"]
partition_by = ["toYYYYMM(created_at, 'UTC')"]
}
}
}
variable "http_basic_auth_password" {
type = string
sensitive = true
}
```
***
## Step 2: Send events to the Webhook Data Pool
Create a JSON array of events you want to send to the Webhook Data Pool.
Here's an example:
```json theme={"system"}
[
{
"customer_id": 5,
"order_id": 34,
"store_id": 4445,
"order_details": {
"taco_count": 7,
"total_price": 25.90,
"checkout_time": "2023-07-31T15:20:10Z"
},
"created_at": "2023-07-31T14:50:35Z"
},
{
"customer_id": 8,
"order_id": 22,
"store_id": 1199,
"order_details": {
"taco_count": 3,
"total_price": 15.75,
"checkout_time": "2023-07-31T12:40:21Z"
},
"created_at": "2023-07-31T12:30:55Z"
}
]
```
Send a POST request to the Webhook Data Pool's URL using curl or any HTTP client. Here's an example using curl:
```bash theme={"system"}
curl https://webhooks.us-east-2.propeldata.com/v1/WHK... \
-X POST \
-H "Content-Type: application/json" \
-d '[
{
"customer_id": 5,
"order_id": 34,
"store_id": 4445,
"order_details": {
"taco_count": 7,
"total_price": 25.90,
"checkout_time": "2023-07-31T15:20:10Z"
},
"created_at": "2023-07-31T14:50:35Z"
},
{
"customer_id": 8,
"order_id": 22,
"store_id": 1199,
"order_details": {
"taco_count": 3,
"total_price": 15.75,
"checkout_time": "2023-07-31T12:40:21Z"
},
"created_at": "2023-07-31T12:30:55Z"
}
]'
```
You should expect a `200 OK` with multiple "Event processed successfully" messages in the body of the response, one for each event.
## Step 3: View your events in the Data Pool
Click on **"Data Pools"** in the Console, and then select your Data Pool.
Head over to the **"Preview Data"** tab, and you should see the events data as POSTed, reflected in the schema we defined.