> ## Documentation Index
> Fetch the complete documentation index at: https://www.propeldata.com/llms.txt
> Use this file to discover all available pages before exploring further.
# Single Sign-On (SSO)
> Configure Single Sign-On (SSO) for user authentication.
Single Sign-On (SSO) is available for with the teams add-on. See [pricing](https://www.propeldata.com/pricing) or [talk to sales](mailto:sales@propeldata.com) for more details.
## Okta configuration
This guide covers configuring your Okta identity provider with Propel for single sign-on to Propel Console.
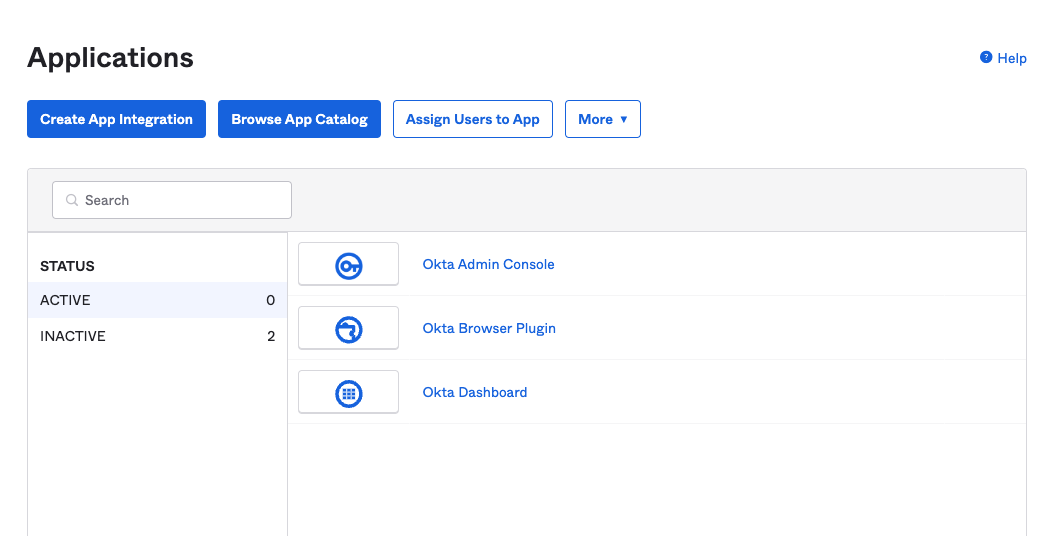
Once you've logged into the Okta Admin console, you will need to create a new app:
1. Navigate to **"Applications"** → **"Applications"**
2. Click the button **"Create App Integration"**
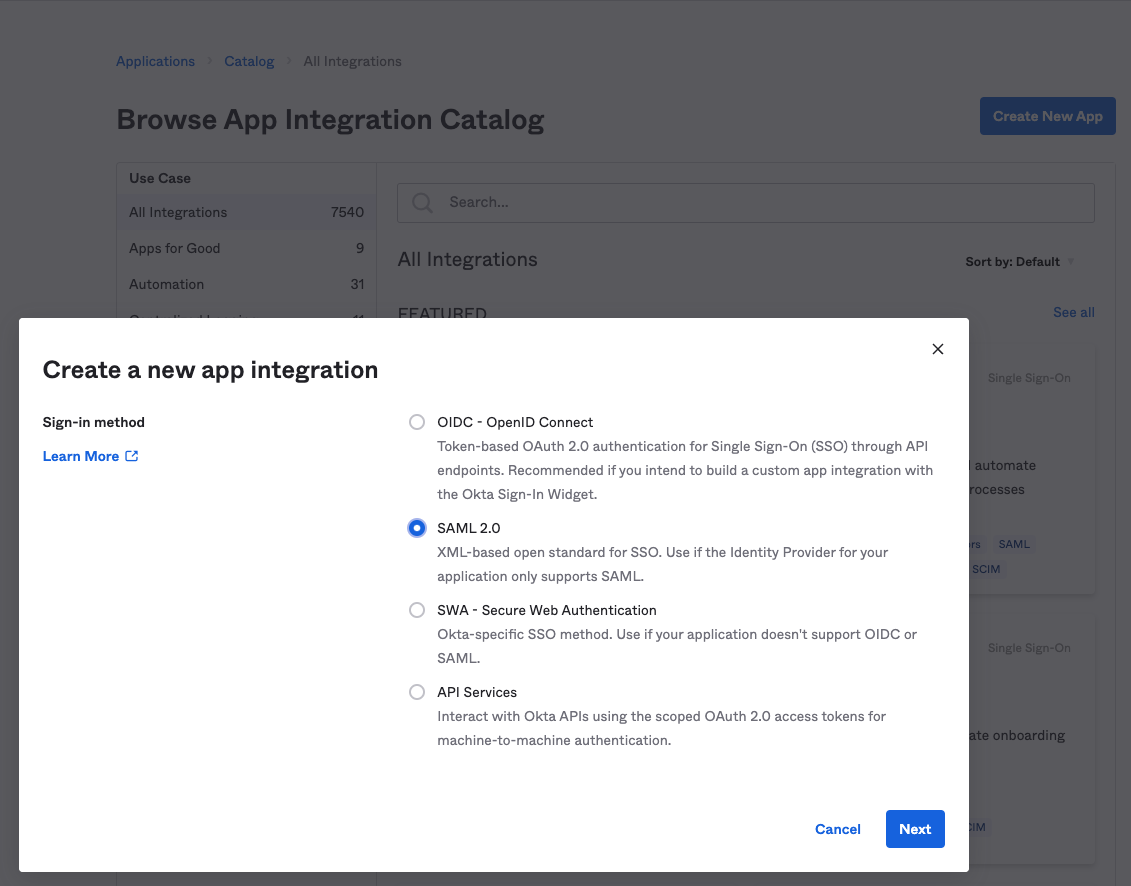
Choose **"SAML 2.0"** as the sign-on method:
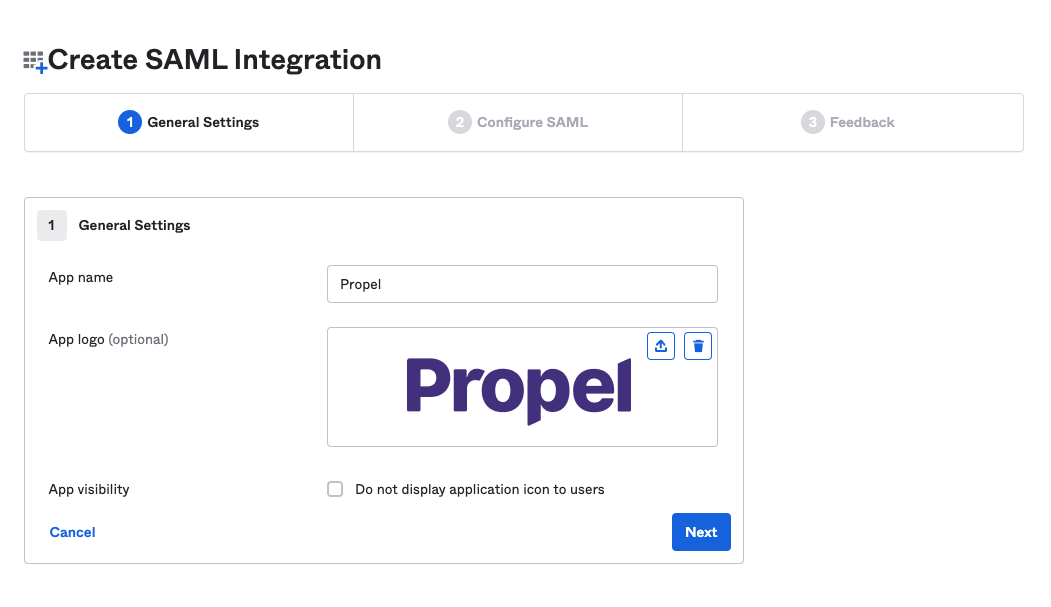
1. Enter "Propel" for the **"App name"**
2. (Optional) Add the Propel logo by downloading it [here](https://assets.website-files.com/63bd88046a1e930f29e4b697/63f7baf454526f7862d09066_Propel-logo.png)
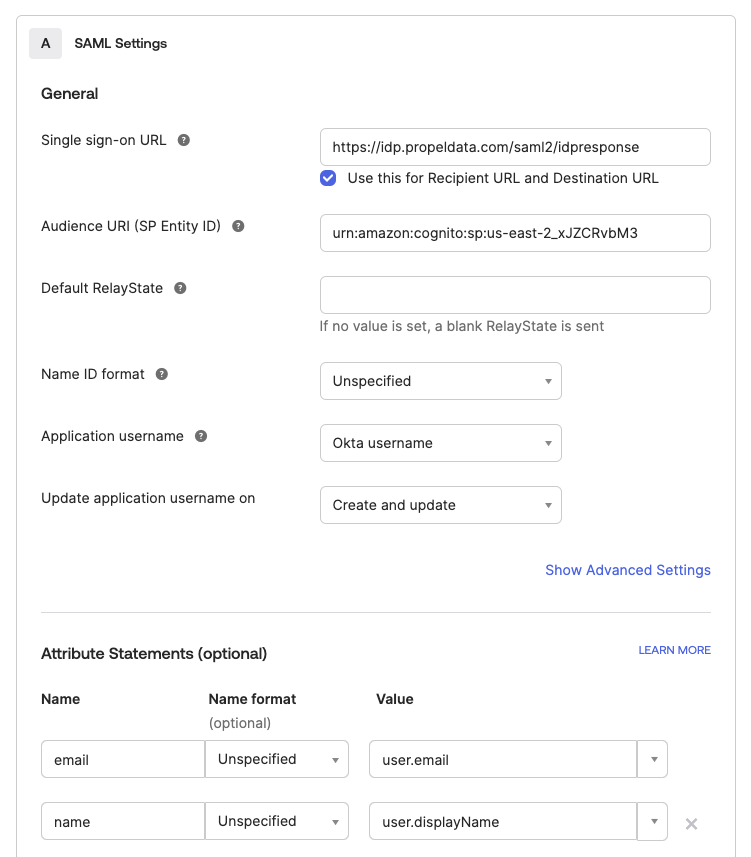
1. Copy and paste the following value for **"Single sign-on URL"**:
```
https://idp.propeldata.com/saml2/idpresponse
```
2. Copy and paste the following value for **"Audience URI (SP Entity ID)"**:
```
urn:amazon:cognito:sp:us-east-2_xJZCRvbM3
```
3. Add the following values to the **"Attribute Statements (optional)"**:
| Name | Name Format | Value |
| ----- | ----------- | ---------------- |
| email | Unspecified | user.email |
| name | Unspecified | user.displayName |
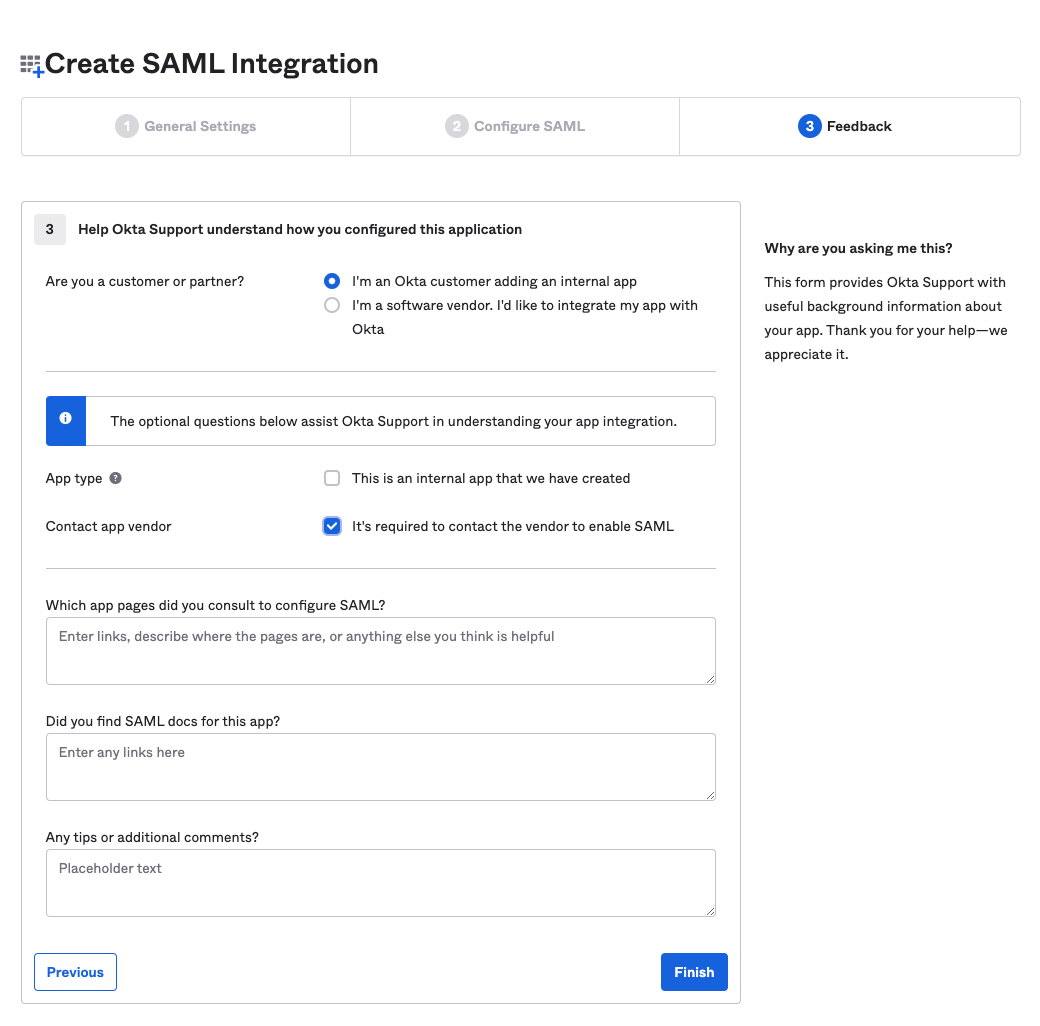
1. Choose "I'm an Okta customer..."
2. Click the "Contact App vendor" checkbox
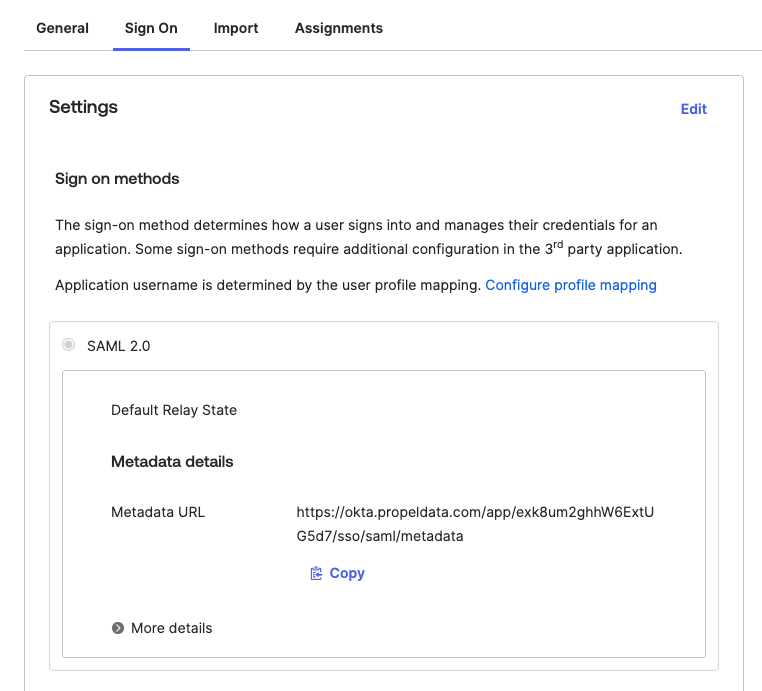
You must copy the Metadata URL and send this to Propel via your shared Slack channel. Failure to do so may result in incomplete SSO configuration.
After Propel has received your Metadata URL and completed the necessary configuration:
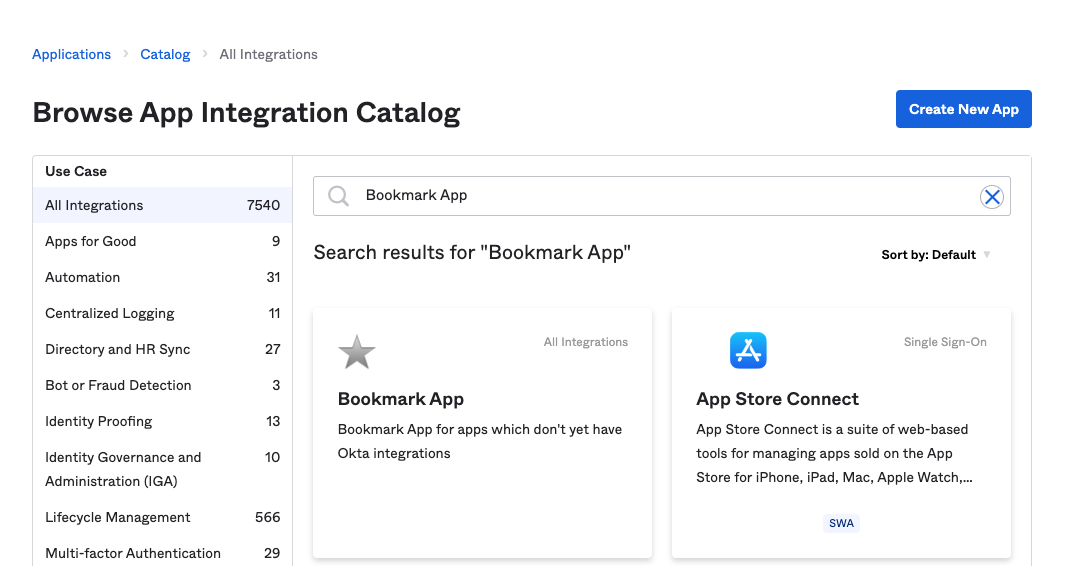
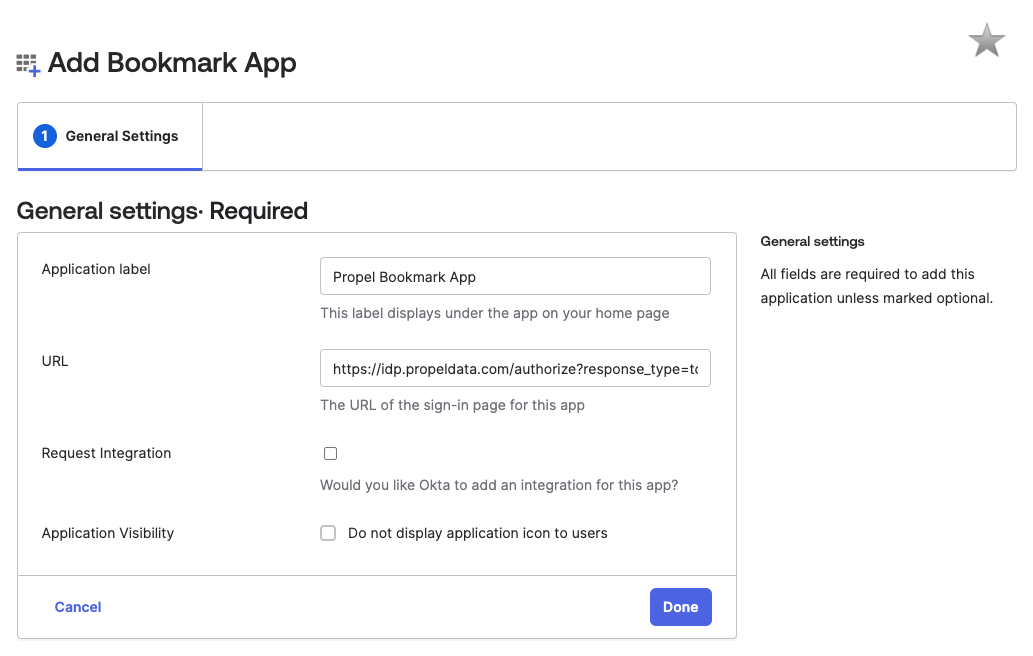
1. Customer support will provide a URL for creating an Okta Bookmark
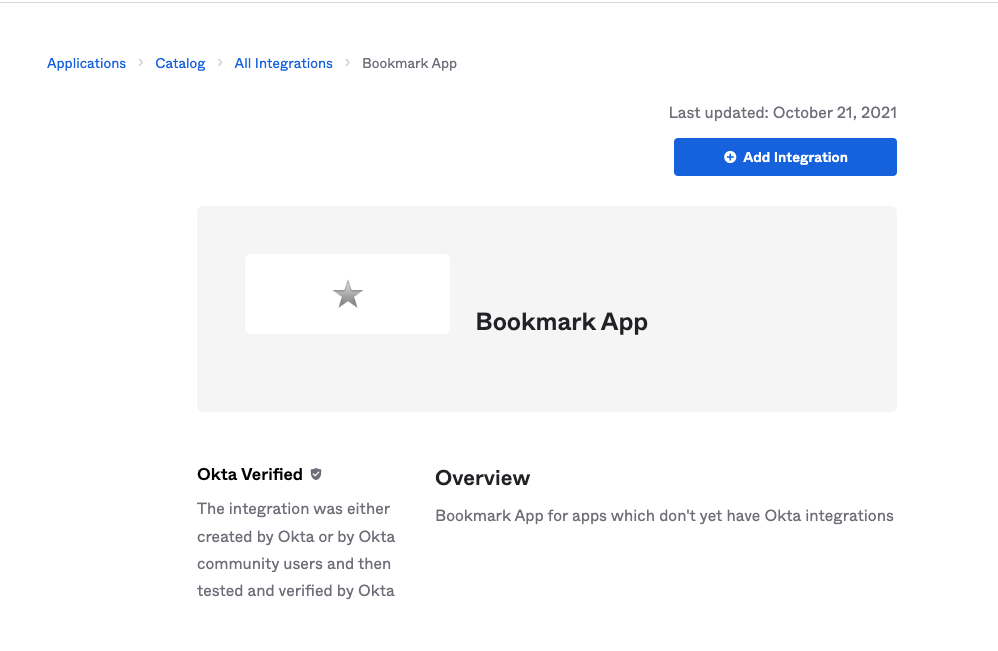
2. Create a new Okta Bookmark app
3. Enter the URL provided by customer support
Propel's current authentication provider does not support IdP-initiated SSO.
## Managing users
Once you have set up SAML with Okta, you'll need to manage user access to Propel. This section covers how to add users, guide them through the login process, and remove access when necessary.
### Adding a user
To add a user you need to:
To add a user to the Okta app "Propel":
* Log in to your Okta admin dashboard.
* Navigate to the **"Applications"** section.
* Find and select the **"Propel"** application.
* Click on the **"Assignments"** tab.
* Use the **"Assign"** button to add the user to the application.
To help the user log in to the Propel Console:
* Provide the user with the Propel Console login URL: [https://console.propeldata.com/login](https://console.propeldata.com/login).
* Instruct the user to enter their email address associated with their Okta account.
* The user should then be redirected to Okta for authentication.
* Upon successful authentication, they will be granted access to the Propel Console.
Ensure that the user's email address in Okta matches the one they use to log in to the Propel Console.
### Logging in to the Propel Console
To login to the Propel Console, you need to:
Navigate to [https://console.propeldata.com/login](https://console.propeldata.com/login).
Enter the email address of the user.
Click the **"Login"** button.
When using Okta for authentication with Propel, you must initiate the login process from Propel's login page. Clicking the "Propel" bookmark in the Okta portal will not work. Always navigate directly to [Propel's login page](https://console.propeldata.com/login) to access your account.
### Removing a user
To remove a user's access to Propel, follow these steps:
To remove the user from the Okta app "Propel":
* Log in to your Okta admin dashboard.
* Navigate to the **"Applications"** section.
* Find and select the **"Propel"** application.
* Click on the **"Assignments"** tab.
* Locate the user and click **"Unassign"** to remove them from the application.
To remove the user from the Propel Console:
* Log in to the [Propel Console](https://console.propeldata.com/).
* Navigate to the [Users section](https://console.propeldata.com/users/).
* Find the user you want to remove.
* Click on the options menu (usually represented by three dots) next to the user's name.
* Select **"Delete user"** to delete the user from Propel.
To ensure the user's access has been completely removed:
* Confirm that the user can no longer log in to the Propel Console using their Okta credentials.
* Check that any active sessions for this user have been terminated.
It's important to perform both steps to ensure complete removal of access. Removing the user from Okta prevents future logins, while removing them from the Propel Console ensures they no longer have an account within Propel's system.